This is a living article. The last update was on 01-October-2022
Any questions can be directed to questions@rvhome.school
Our search began while we were living in Las Vegas. There are a LOT of RV dealers there, and a lot of RV shows - often held at casinos with exhibit space such as The Orleans or the South Point. We looked over all of the major brands, and saw a lot of things we liked, and a lot of things that we didn't. One of the things you will find is that you see floor-plan elements that you love, but that just aren't quite perfect. It would be nice to be able to take elements from several manufacturers and put them together, but that's just not possible.
There were a couple of Fuzion and Voltage models that we liked, and we were leaning toward a Voltage 3950 - although there were a lot of trade-offs. The 3895 had a bigger garage, but other things we didn't like too.
We also had some real questions about their quality and manufacturer warranty support based on things we were reading on-line and in speaking with owners. We looked at some of the really high-end models too, and didn't find a floor plan that worked for us in any of them.
Then an opportunity came to move back to Utah, and it could not be passed up. Shortly after we moved, there was an RV show at the South Towne Expo Center. At that show we came across two brands that we had not seen before - Tesla by Evergreen at the Parris RV display and Grand Design RV at the General RV display.
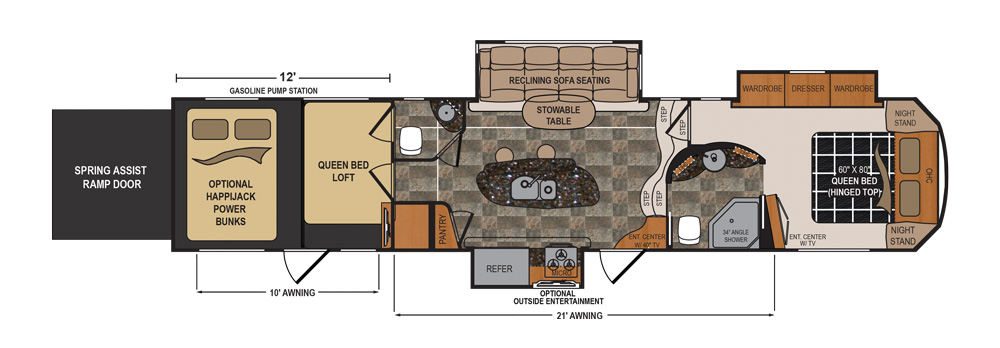
There were some elements in the Tesla units - especially the 3950 - that we REALLY liked. The layout of the bedroom with nightstands, the storage closet layout with the washer/dryer space, and the television layout in the main living area. They use an on-demand (tankless) water heater. It also had a built-in dishwasher, although RV dishwashers are very small and can't do large loads or large items. They also had very nice blackout blinds on the windows.
The construction quality was very nice - better than any of the others we had seen to that point. There were also a few elements we didn't like.
The garage was only 12'. I'm also not a big fan of enclosing TV's in cabinets. That's an older way of thinking that goes back to how mounting was required with older tube-type televisions. With the flat panels of today, there isn't a reason to enclose it. It means that you can't ever go up in size without remodeling the cabinet. The cabinets they had were nicely made, but not ideal. The storage still wasn't what we were hoping to see (they have a pantry, but it's quite shallow), and all of the tables still used the older hole-and-peg legs that lock the table into one position.
I also wasn't a big fan of the multicolored, flashing lights in the garage. We weren't looking for a "party machine", and that's the impression that the Tesla left to us.
NOTE: It turned out that Tesla (Evergreen) later went out of business.
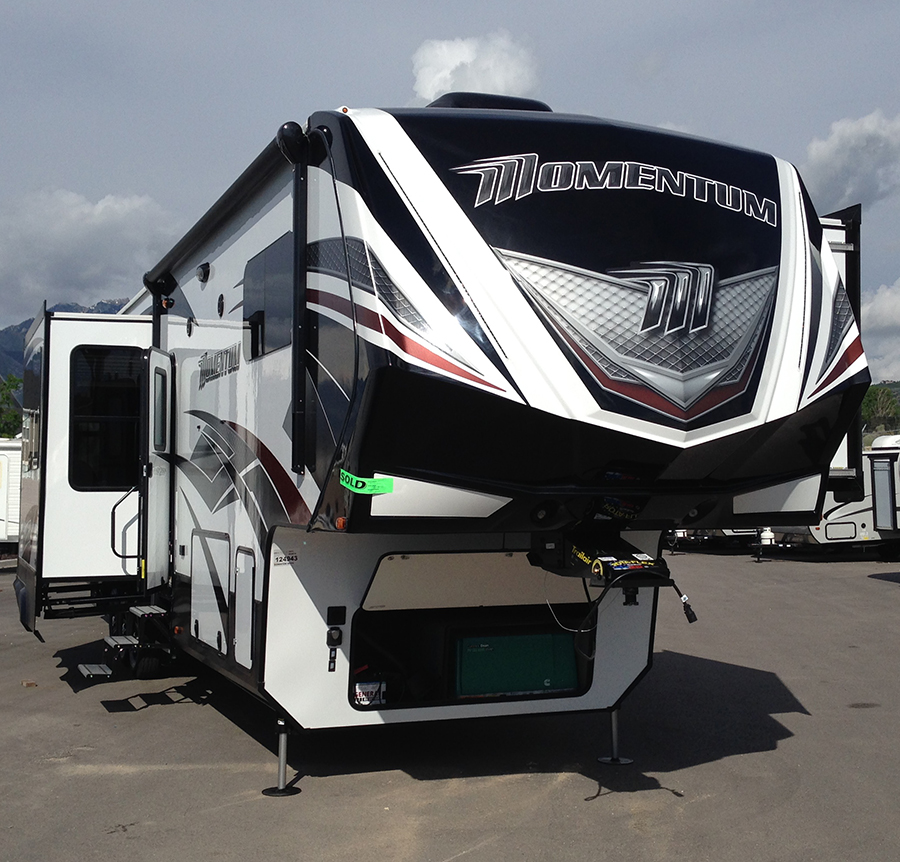
We walked across the convention center and found the Momentum Toy Hauler line from Grand Design RV at the Draper, Utah General RV display. They had a Momentum 385TH on display. The floor-plan was 99.9% perfect.
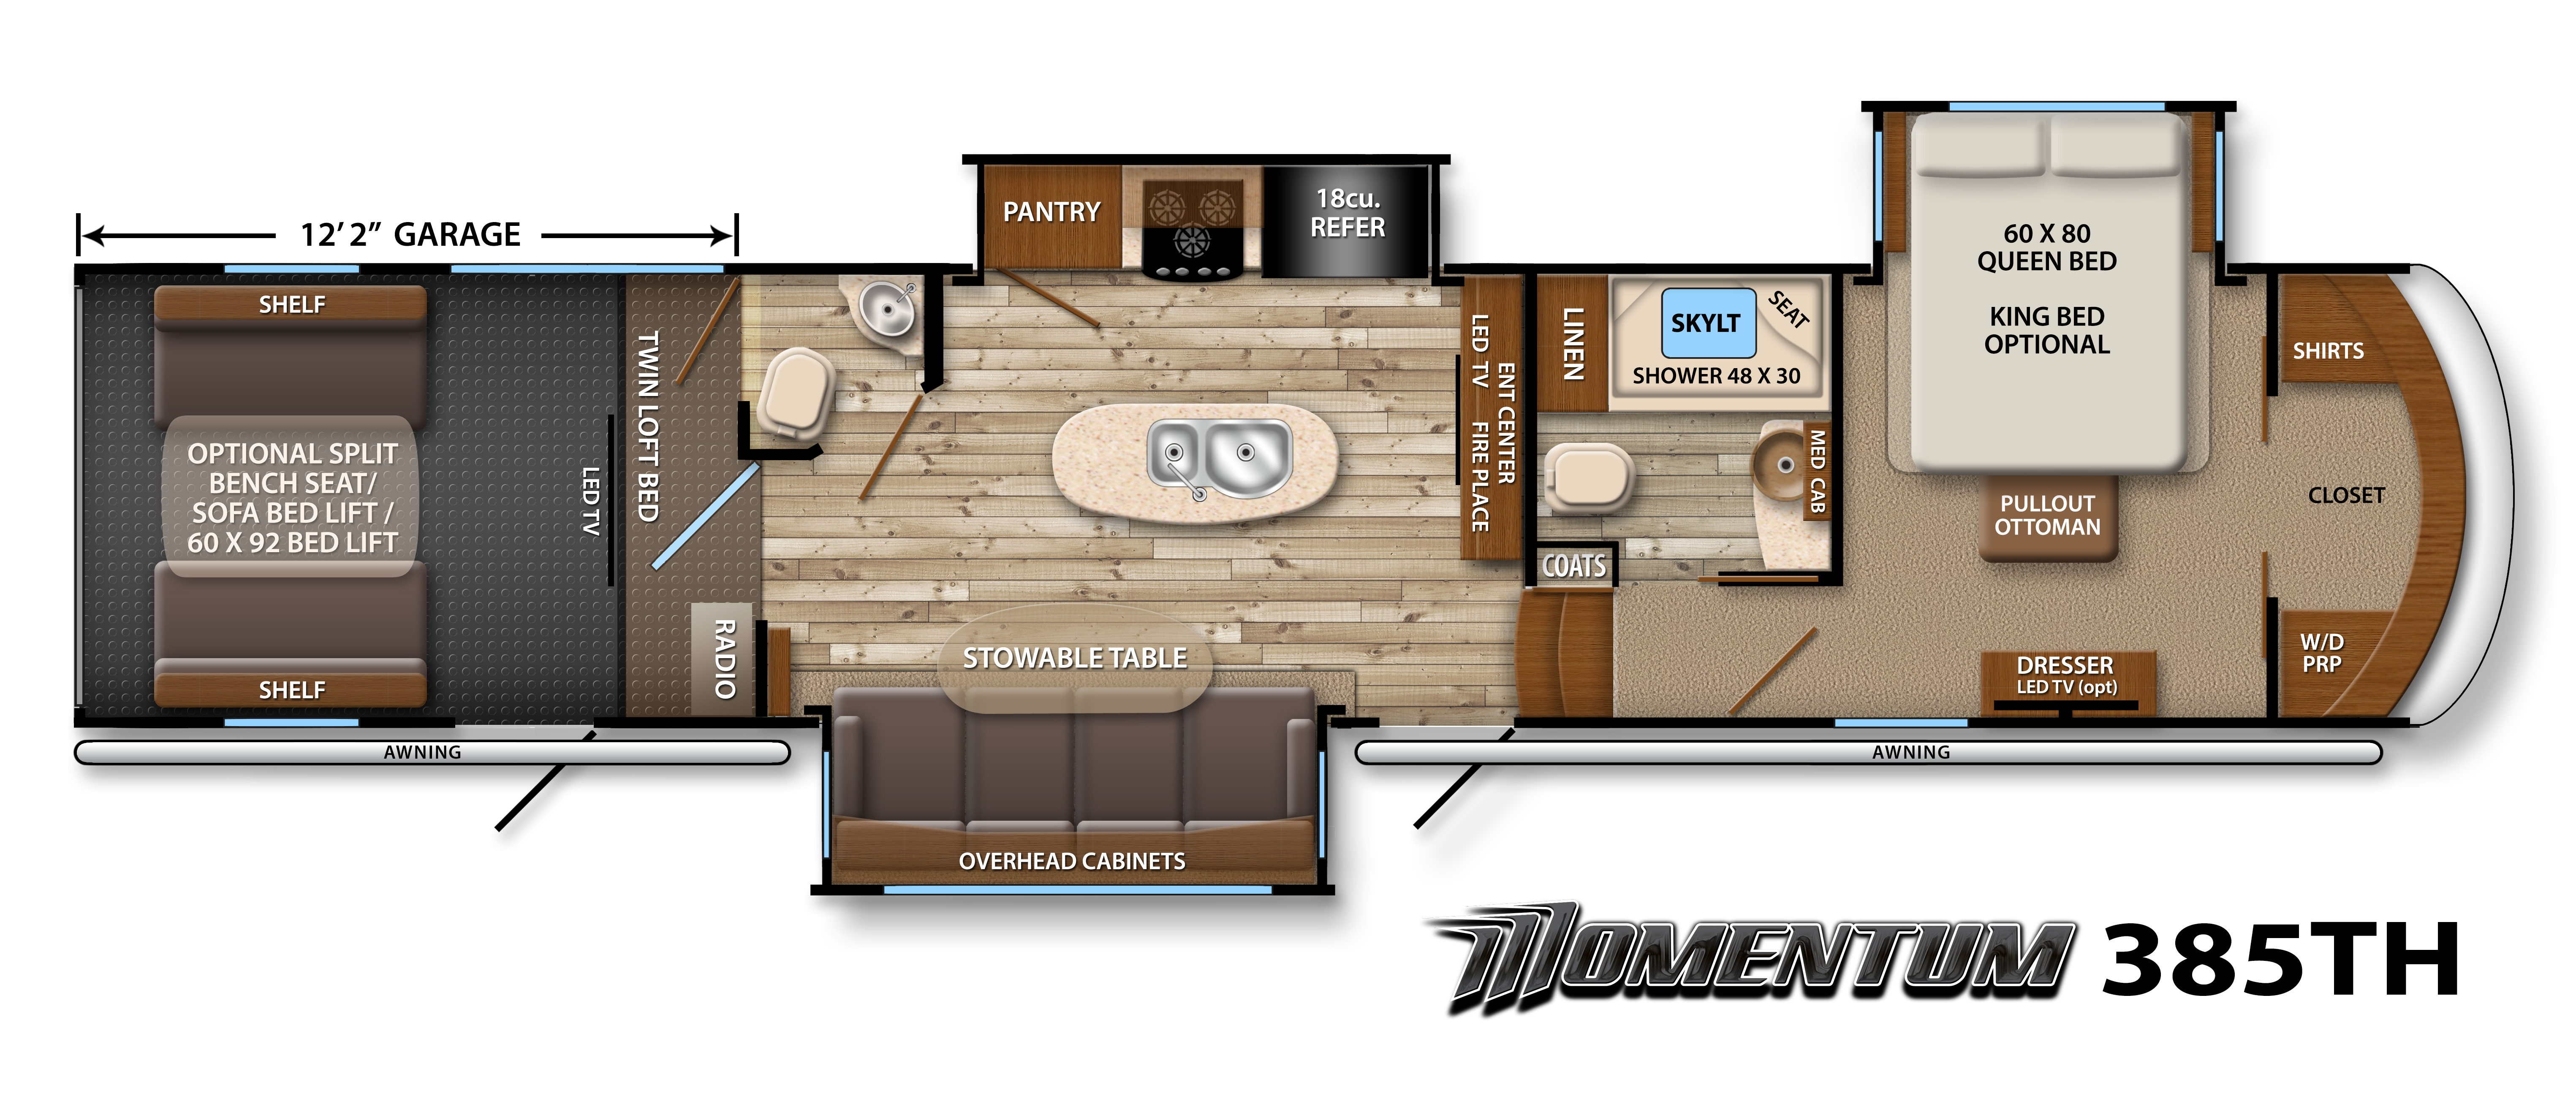
It had a ton of storage in all the right places (including a huge, deep pantry in the kitchen area), a 1/2 bath in the rear, W/D prep (although in a slightly less-desirable setup than the Tesla), free-standing tables (no hole-and-peg restrictions, and a great card/gaming table for the back too), and great television setups - with the exception of the angle on the main 48" LCD TV in the living area. It is a big TV, but not the easiest to position for viewing. The television in the main living area is attached to a pole that allows it to swivel, but still leaves it at a somewhat less-than-optimal viewing position based on the seating in the unit.
The construction quality was EXCELLENT. Really top notch.
In terms of handling our summers and winters, the roof is R-40, the floor is R-45, R-24 in the slide-out floors, R25 in the garage floor, and R-11 in the walls. There are also heat ducts to the garage, bathroom, and the bedroom, and a 3rd A/C unit in the garage is an option (with a main 15,000 BTU A/C in the main living area and a second 13,500 BTU in the bedroom). There is also heat in the underbelly and storage compartment, and 12VDC tank heaters to keep them from freezing. In addition, there is an electric fireplace that provides additional heat to the main living area. That should be sufficient for our environmental requirements!
As I mentioned, there is a ton of storage in all the right places. They made great use of the available space in the trailer. The underside pass-through storage is huge - even with the built-in vacuum system. The bedroom closet sides are partially used if you decide to put a Washer/Dryer in, although a combination unit could be placed on only one side if you want to maximize storage. There is a nicely-sized 4-drawer dresser in the bedroom (although it would be nice if they used the slightly lower unit with 6 drawers that they use in their other models), and the under-bed storage is generous as well. They really did that right.
The biggest draw for my wife was that big pantry. It is sized to facilitate an extended stay. She also loved the overall feel of the unit. It was her absolute favorite out of everything we had seen.
The upper bunk in the main living area would be great for storage if you don't have anyone needing that as a sleeping bunk. The built-in ladder to get up to it has a recess designed for it in the wall by the 2nd bathroom, and it simply slides out to use, and then back in when not needed. No need to find storage for it!
It has a 5500 Watt Onan Generator, and plenty of fuel tank on board - 30 gallons for generator, and 30 gallons for the fuel station which can refuel anything that takes gasoline.
The only things I didn't totally love were the lack of 12VDC outlets at each TV location (which few manufacturers include any more), the angle on the living room TV in relation to the seating, and the garage is slightly smaller than I was hoping for. At 12'2", it is just a couple of inches too short for the 6-seat Polaris Ranger which comes in at 12' 4.5". I really wanted to see something that's 12'6" or 13' with this same basic floor-plan.
We decided to wait for a bit and see what came up in at the next show in February.
When the February show came on 14-February-2015, we again looked at the options. We spent a long time walking the whole show, avoiding the General RV area. We looked at Voltage, Fuzion, the Crossroads Elevation (one of those even had a window in the front cap), and Tesla again, plus others. We didn't see anything that we liked as much as - or that had the quality built into - the Grand Design Momentum 385TH.
When we finally got to the General RV area at the show, we were very pleased to get some face time with Bill Fenech (Co-Owner of Grand Design RV), Marc Hauser (GM of Grand Design RV), and Nate Goldenberg (GM for the Momentum Toy Hauler Line). We told them about our project, and they were very enthusiastic.
In speaking with them it is very clear that they really do care about the quality, and about the customer service on the back end. You can learn first hand about this by visiting the Grand Design Owners Forum (http://www.granddesignowners.com/forum/activity.php). That site is NOT owned or operated by Grand Design RV, and folks go there to both compliment and complain - with the majority being compliments - as well as talking about modifications and customizations. The great thing is, the folks from Grand Design factory customer service also get on the forum, and make sure that people with problems get them taken care of - either through their local dealer service or by the factory itself. You even see the owners of Grand Design RV get on there to help, and let you know they are reading and acting based on owner feedback. I doubt you would see that from any other manufacturer. I know I never have.
When I was talking with Bill, he made it clear that they would love to build a perfect RV, but considering that it's a home on wheels that suffers earthquakes on a daily basis (while traveling - including the trip from the factory to the dealer) it's almost impossible. There are also constraints in available space and weight that limit things, and they sometimes have issues with their suppliers that they have deal with. What they can absolutely do is make things right when something goes wrong. Given that understanding, they really do a great job.
The 385TH that was on display was really nice with the darker wood finish - and the woodwork really was impressive. Things fit right, and were finished well. I have seen far lower quality on other RVs, and in a lot of site-built homes.
I was able to take a few minutes and explain the idea of running HDMI cables from the entertainment center to where each of the TV locations are in the RV (garage, bedroom, and underside TV) - which had been discussed on the owners forum. I could see the wheels spinning, and when I explained that it would essentially future-proof the units in terms of entertainment connectivity for a few years, they were very receptive. I would not be surprised to see the factory offer this as an option (or maybe even a standard feature) in the future.
Since Nate is GM for the Momentum line, speaking with him about some technical upgrades was especially helpful. Part of the project would be to install the Ham Radio gear in the garage area. I was looking at mounting the radios in the pass-through storage cabinet between the living area and the garage, and mounting some external antennas and an antenna tuner adjacent to the outside ladder on the street-side of the trailer.
Nate was able to tell me exactly how to route those antenna cables, and it turns out that there is a factory wiring channel in the perfect position to help. He also told me how I can get some Cat 6e cables (for data communications) from the cabinet by the fireplace to the outside hookups to facilitate hooking up to DSL lines or an external Ethernet connection. It REALLY helped to have him tell me a little about specific aspects of the construction that will be very helpful to accomplish this.
This is the kind of service and support that you really want. I was even able to talk to them about getting some extra 12VDC outlets to each location where there is a TV, and to that pass through storage cabinet. I was very impressed with their willingness to help, and with his familiarity with the hidden construction of the unit. I even asked him about ways to deal with the mounting angle of the main TV. He was very open and honest about it.
When I spoke with the folks at Evergreen/Tesla about things like this - their factory folks weren't really interested, or even forthcoming with information. They wouldn't even answer questions about wiring or how things are made behind the walls. That's one of the biggest complaints I have seen about the RV industry, and Grand Design doesn't suffer it. That alone makes them pretty unique.
My one reservation was that I'd still love to have a 12'6" or 13' garage to fit any of the machines we may be getting in the future. In the months between the RV shows, we found out that we will soon be adding a daughter to our family. Our current 2014 Polaris RZR 800EPS only seats two. While it's ideal as a search element and can hit any of the trails restricted to 50" wide machines, we are eventually going to want to take our daughter with us.
There ARE 4-seaters out there (most notably the 4 seat Polaris Ranger Crew 570 and the Polaris RZR 4 900EPS) that will still work for us within the 12' 2" limit - and I think we'd be very happy with either of them (the RZR 4 900EPS especially). Given everything else on the Momentum 385TH, when you look at the big picture there was nothing that was near equal. We made the decision to buy one. It was the best decision, and I am TOTALLY comfortable with the support from the factory.
We worked with Jeremy Darst (who came from General RV Ohio to work the show) and TJ Hovey (based in Draper, UT), both at General RV, to arrange to order a unit. Nate Goldenberg was willing to help us with a couple of things from the factory relating to 12VDC wiring, and Marc Hauser threw his support in. Robbie Jensen (Sales Manager for the Draper General RV) also promised to do everything he could to facilitate whatever we needed.
Because we'd be ordering a unit, the paperwork to get started and lock-in show pricing and an excellent financing rate (pay your bills on time and keep an excellent credit score - it helps) was pretty simple. That was on 14-February-2015.
If you are interested in getting a Grand Design Momentum or any of the other Grand Design products, you can give Jeremy a call at 330-896-8977 or send him an e-mail. General RV has locations in Michigan, Florida, Illinois, Ohio, and Utah, and he can hook you up. Otherwise, you will want to find your local dealer on the Grand Design website.
The 385TH that was on display was very well setup. It had a larger refer unit - 18 cubic feet - which still operates on either 110VAC or propane. The dark wood was beautiful. It had a king-size bed in the bedroom, and everything else was basically perfect.
The mandatory options included...
Options included on the display model and that we wanted on ours included...
We needed three items in addition to what was offered on that unit.
The unit that they had on display came with two A/C units - one in the main living area, and one in the main bedroom. Having heard from others that the garage can heat up in hotter weather, we wanted to make sure that we had a 3rd A/C unit in the garage area, which is an option available from the factory. That garage can also double as living space and as sleeping space. It will also be the operations center for our two-way radio gear. Being comfortable back there was important.
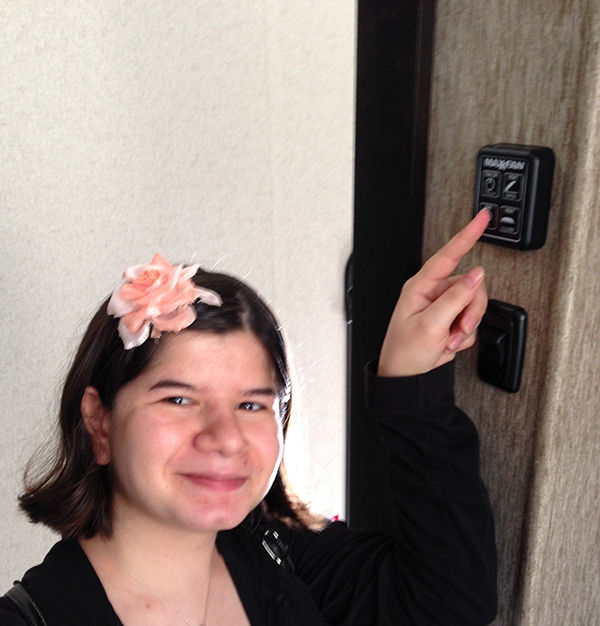
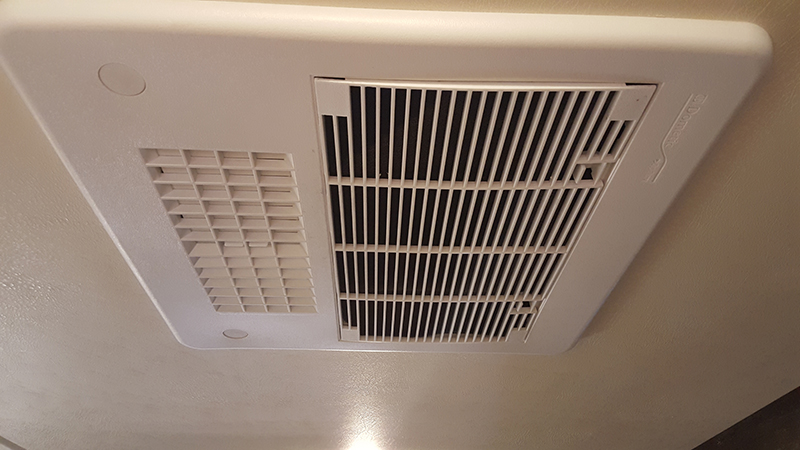
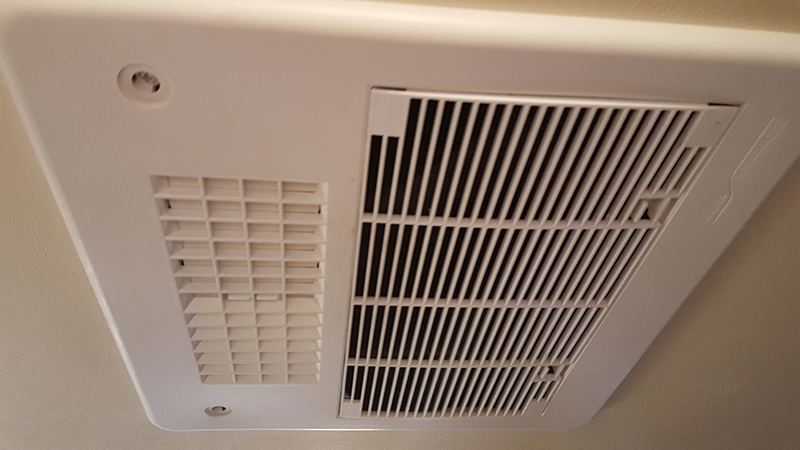
We also wanted to get a MaxxFan with remote added to the main bathroom. They offer a Fantastic Fan option for the bathroom, but we really wanted to get one identical to the one over the kitchen area. It has a wall-mounted remote control. My wife is only 4' 9.5", and can't reach the controls mounted on the ceiling fan that normally ships from the factory. They list a Fantastic Fan as a factory upgrade, and that was also a must have. With wall-mounted controls, it would be perfect. They agreed to do that, and we are both very thankful (my wife especially)!
Aside from those two things which are listed as factory upgrade options, we needed one other upgrade.
Since we plan to use 12VDC capable TV's for low-power operation in emergencies, we wanted to get 12VDC outlets to each TV location - and to the pass-through storage cabinet where we would be mounting the radio gear. We really wanted that done at the factory, and Nate was willing to make that happen. That was a BIG help. All of the radio gear we use runs on 12VDC, which is very common for both public safety and Ham radio gear. With the ability to use 12VDC TV's, we can run things like APRS map displays from the computers inside to any of the TV locations without requiring 110VAC.
We seriously considered the dual-pane windows which are offered as a factory option, but we really needed to keep the cost in a certain range. They would have pushed it a little outside of what we felt comfortable with.
They also offer slide-out toppers - basically an awning that extends and retracts with the slide-outs and protects the top. Again, we wanted to keep the cost down, but this is another one to consider. If we were not concerned with staying within a safe budget, we would have done both.
With the upgrades at the factory taken care of, it was time to look at one other big item that would have be done at the dealer.
We wanted to get HDMI cables from the main entertainment center to the locations where each of the TV's are located in the trailer (three of them excluding the one at the entertainment center - 1 to the TV in the garage, 1 to the TV in the bedroom, and 1 to the location for a TV in the storage area under the trailer). At this point, they don't offer that option from the factory, but General RV indicated that they would be able to do so. That will be done once the unit is delivered to them. I'll be working with them on that, and will supply the HDMI cables once we know how long they need to be.
I'm only going to have them do two of the cables (entertainment center to garage and entertainment center to bedroom). I'll install the one to the underside storage TV myself. I'll also run one to the main TV which is right above where our stuff will go - a 3' or 5' cable should be more than enough.
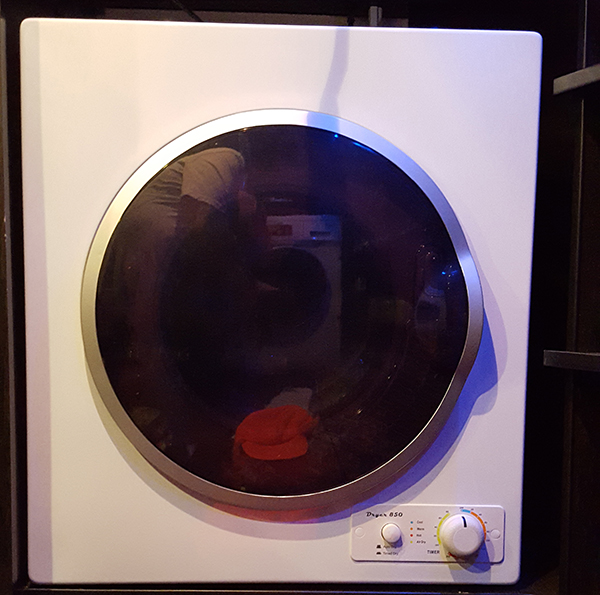
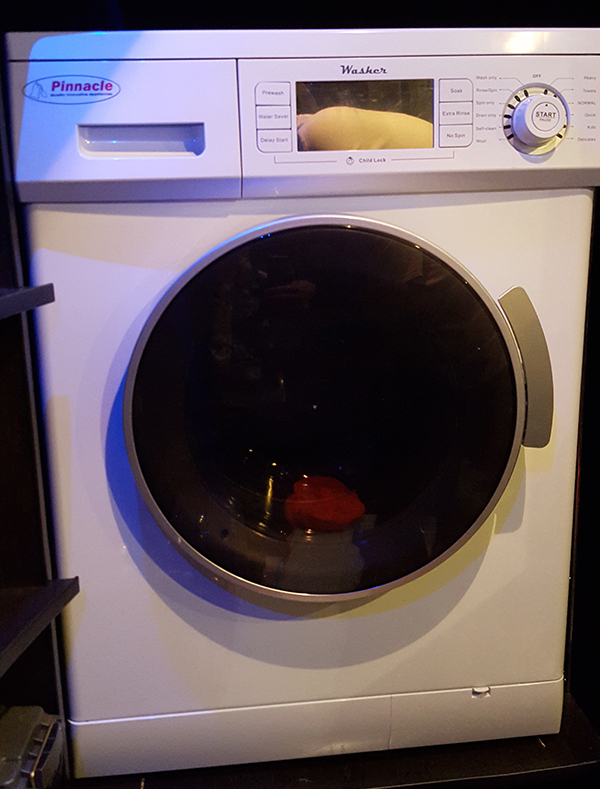
We will be adding and installing a Washer and Dryer ourselves. We have a running list of what we know is out there in terms of RV appliances at http://www.momentumgunner.com/rvappliances.html. We plan to do some reviews and identify the best of them out there. We will be starting with the 18-820 and 18-850 from Pinnacle this summer.
We will also be replacing the mattress with a Memory Foam mattress. We both sleep better on one of these.
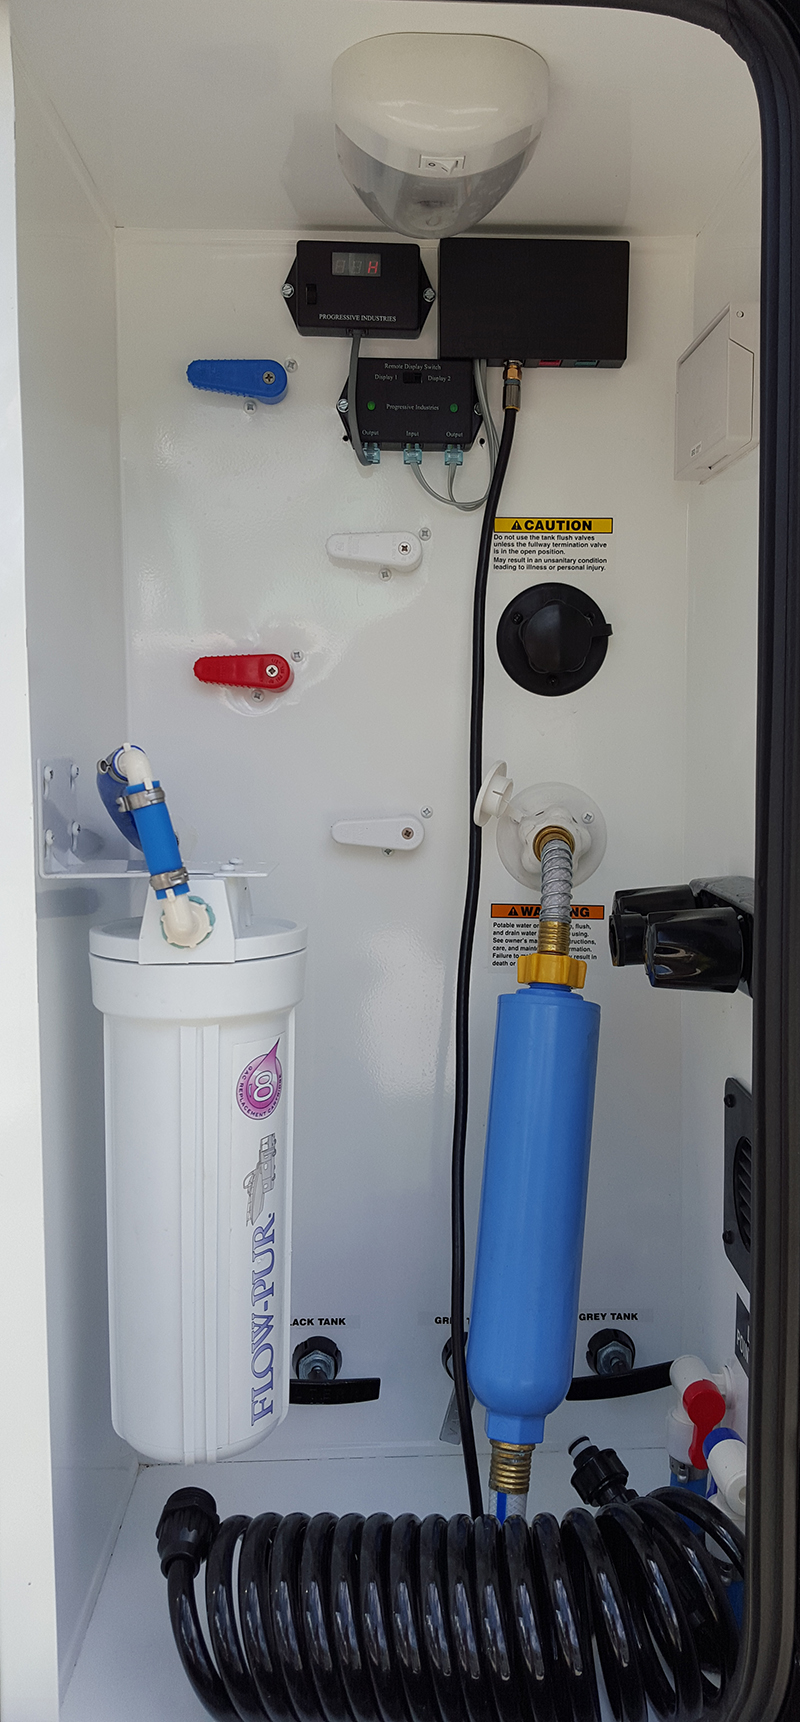
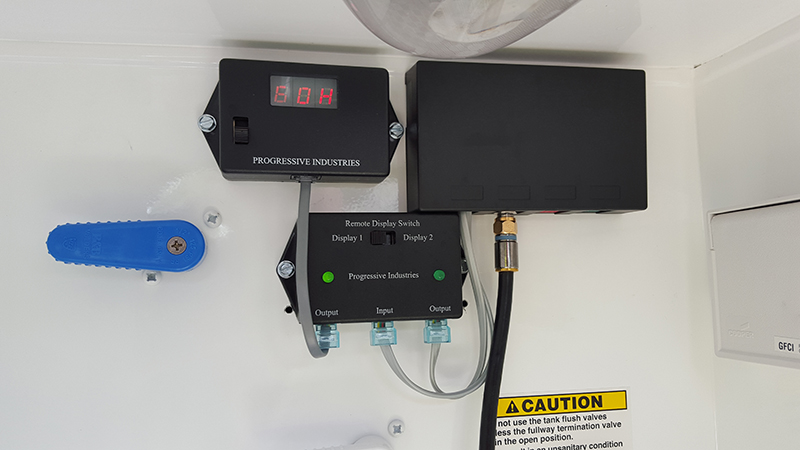
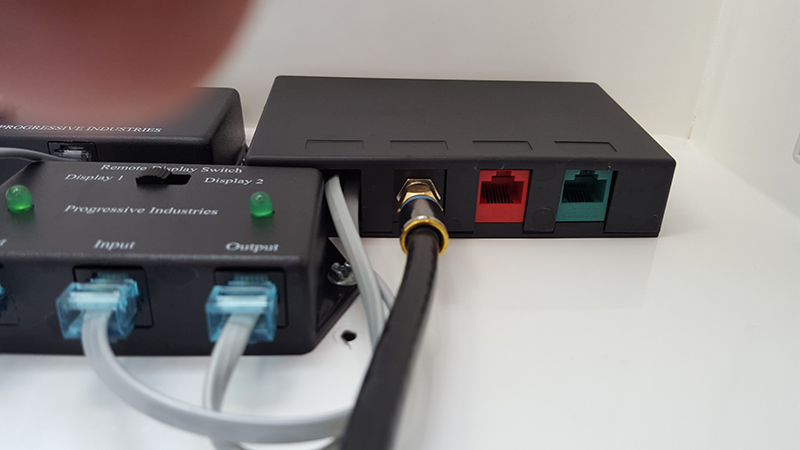
We will be installing a Progressive Industries EMS-HW50C power protection system. This will be especially critical with the data networking and 2-way radio gear we will be installing. I'll be documenting the installation here and on our YouTube channel.
The main additions we plan to add are the following Ham Radio items in the pass-through storage cabinet between the living area and the garage...
This means that we will need to add several cables for antennas and the antennas themselves...
These will be routed from that pass-through storage cabinet, up to the attic space, and then over to the street-side of the trailer. They will exit to the left of the side-mounted roof access ladder using a sealed weather head. Nate from Grand Design was really able to help advise me on how best to run the cables.
We had to delay ordering a little due to a possible issue with our daughter. Things are well and we can move ahead.
The order was placed and we have the order number. There may have been a little confusion on the interior color - we want to make sure we get the dark wood interior and dark leather sofas like the unit we saw at the show. It turns out that Shark is the darker color, and it was ordered in Chocolate which is lighter (seems backwards). It should be taken care of. I'm hearing it takes around 6 weeks turnaround right now.
We got confirmation back from Nate Goldenberg on everything they are taking care of for us, and the interior color will be Shark (the darker colors) with the Dark Expresso sofas and window treatments. Perfect!
Grand Design really has their act together, and some great people that really care about doing the job the right way. You won't find another RV manufacturer doing what they are, and when you look at their growth, you can tell that buyers are taking notice. Their willingness to do some custom items for us is especially appreciated, and not very common in this industry.
We wanted to take a factory tour while ours was in the build chain, but that's not going to be possible now with my wife not as comfortable traveling. We plan to take one in 2016.
So far, our experience with General RV has also been good. We are looking forward to the delivery of the unit and getting on the road.
I got an e-mail from Jeremy that the trailer arrived. He wasn't able to get back to me today on the time frame for the additional work they need to do, but I'm expecting to hear back tomorrow. We want to go take a look at it tomorrow if possible too. That was a LOT faster than we expected.
It's 20:40 and we just got back from taking a look at the 385TH at the dealer and then doing some baby clothes shopping. We were very pleased with what we saw. We didn't have a lot of time, but wanted to give you a quick look at some of the differences in the 2016. We will be taking more and better photos next week.
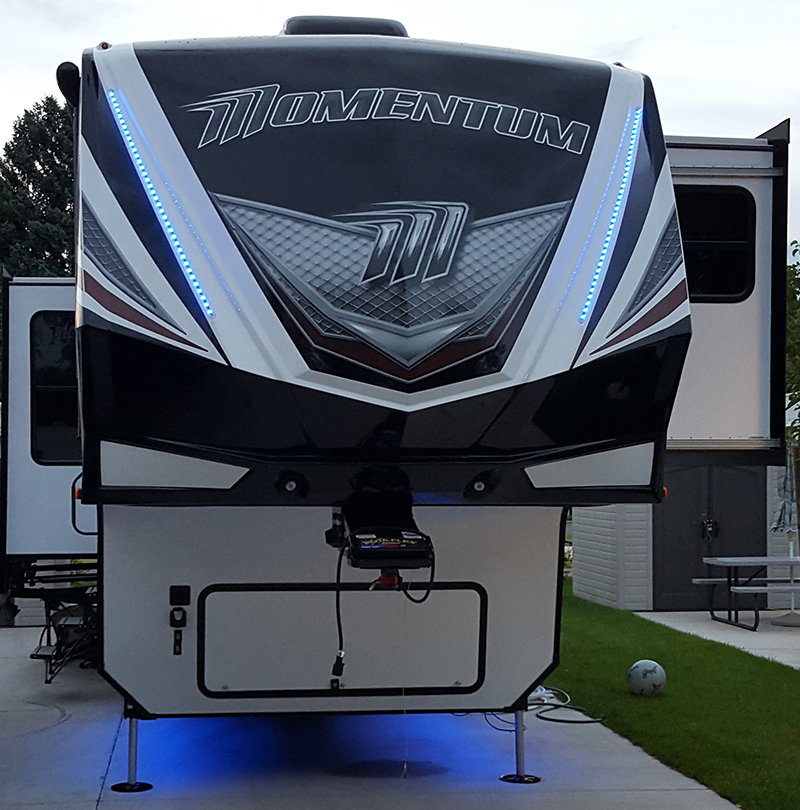
First, you will note that the exterior does have the new white color scheme with the bold graphics on the front cap. It looks fantastic! We liked the darker color of the 2015's too, but this should prove to keep interior temperatures a bit cooler in the long run.
Do you see the window on the forward curb side? I noticed when we came up to the trailer that it wasn't where it used to be. The 2015's and earlier had a vertical window positioned more to the rear of the bedroom. That told me that one of the things we would liked to have seen different on the 385TH was done for the 2016's...
"There is a nicely-sized 4-drawer dresser in the bedroom (although it would be nice if they used the slightly lower unit with 6 drawers that they use in their other units)"
Other changes to the outside aside from the colors include a re-design of the LED's that light up the hitch. We didn't get to power everything up, but they sure look better than the LED stop that was shown earlier.
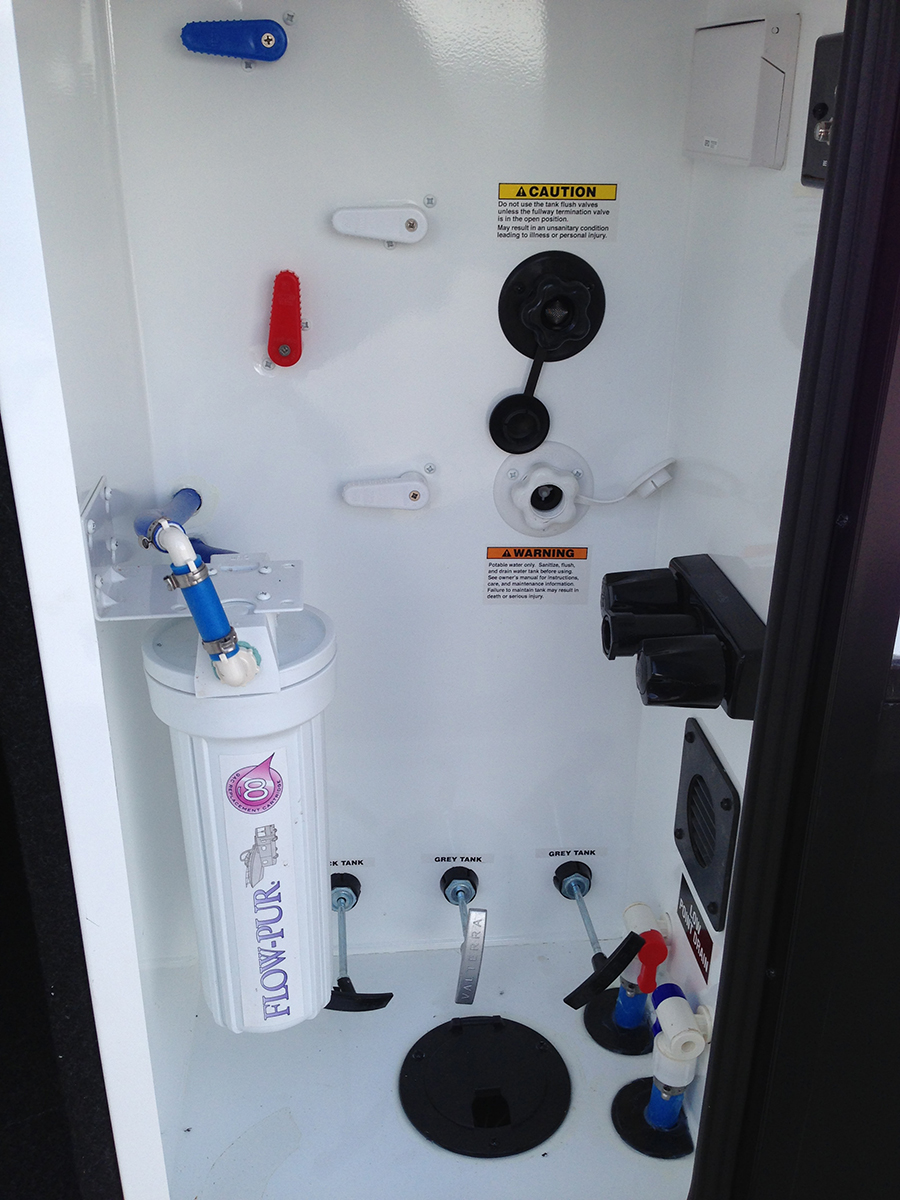
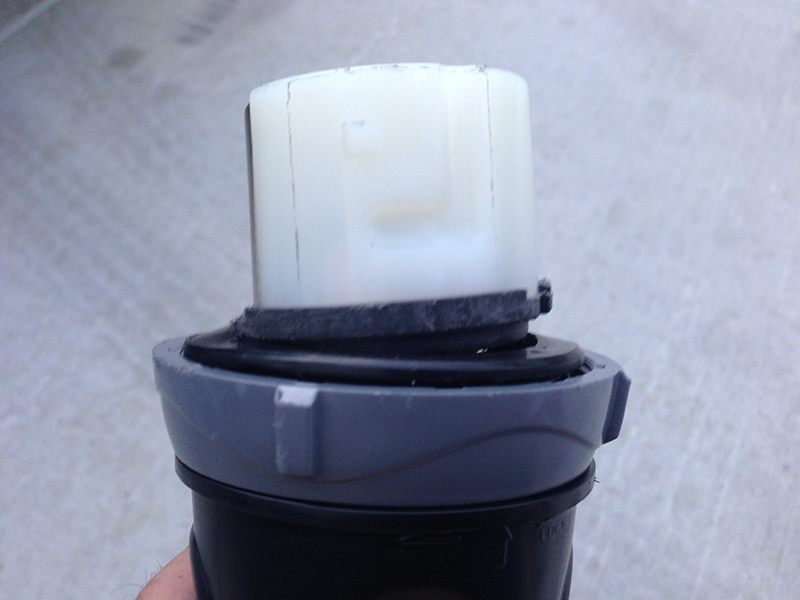
There is also a change to the water input and control system - the KantLeak valve system is gone...
On to the interior with some of the changes we noted...
Starting at the front - the bedroom is more like their other units, including that lower, 6-drawer chest in the bedroom, and the area at the head of the bed - including the small nightstands on the king bed version. Those are perfect for a pair of eyeglasses! This was a fantastic set of changes.
We honestly don't think this can be improved upon - with the possible exception of some real blackout window shades.
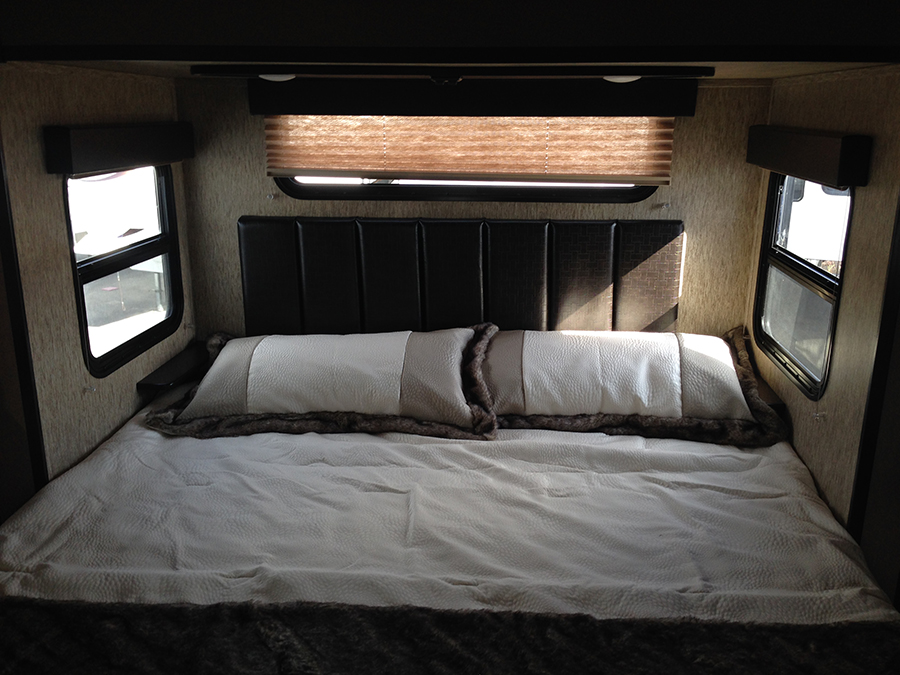
Those nightstands give just enough room to be useful without being intrusive. Another excellent design element.
That new chest gives more usable space on the top, plus two extra drawers. This pretty much perfects the bedroom in the 385TH.
They also installed a 12VDC outlet above the TV as requested - which means we can run a 12VDC TV for lower power consumption without requiring a generator running.
Moving back to the bathroom, one of the requested changes that Grand Design made for us was the installation of a fan with a wall-mounted remote. My wife is 4' 9.5", and even on a stool can't reach the ceiling fan in the bathroom. With this remote, she can start the fan with no problem at all. An added benefit to this fan is a rain sensor that will close it automatically. We are both very appreciative to Grand Design for doing this. Maybe they will make that a standard feature in the future.
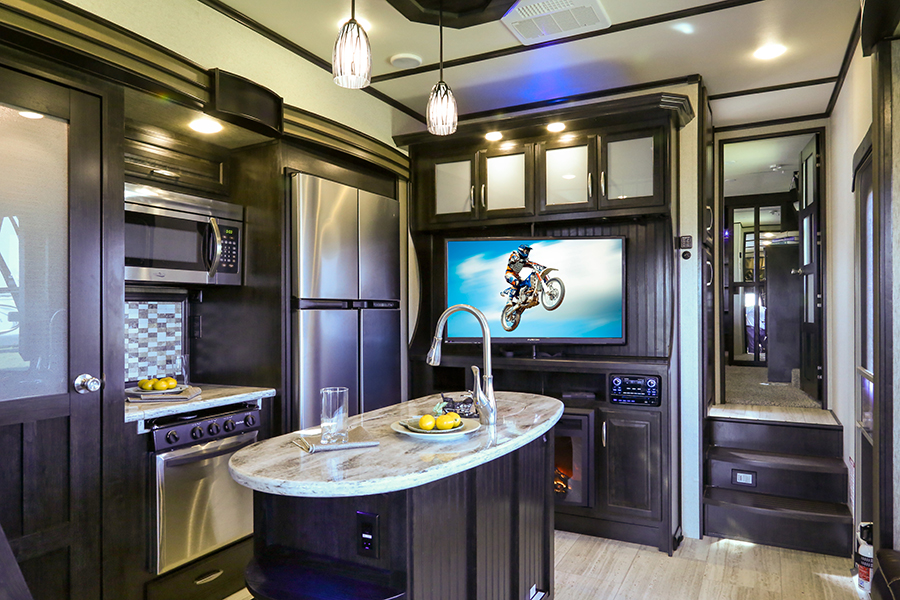
Moving back to the main living area, there are a couple of changes. The TV is no longer mounted on that pole - they use a swing-out arm now. Again, an EXCELLENT change! There is already a 12VDC outlet above this TV. All of the TV's installed were Haier.
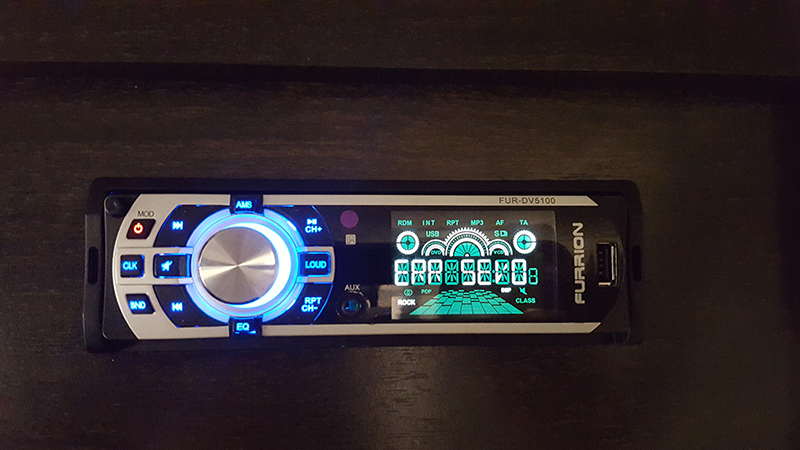
They are also installing an updated Furrion radio/DVD player, and they have moved it to the center rather than being above the cabinet to the right of the fireplace. There is a sound bar under the TV. Our HDMI cables will run from the section to the right of the DVD player to the garage, and to the bedroom TV location.
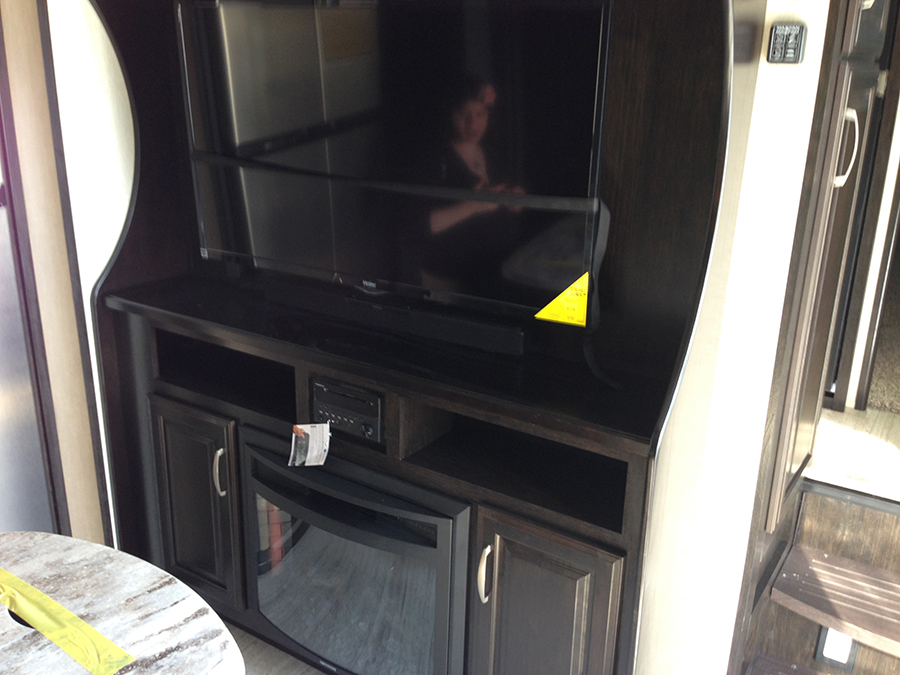
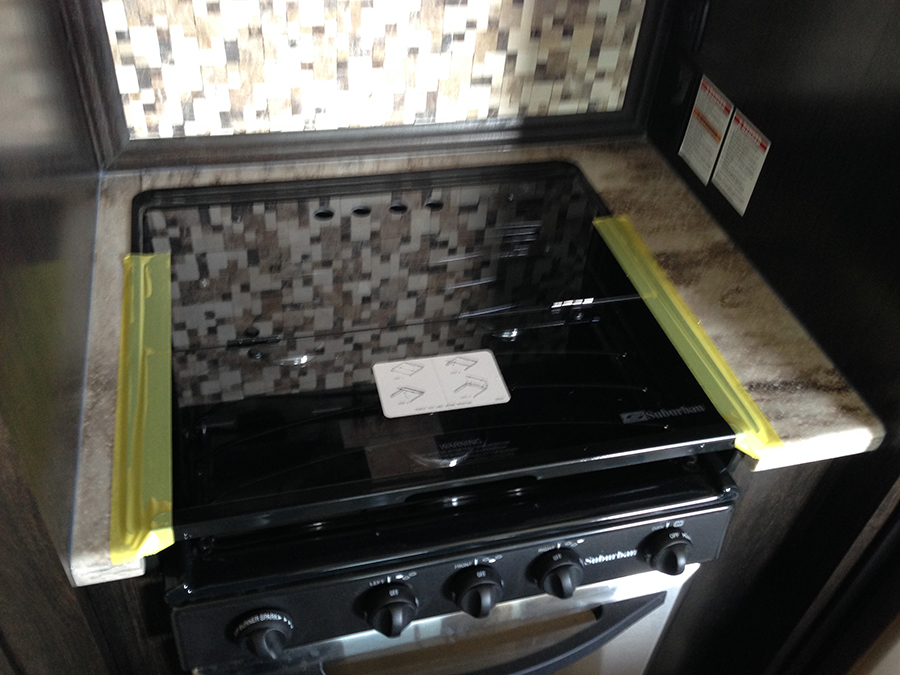
And, there is a glass top to the stove now which forms its own back-splash
Moving back to the garage, it has the updated upholstery and the 12VDC outlet above the TV we had requested. I also noted there are pegs for a table in the back.
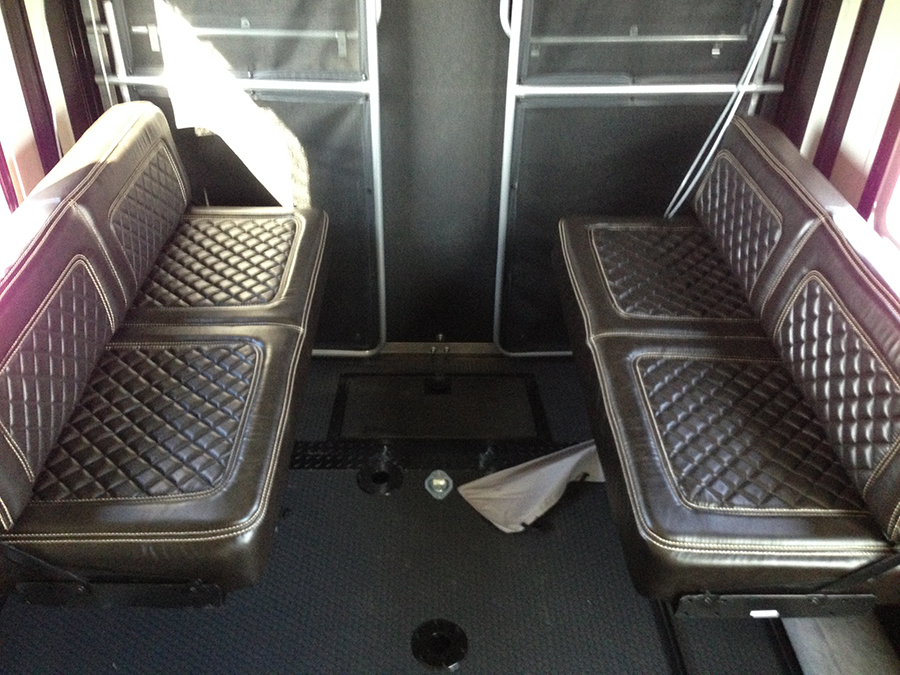
We didn't get a chance to look for the card table or anything else as the dealer hadn't gone through the interior yet - they had just washed the outside. We will be taking a lot of photos next week when we do the PDI. I did notice a couple of things that I'm going to e-mail Grand Design about tonight.
Yesterday I noted that there was no template for drilling a hole to mount the vent on the wall behind where the dryer goes. I also saw that they hadn't installed the cables or the swing arm for the TV in the pass-through storage area. I wasn't sure if they still do this, so I contacted Grand Design to find out. They do, it was somehow forgotten during the construction.
JD Adams from Grand Design was able to tell me how far to measure up the wall on the left side, and how far to the right to measure to be centered on the safe spot to drill for the dryer vent. 6.25" up, and 5" to the right. I'll confirm that one more time with him - measure twice and cut once.
He is also going to send me the parts for the underside storage area TV as soon as I get him the VIN from the unit. That's all I could ask for.
We have also been following an issue that's being reported in increasing numbers on the Grand Design Owners Forum and other places relating to the Lippert Axles.
Folks are reporting that with VERY low mileage (sometimes less than 1000), they are finding the axle seals leaking and grease entering the drum. In some cases it's been bad enough that it covers the brakes, pads, and magnets - that means brake failure. It's 1500 miles from Elkhart to Salt Lake City, so I have requested that General RV check them out before our PDI. Jeremy Darst relayed that request to the service department. The last thing I want to end up with a trailer without brakes and my wife and daughter in our truck.
I'll keep you updated on what I hear back from them.
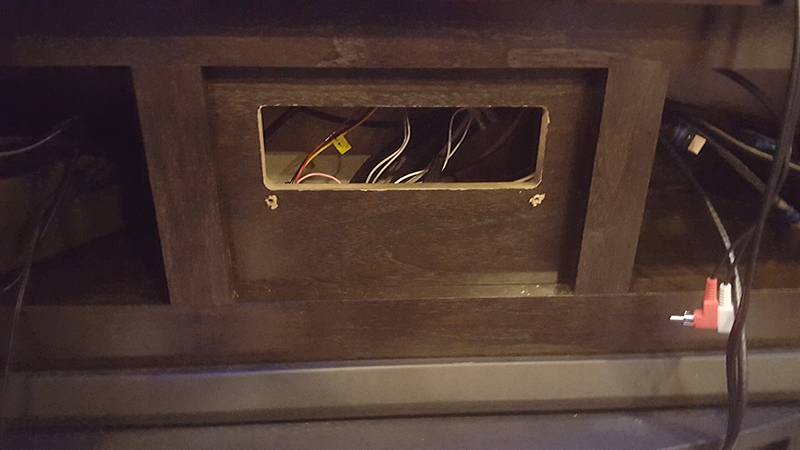
Today, I dropped the HDMI cables off at General RV in Draper. This is the part I'm a little apprehensive about. We need two HDMI cables installed - one from the entertainment center to the garage TV, and one from the entertainment center to the bedroom TV. The connection points for both TV's are in the ceiling right above them, so I want the HDMI cables to come out there too.
Both of these cables will run back to the entertainment center and connect to an HDMI distribution amplifier.
I really, really wish these could have been installed at the factory, but that's not something they offer at this time.
I've installed wiring and antennas and 2-way radios in a number of vehicles (including police cars) and trailers, and I have pulled alarm, data, and video cables in both residential and commercial buildings. I haven't had to pull anything through a trailer like this, so I'm not certain of how they plan to do this. I'd hate to have to put a "halfway hole" (a hole drilled or cut in a ceiling or a wall to give you an accessible point for pulling wiring over distances in a place which is otherwise inaccessible - which is then covered or repaired after) in the ceiling that will end up covered with a plastic or metal plate in order to make this work.
In all the cables I have run over the years, I only had to use a halfway hole in one commercial installation (in which we ended up putting in a conduit box so that we could save the route for more cable later) and one residential installation on a vaulted ceiling, which afterward we were able to perfectly tape, texture, and paint the hole so it was invisible.
There was another factor to consider in this installation as well. HDMI cables can sometimes prove unreliable at distances exceeding 30' and we estimated one run to be 35'. I got the best cable we could find, and the HDMI disti amp we will be using regenerates the signal on the output, so it SHOULD work. I got the cables this morning via FedEX and tested them out, but I also planned a backup because we only get one shot at this.
It is possible to run HDMI over Cat5e cables, but most of the adapters to do so require two straight-through Cat. 5e cables that are NOT run through a switch or router. So I cut two lengths of Cat. 5e cable and set them up in a bundle with the 35' HDMI cable.
I had two 25' cables and one Cat. 5e cable for the shorter run. I doubt we would need the Cat. 5e on that run, but it might come in handy for something someday.
I bundled the long cables together and the shorter cables together, and then dropped them off at General RV for their techs to install.
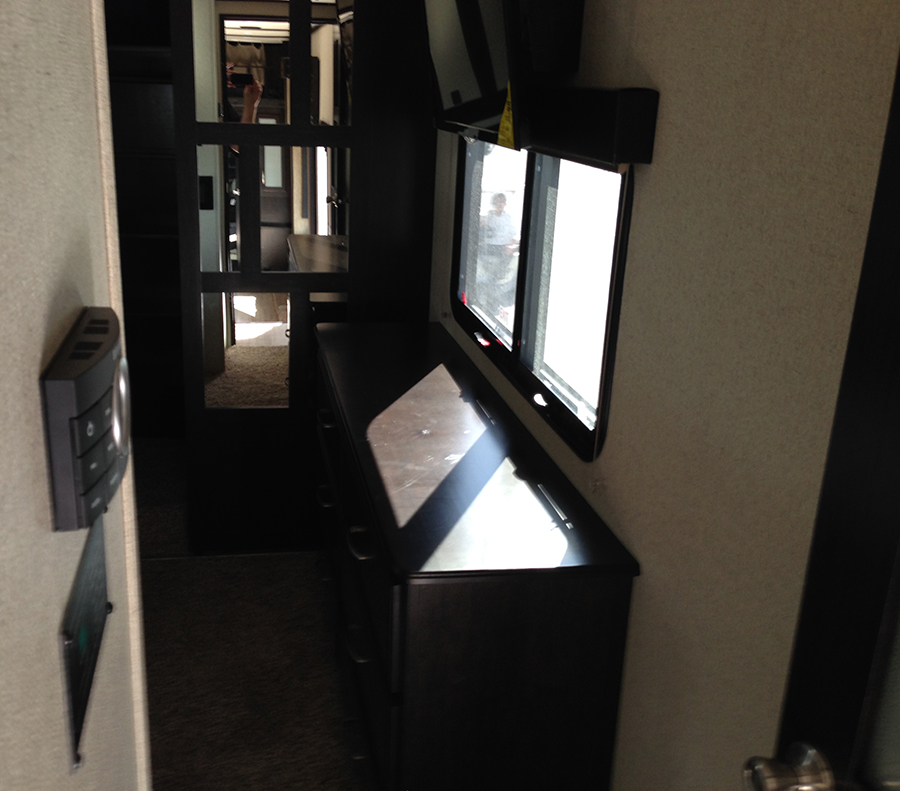
I'm intending that both cables will home run back to the entertainment center. In the 2015 and earlier 385TH units, the Furrion Entertainment Center (radio, DVD player, CD player) was directly above the cabinet to the right of the fireplace.
In that setup, I was going to have the cables run to the open area immediately to the left of the radio, which is where the HDMI distribution amplifier will go. However, they changed the layout of that cabinet in the 2016 385TH.
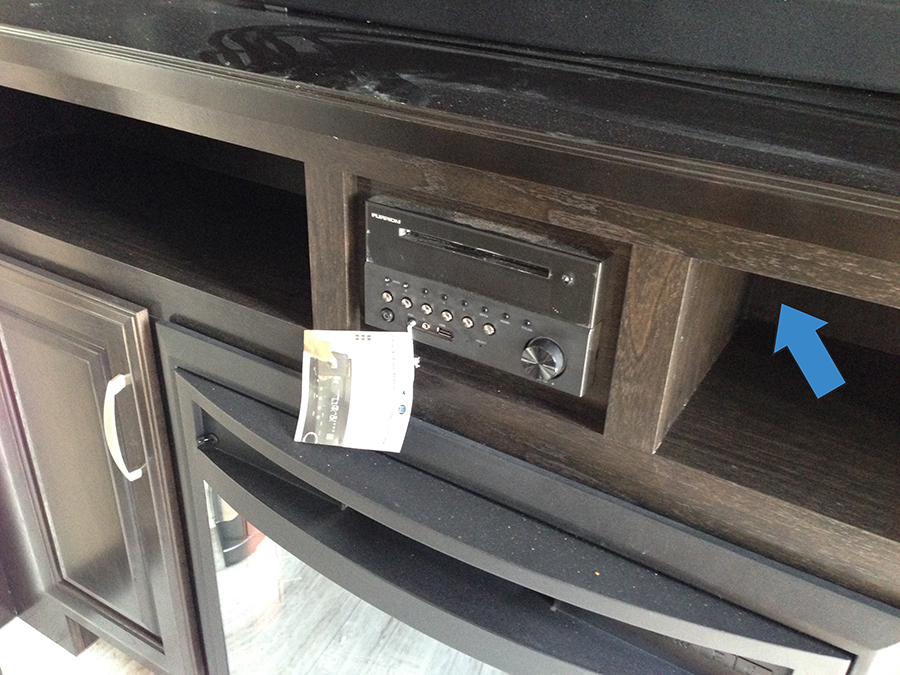
Now the radio/DVD/CD/amp is in the center right over the fireplace, and there are two open areas - one on either side. For our purposes it doesn't change how we are going to do this. The plan is to have both of the HDMI cables return to the point indicated by the blue arrow.
We will put the HDMI distribution amplifier in that open area. It will be supplied by our media server, a Roku 3, an Apple TV, and another video box. With this, we can send entertainment video to any or all of the TV's when not working an emergency, or things like area maps with APRS location data on them to any or all of the TV's for use when providing emergency or SAR communications.
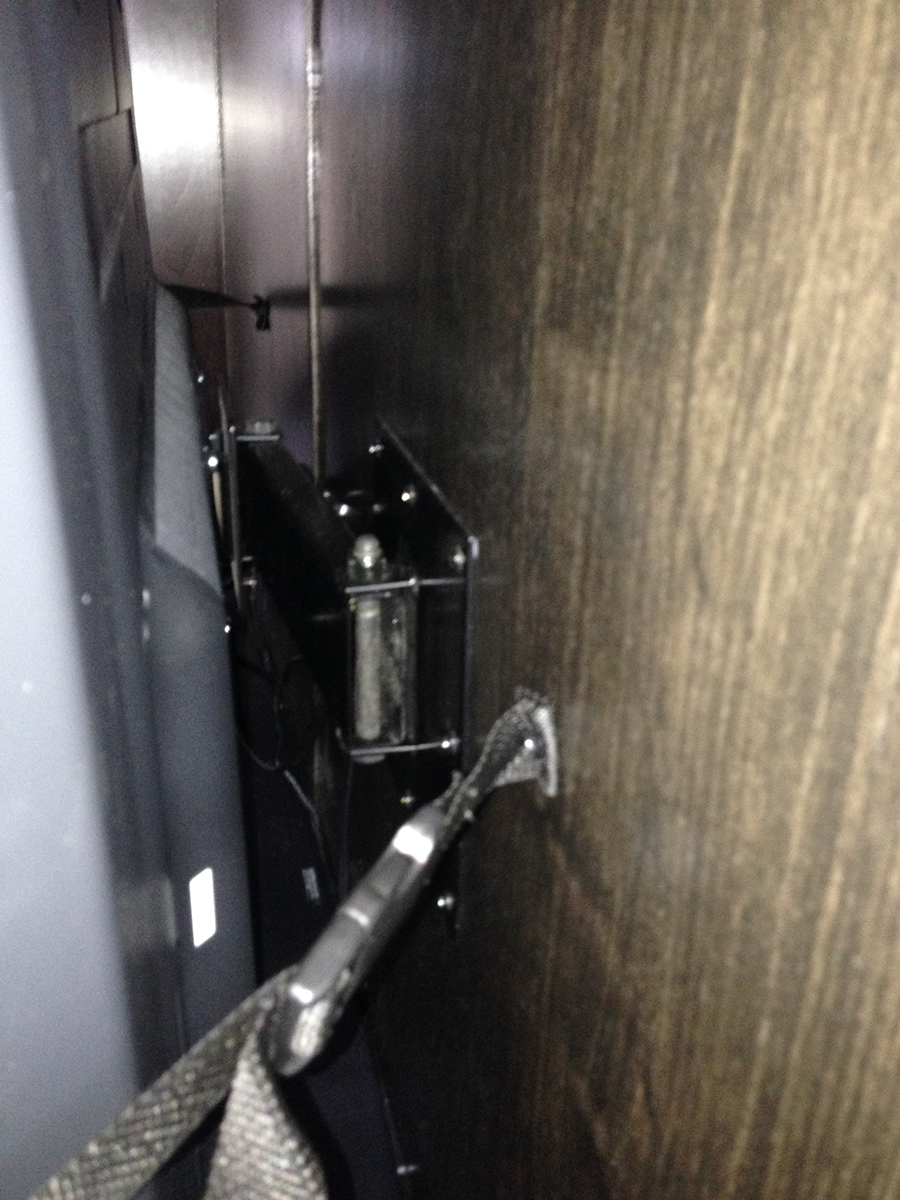
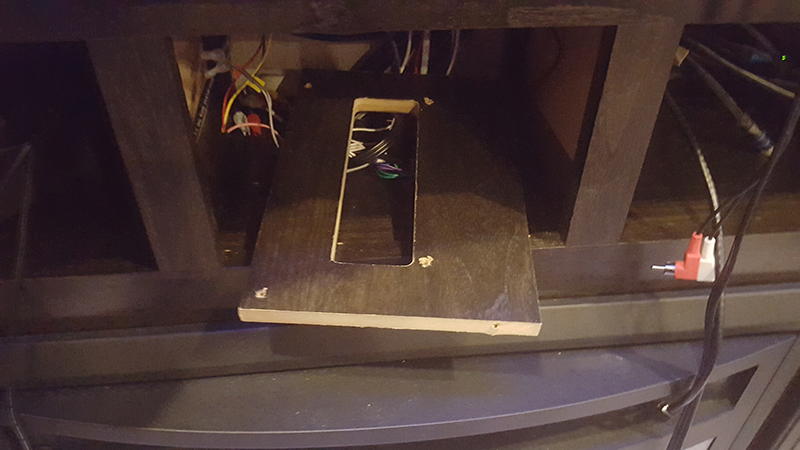
I will later install two more HDMI cables - one to the TV right above, and the other to the TV in the pass-through storage area. You can get to that area - and to the main service entrance - by pulling out the fireplace. The surround on it lifts straight up, and then there are a few screws you remove and it pulls out the front. That will let us route signals to any of the TV's in the unit. I'll also be adding a couple of Cat 5e runs to the service entrance in case we need to hook up to either DSL or an existing network somewhere.
I made sure the tech has my phone number and e-mail address, and I asked them to call me with their plan. If they want to run it on the surface using something like surface-mount plastic conduit, I'll just do it myself. If it's going to require "halfway holes" in the ceiling that will need to be patched, we may re-think it. I think there are enough existing penetrations (speakers, lights, and the kitchen fan) that could be used to help pull the cable.
I'm hoping that it will be possible to use a long fish tape to reach from the ceiling over the remote TV's to where the entertainment center is. I'd even be willing to help them if they'd like. We'll have to see.
Today is the day for the PDI. I never heard back from the folks at General RV on either the cable installation or the VIN for the rig (which I had called and asked about last Friday). We will find out what's up when we get there.
Update at 23:00 MDT -
First - do not do a PDI with a wife who is 7-months pregnant, with an ambient outside temperature of about 97 degrees. It's not very enjoyable for her.
Second - General RV does things a little different than most dealerships. I went in planning to do a regular PDI with a full checklist as I had advised Jeremy. The tech at General RV had no idea what I was talking about. He said "I already did the PDI, this is the walk-through". That surprised me, and I explained what I meant. General RV doesn't do it that way. Fortunately, it turned out he really had. They actually have a pretty detailed procedure for doing so which he explained. In the walk-through we still looked at everything.
I asked him what shape it was in when it rolled onto the lot. When they received the unit, he had to re-tack a few pieces of trim, putty a couple of nail holes, do some sweeping and cleanup, and that was about it. The unit came in great shape, and he had everything pretty much perfect when we went through it. There was only one show stopping disappointment that I discovered after leaving General RV and arriving at our campsite.
All of the woodwork was in great shape, the trim was fantastic, the faucets all worked, the TV's all worked, all of the remotes worked, the fireplace, fridge, and AC units all worked, the Happi-Jac bed/sofas worked, the slide outs were good and sealed. The ramp door sealed and raised and lowered fine, and it looks like they changed the bolts that hold the ramp onto the unit (which was an issue others had reported in some of the 2014's and 2015's). All of the interior doors fit and worked perfectly. The patio setup worked. The outlets worked, the GFCI worked, and the TV antenna worked. The fireplace worked. The spare tire was there, all of the awnings and lights worked - it really was fantastic, ready to go out the door.
The one thing I'm worried about were the axle seals that have been reported to leak recently. I explained what the back story to that issue is, but the tech that did the walk-through told me they would have to charge me to check them. That didn't really impress me, and didn't leave a good taste in my mouth. I'll pull them myself and check each one over the next couple of weeks, and work with Grand Design directly if I find any issues. That was something I did NOT like about General RV. But since it's not an issue they know about or would normally check, they weren't willing to do so.
We expected issues and were not going to sign anything until any punch-list items were resolved. Aside from not checking the axles, there were no issues that we found in our inspection or the walk-through. It really was in great shape and was everything we had hoped to see from Grand Design.
No RV manufacturer is perfect, but you will notice that the majority of issues that are reported on Grand Design products seem to be with components that come as complete assemblies from suppliers such as Lippert (who makes the axles that are having the leaking issues). We were very impressed with that we saw in our unit. It was good enough that we were able to sign the papers, hitch up, check and adjust our trailer brake controller, and take it to our campsite.
We only found one issue - a very fundamental one - when we arrived at our campsite. It was enough of an issue that we couldn't camp in it.
The tech already had the power hooked up when we got there, and he disconnected it after we went up to the office to sign the papers. I don't know if he used one of their cords or what, but the cord with ours (made by Furrion) was seriously messed up. The connector on the trailer end was not secured properly, and it would not lock into place. It looked like it had been pulled free of a gasket that seals the system. When I looked into the connector, there was some spalling and signs of heating (discoloration), that I would have expected from a cord that didn't secure properly. It's clearly not put together right.
I worked on it for 1/2 hour and could not get it to go back together properly. I'll be taking that in to General RV tomorrow morning at 09:00 when they open to see if they can give me a replacement.
In the meantime, I had a few minutes before quiet time in the park, so I started the generator, got power that way, extended the slide outs, got the AC running, and hooked up the water supply so that my wife could empty her bladder (which our daughter is taking particular pleasure in beating on).
But since I couldn't run the generator any more, we locked it up and headed home. We will return to it tomorrow after obtaining a working power cord. That was a real downer.
I was also prepared to shoot a bunch of photos and a video, but my phone reset itself on me and took almost 2 hours to recover from. I'll bring our main camera tomorrow.
As I mentioned before, when we ordered our 385TH, we ordered the "Bedroom TV with exterior TV swing arm". The swing arm wasn't installed at the factory. JD Adams at Grand Design said he'd get one out to us, but I think I may have figured out why it wasn't installed. In the 2016 models, they have a new option for an Exterior Entertainment System which is located on the outside of the sofa-side slide out. It's a dedicated compartment for the TV. It's a better way to do that, but the option wasn't installed on ours because it was ordered under the 2015 option sheet. We will be fine with the swing arm in the main pass-through storage compartment once it arrives.
General RV also installed the HDMI cables I supplied. They didn't give the tech the document I prepared explaining what we needed (even though I gave them two copies). He wanted them to call me and ask a few questions, but they didn't (the document also had my direct cell number and e-mail address on it). That was a disappointment.
He did a good job on them, however, and it looks like they are going to work just fine. They were not quite what I expected, but he couldn't get to some spots in the ceiling. He is waiting for a couple of plastic trim pieces to finish off the holes he cut where they come out of the walls to install them, and I'll go pick them up when they arrive. Overall, he did a good job - even though he had to run under the floor instead of through the ceiling.
He also commented on the insulation under the floor. He said they really insulated it well, which is one of the things that Grand Design really has down. He also noted this when he set the AC units to about 59 degrees to test all of them while doing his PDI. He had the trailer in his bay, and the ambient temperature outside was in the 90's. He said that while doing his PDI the AC units shut off after some time. He investigated (thinking they had failed) and it had reached 59 degrees inside. He hadn't ever seen that happen before, even with other high-end units that claim to be well insulated. That third AC unit in the garage makes a real difference too.
While the majority of improvements in the 2016 model year (which I will cover tomorrow) are truly excellent, there were a couple of non-show-stopping disappointments as well.
It seems that Grand Design may not be including those great card tables any more. Our unit didn't have one. I'll check with Grand Design and find out what's up with that - we were really looking forward to using it. The rear table for the garage area that goes in between the sofas does have the old peg leg system, but the table for the main living area is free standing. We were really looking forward to the card table.
We did find that the new Furrion Stereo they installed in the entertainment center is actually a step backward - even though it is a more "modern" unit with a nicer display and appearance. It does NOT have an HDMI output, and it does not have either an optical or coaxial audio input. Their older 1200 model has that, but their new 3000 and 3100 do not. We were counting on those features to work with the HDMI distribution amplifier we are putting in. I'll see if Grand Design has any more of the 1200 models that they might be willing to swap this one out for.
Well, it's 23:30 and we are getting some sleep. Tomorrow will be another big day. I'll shoot some video - including a walk-through - and a bunch of photos.
I got to General RV at just after 9, and it's 9:43 as I type this back home. They exchanged the defective power cord for another out of another new Momentum unit, and they will deal with Grand Design or Furrion to get a replacement for the defective cord. I appreciated that.
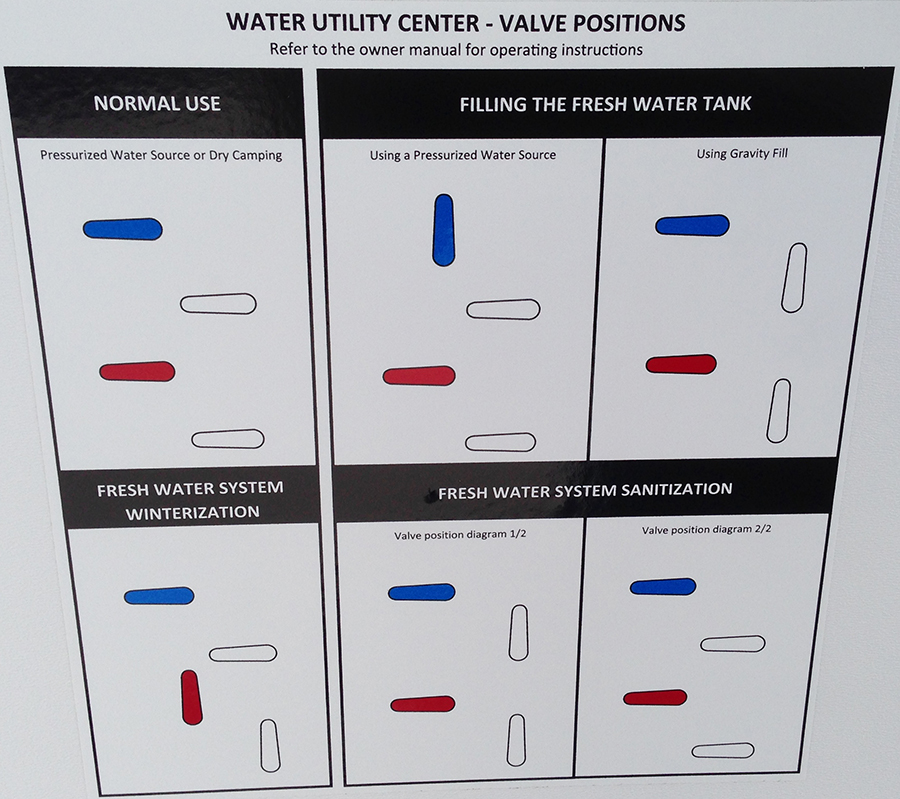
Once we got to the trailer, the cord was attached and secured in about 5 seconds, and it worked perfectly. We have full power, and I got the thermostat set so that we had all three AC units running. We also turned on the fridge and made sure that the Valterra Adjustable Water Pressure Regulator was set correctly. The factory told me that 50 PSI is a safe working pressure for the momentum. I set the Valterra Adjustable Water Regulator to 50PSI while the park is somewhere around 100 PSI. It's installed at the water supply to protect everything starting at the hose.
The AC units were doing a good job cooling the unit when we left to get a few more items from home. It got to around 100 at home, but the trailer was very pleasant inside at around 72. We are VERY happy with those AC units.
Once we got back from our supply run, we took a really close look again at all parts of the trailer. Here are the results of what we found.
Outside:
The outside looks great! We thought we liked the brown/beige color of the older units (and we did), but after seeing this in white we can't imagine going back, especially in hotter temperatures. We love the pass-through storage and the central hookups, and the awnings are adjustable. They went away from the KantLeak system, which really could. The outside speakers are mounted on the outside wall now. We also love the new LED lighting. It's awesome! I'll be adding some photos this next weekend when we have full Internet access.
Bedroom:
The new layout is fantastic. It was a major improvement, and considering that we really liked it before, that says something. It's also nice having the bedroom TV connected to our HDMI distribution center.
Master Bath:
Since they added the MaxxFan with wall-mounted remote for us, we can't see anything to improve there. It's a great RV bathroom with very deep, plentiful storage. We like the taller toilets too. The above-cabinet glass sink is great too. It really does give you more usable counter top space.
Main Living Area:
We love the new TV mounting with the swing-arm (a massive improvement), the fireplace (electric heat!), the entertainment center layout, the fridge (bigger than what we have at home), the residential-size High Point microwave (1000W), and the comparatively massive pantry. Some of the other guys have what they call "pantries", but they are very shallow in depth and hold a lot less. The Beaufloor flooring looks great, and the sofas with heat and massage are great after a long day. There are plenty of windows - all on the campsite side which is really nice.
Back Bathroom:
It's there and it works, and you can get into it from either the garage or the living area. It's convenient!
Garage Area:
We love having the option to use the rear ramp as a patio, and having the TV in the garage connected via HDMI to our distribution amp. The garage is big enough for what we have now, and for what we realistically might have in the future.
Outside:
I don't know what could be better about the graphics or finish on the outside, maybe a final coat with liquid diamond like KITT from Knight Rider, but that would cost millions or more. On a more serious note - there's an owner that added a bunch of extra brake and turn signal lights to his on the Grand Design Owners Forum. Grand Design might want to look into adding a few more.
Bedroom:
We absolutely love the new bedroom layout. It's about perfect. We did find one small thing we'd change as a matter of personal preference...
The reading lights over the bed are centered about 22" from the inside edge of the valence that covers the blind over the window above the headboard. That puts them below where you head is when laying down. If they were moved about 16" or 17" closer to the window, they would end up just behind where your head is. I think that would be a better position for them as a reading light. I'd also add a variable brightness control (dimmer) for each.
We also plan to install some really dark, blackout blinds in the bedroom soon.
Master Bath:
With the addition of the MaxxFan with wall-mounted remote, we can't think of anything that could be done to improve the master bath. It really moves a good volume of air, seriously keeps moisture under control, and helps pull cooler air from the bedroom and living area into the bathroom - plus my wife (or any smaller person or taller child) can reach the controls. I'd recommend that the factory make that a standard feature.
Main Living Area:
Again, we really love it! They removed the shelves from the ends of the island for this model year, and we don't feel we will miss them.
The only things we could come up with as improvements were...
The switch for the interior light above the entry door is part of the control center behind a door.
They put in a Furrion 3100 stereo/DVD player. It LOOKS like it should be a more capable unit than the 1200 model they used to install, but it's a big step backwards. No HDMI output, and no digital Coax or optical audio input. We need the Coax or Fiber digital audio connection to work with our HDMI distribution system - so we have to find a workaround.
Add a little more counter top length to the side of the island towards the garage for more workspace. I think a foot could be added without interfering with anything.
Go back to the taller entry doors. I'm 6'1" and the shorter ones work OK, but I really liked the taller ones. I do find myself automatically dipping my head slightly when going in and out.
Rear Bathroom:
It's small, but functional. We can't really think of anything practical that could be done to improve it.
Garage Area:
The garage comes out just over 12'2". The wall separating it from the main living area sticks out a bit farther on the side that has the back bathroom. On that side there is just over 11'11" of length. You have 41.5" at just over 11'11" and about 56" at just over 12'2". The pass-through cabinet between the garage and main living area may be a factor on that side depending on what you are going to put back there. When we can afford it, the Polaris RZR 4 900EPS we prefer, or the 4 seat Polaris Ranger Crew 570 will fit back there just fine when our daughter is old enough to ride with us. It would be nice if they could lengthen it out to 12'6", but I think that would mean taking space away from something else due to overall length restrictions.
We also noted that the garage stereo/DVD player is mounted a little high. The issue with that is due to the LCD display/polarization. When you are close enough to manipulate the controls, the LCD display washes out because of the angle. You have to stand back from it or up on something to see it clearly. It would be nice if a way could be found to mount it lower - maybe using an external radio mount under the pass-through cabinet.
Here is a complete list of the issues we found. There were a few things that we noticed during the first day in the trailer, but they are almost all things I can fix...
We spent the night in the trailer and slept like logs for the most part. It's reasonably quiet inside, and the AC units kept it very comfortable. The fridge also works very well - plenty of cold water and soda.
The 12 gallon water heater is perfect for showering and shaving, and it seems to work equally well on both gas and 120VAC. That's one of the great things about having a trailer like this for emergencies. The fridge and water heater both run on A/C power or propane, and the 385TH has a propane furnace AND an A/C powered fireplace. It also has a built-in generator and plenty of on-board fuel storage. The water tank is also nicely sized.
We went over things with a fine-toothed comb today, and noted a few scratches that had been fixed at either the factory or at General RV- including one in the door to the garage from the main living area. It took going over it really closely to even see it.
We also noted a couple of pieces of trim that were not secured fully - I think from when the tech installed the HDMI cable to the garage. I'll fix that too.
Aside from that, we spent the day organizing and relaxing in the evening watching Jurassic Park on the main TV and using the massage in the sofa. It's well worth it.
I'll also mention that they installed all Haier TV's in our 385TH. So far, they are great! We have been testing the HDMI cables we had installed and they all seem to be working fine.
I'll be working on the AC units this coming weekend and I'll let you know what's up.
I apologize for being so late in updating the site. With the arrival of our daughter being only about two weeks away, things became a little hectic. We had to involve a specialist, but they think that everything is going to be OK at this point.
After contacting Grand Design about the issues that I noted, JD Adams was on the case. Here is an update on those issues first...
I also discovered a couple of other minor issues.

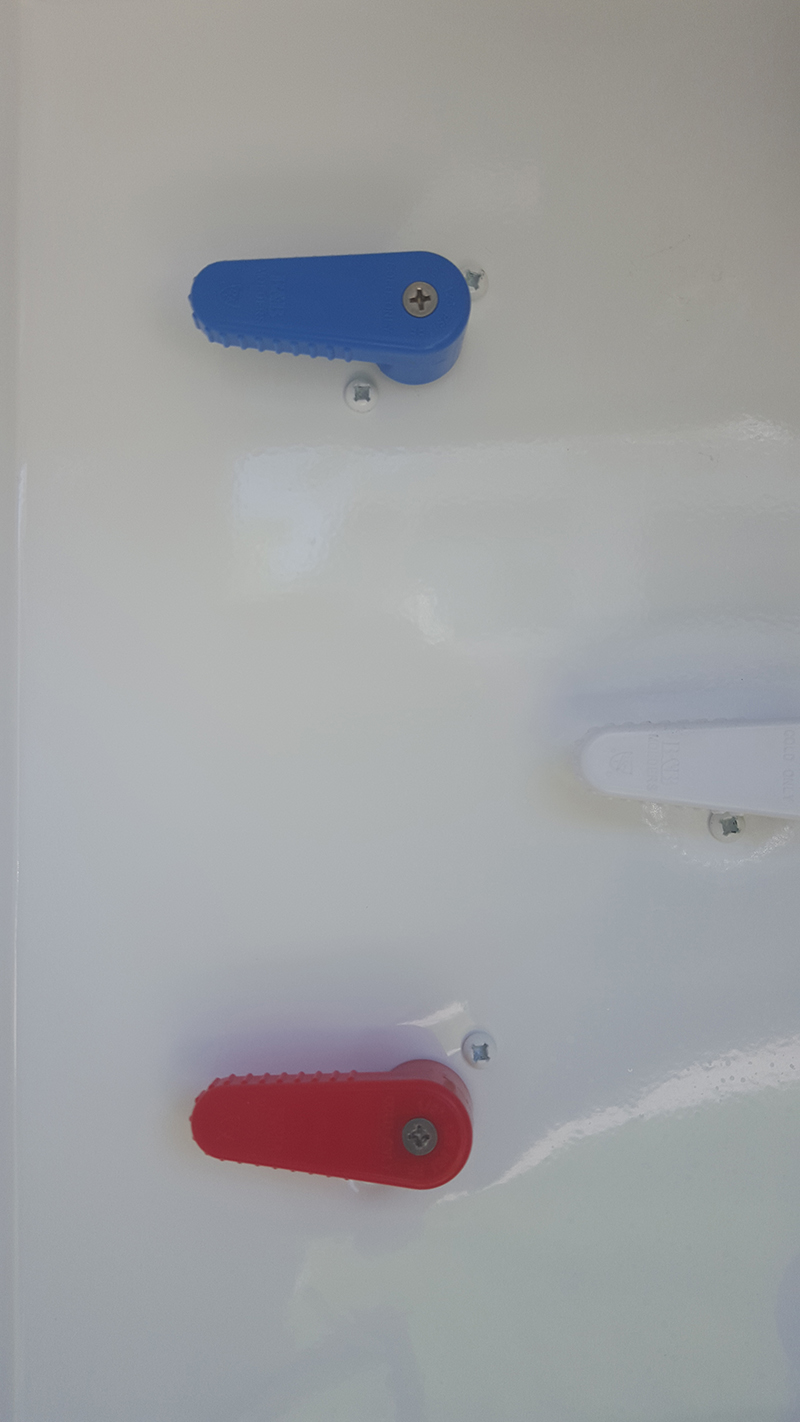
We also had an issue with one of the tank release valves in the hookup center, but in the end I found that I might have bound it up when I was working behind it. I did find that the forward black tank on our 2016 385TH is on the street (drivers) side.
On the A/C units, I did find that the duct outlets were closed with aluminum tape on all of them. I pushed in on the center to puncture it, and folded the tape in towards the duct to fully open them, and all of the ducts are now working - although I still find the airflow to the 4 outlets in the ceiling of the main living area is still somewhat restricted. I'm wondering if those are connected to the heat? It is nice having all three A/C units contribute to the cooling of the entire unit.
This issue has been reported before, and I do think that GD needs to make sure their installers are trained to make sure that they open the duct outlets on any A/C units they install.
We also found that one of the blinds in the bedroom - on the window above the bed - doesn't sit completely level when closed. One of the anchors was installed higher than the other. I'll fix that within a few days.
I also need to deal with the faucet on the kitchen sink. Aside from the hot/cold being reversed, there appears to be a leak coming from up inside. I could be wrong about that so I'm going to re-work the fittings too.
Aside from the issues noted above, the trailer has been perfect in every other respect. We have had a few major wind/rain/hail storms and the trailer has remained completely dry inside.
I installed a Pinnacle washer and separate Pinnacle dryer in the trailer. Because of the way the cabinets in the main closet for these are designed, there are a couple of issues to be aware of.
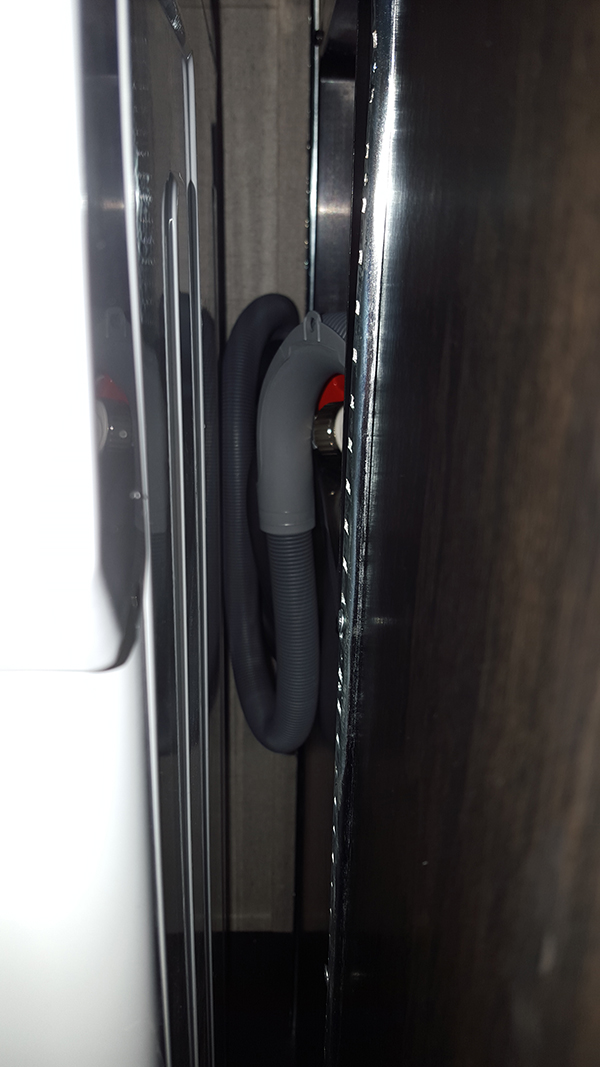
It would be nice if the factory could move the water and drain and power connections toward the rear (curb side) of that cabinet. That would let you hook them up first, and then slide the washer in. Even better would be to have them on the outer (curb side) wall, along with the power, but I'm not sure how that could be accomplished in a practical sense. I think moving them further back on the right wall where they are would be possible, and would make the installation MUCH easier.
So far, we have been very impressed with the Pinnacle washer and dryer. They are both quiet, clean clothes well without using much detergent, and are very convenient. I look at the trade-off in storage space as being a good compromise for the convenience of not having to use a laundromat. I'll be posting detailed reviews of each in the next month or so after have more use on them.
We did decide that an ideal 385TH would have the same floor plan but with a 14' garage (which I think would make the overall length too long for DOT), with a cabinet for the washer and dryer in the back where the radio cabinet is. That would still leave enough room for the longest Polaris RZR units, and give you that little extra storage in the closet. But given the constraints of overall length, we are quite pleased with the 385TH as it is.
The main walls share the following wallpaper pattern.

The bedroom, kitchen, and sofa slide-outs, master bathroom, and the upper-front wall of the garage all share this darker pattern.

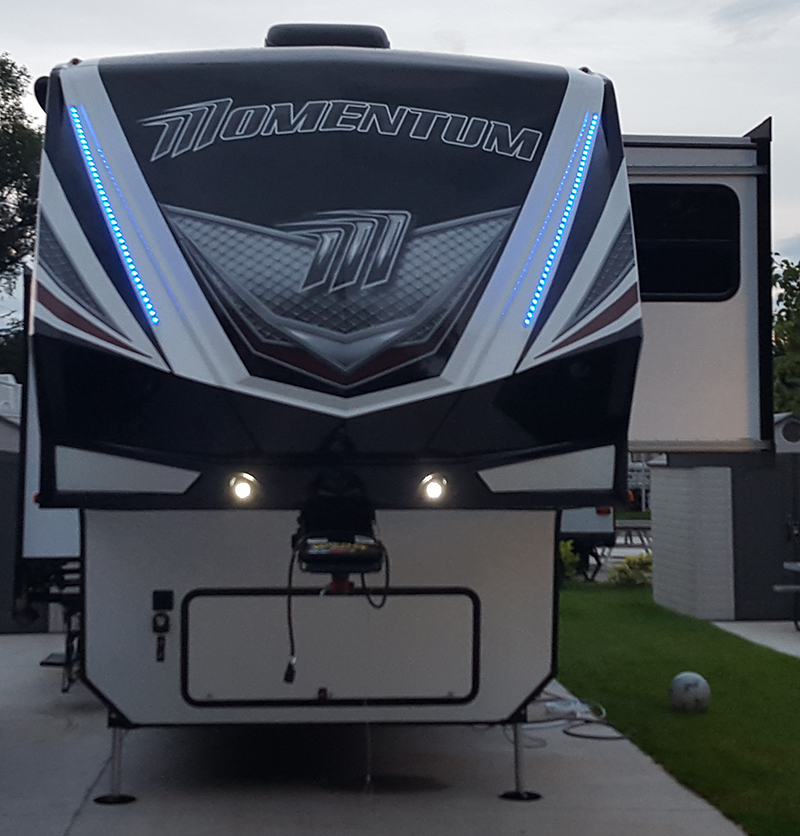
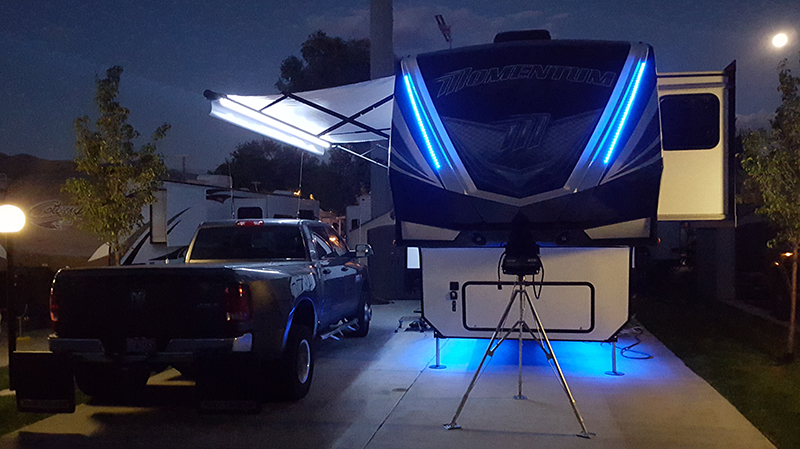
Unlike Tesla, when Grand Design installs colored LED lighting, they do it tastefully. Tesla had "disco" lights that flash multiple colors in many of their units. It gave them a "party machine" feeling that wasn't to our liking - it seemed cheap. Grand Design elected to use blue lights in just a few places that look great.
There are two blue light strips on the front that look great a night and let the trailer stand out.
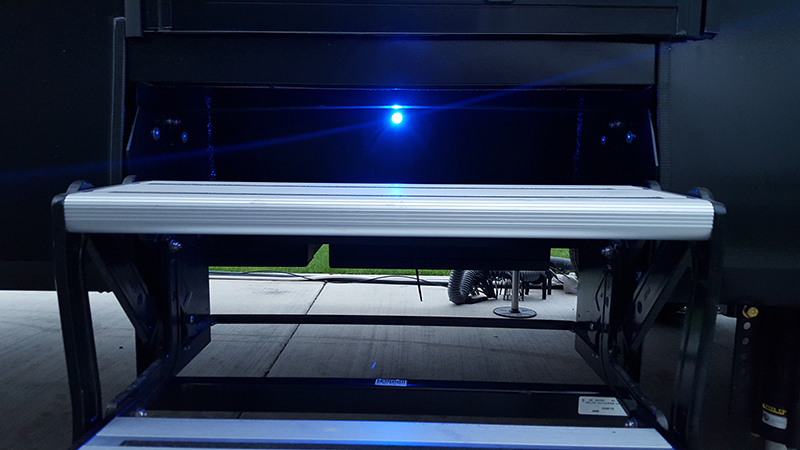
There are blue LED's under the trailer that illuminate the entry steps and under the front on both sides.
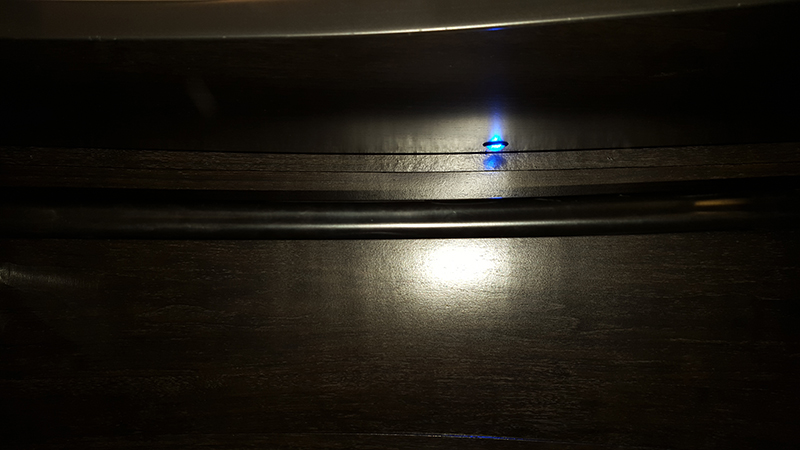
There is a blue LED night light above the main entertainment center.
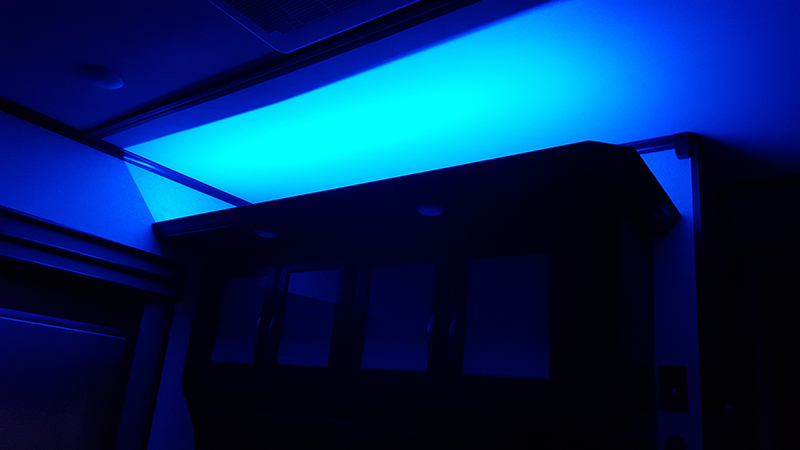
There are also blue LED's used for accent lighting in the front closet.
I have had time to complete some of the auxiliary projects we planned...
I have also been busy at work setting up the components for the internal LAN. I should have photos of those and some details up later this weekend, depending on if the baby is here yet or not.
The replacement for the seeping valve arrived today. I'm going to install it tomorrow afternoon.
Many others have reported that the Furrion DVD/stereo in the garage begins having an issue with the servo motor running, trying to load a disc, while the unit is on or off. Ours started doing that this morning and shows ERR SEV0 in the display.
I'm reporting that to JD as well, and I'll send out a status update when I hear back.
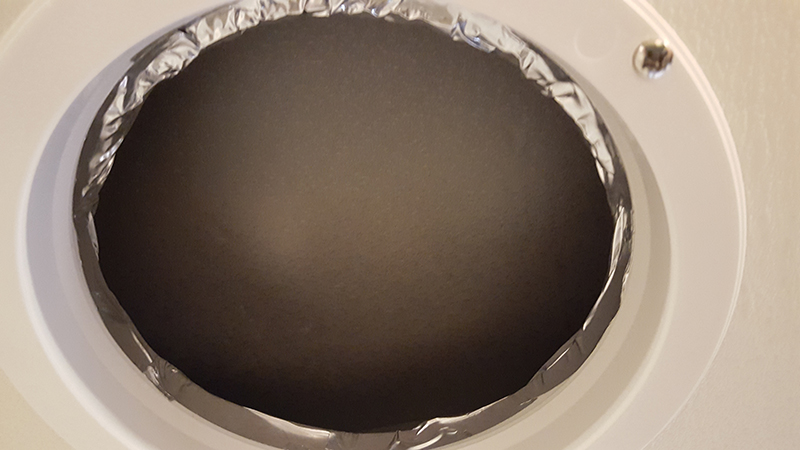
Step 1: Remove the circular screw caps on the end of the A/C unit
Step 2: Open the filter cover on the A/C unit
Step 3: Remove the 6 screws holding the cover on. I recommend saving one of the middle screws to be removed last.
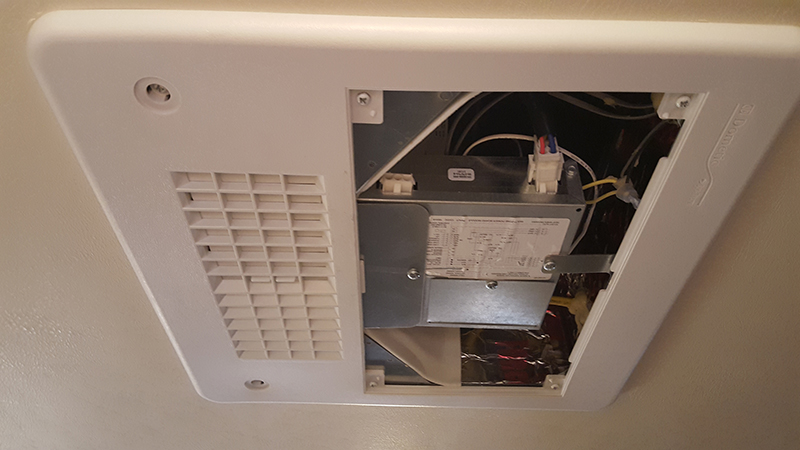
Step 4: Pull down the cover and set it aside. The smaller opening is the one with the duct connections - one each - left and right.
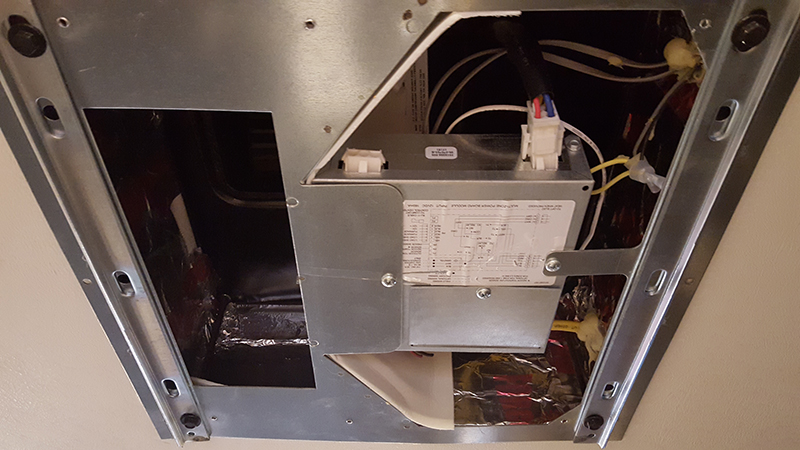
You will most likely see solid walls of reflective tape all the way around the smaller opening.
Step 5: Either push in on the center of the tape and fold it in to open the duct, or remove it and re-tape the duct to seal it to the A/C unit.
Step 6: Repeat the process on the other side and then close the A/C unit up.
We also took the covers off of the ceiling vents in the bedroom and bathroom, removed the tape that was in there (which had a lot of gaps allowing air to go into the ceiling space), and then re-taped them to keep air from going anywhere except for the vent.
Repeat the process on each A/C unit. The one in the garage had the same issue. We also had the same issue with the vents in all areas. If you re-tape and seal them well, you won't lose any cooled air into the ceiling space.
One other issue was that on the main A/C unit, the tape on the street side had been completely removed, meaning that the duct wasn't totally sealed and air could escape around it. I re-taped that as well.
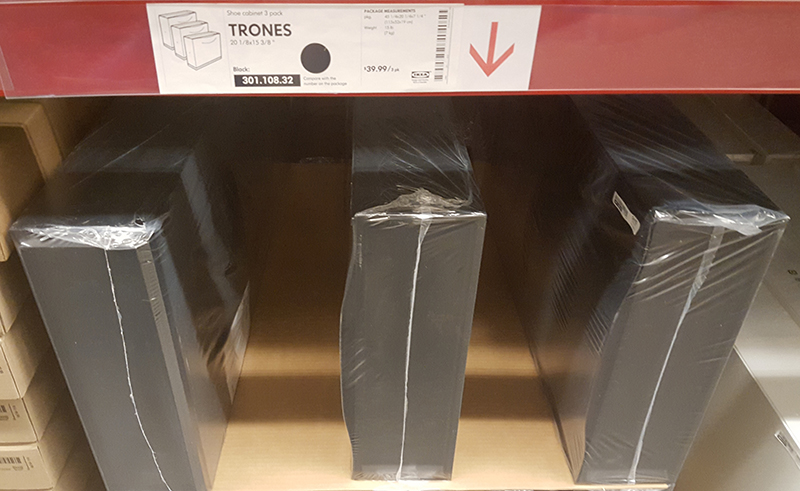
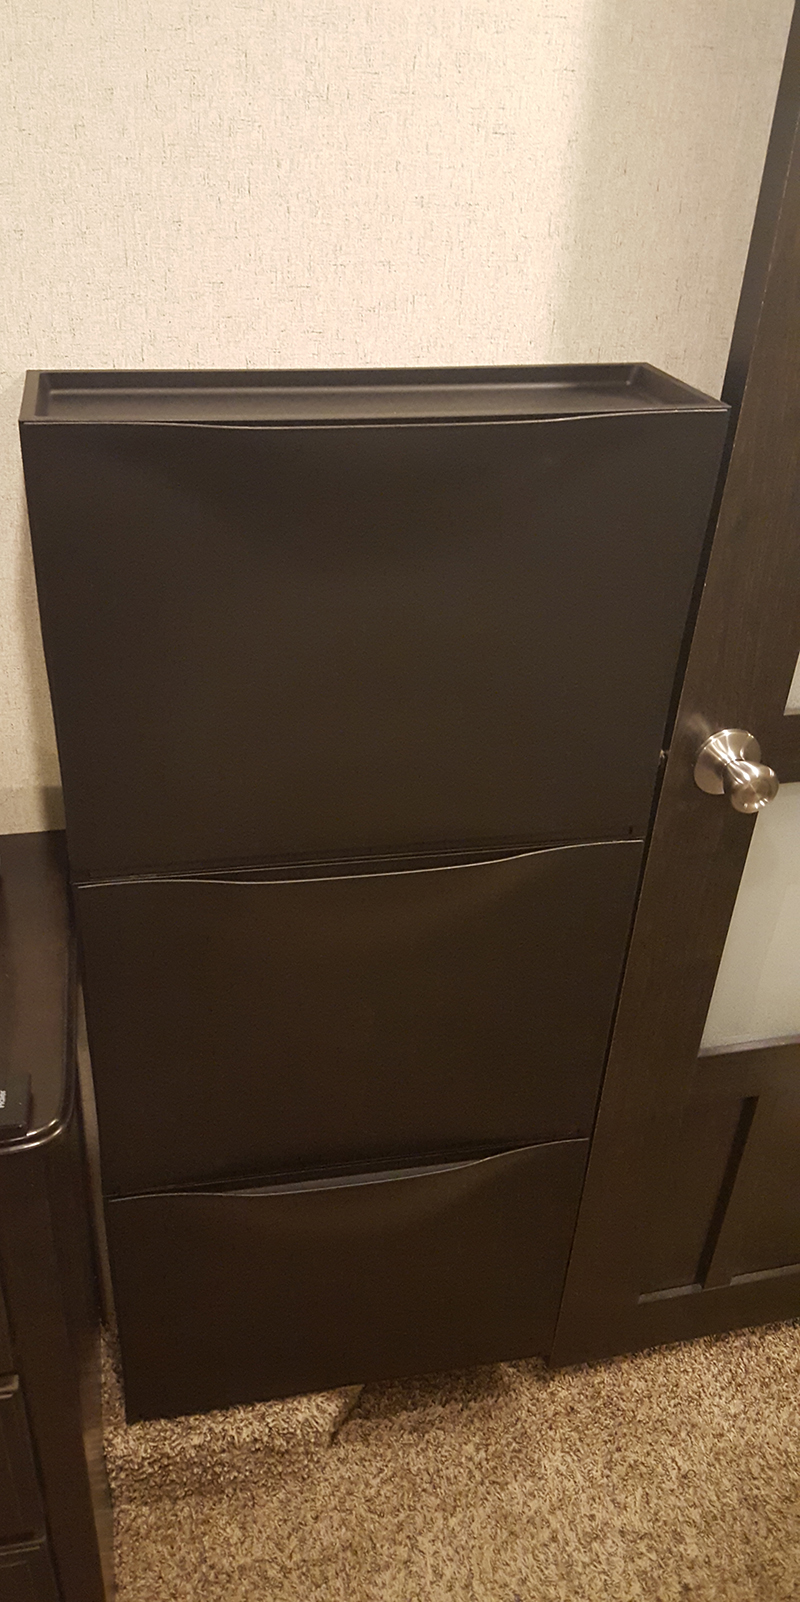
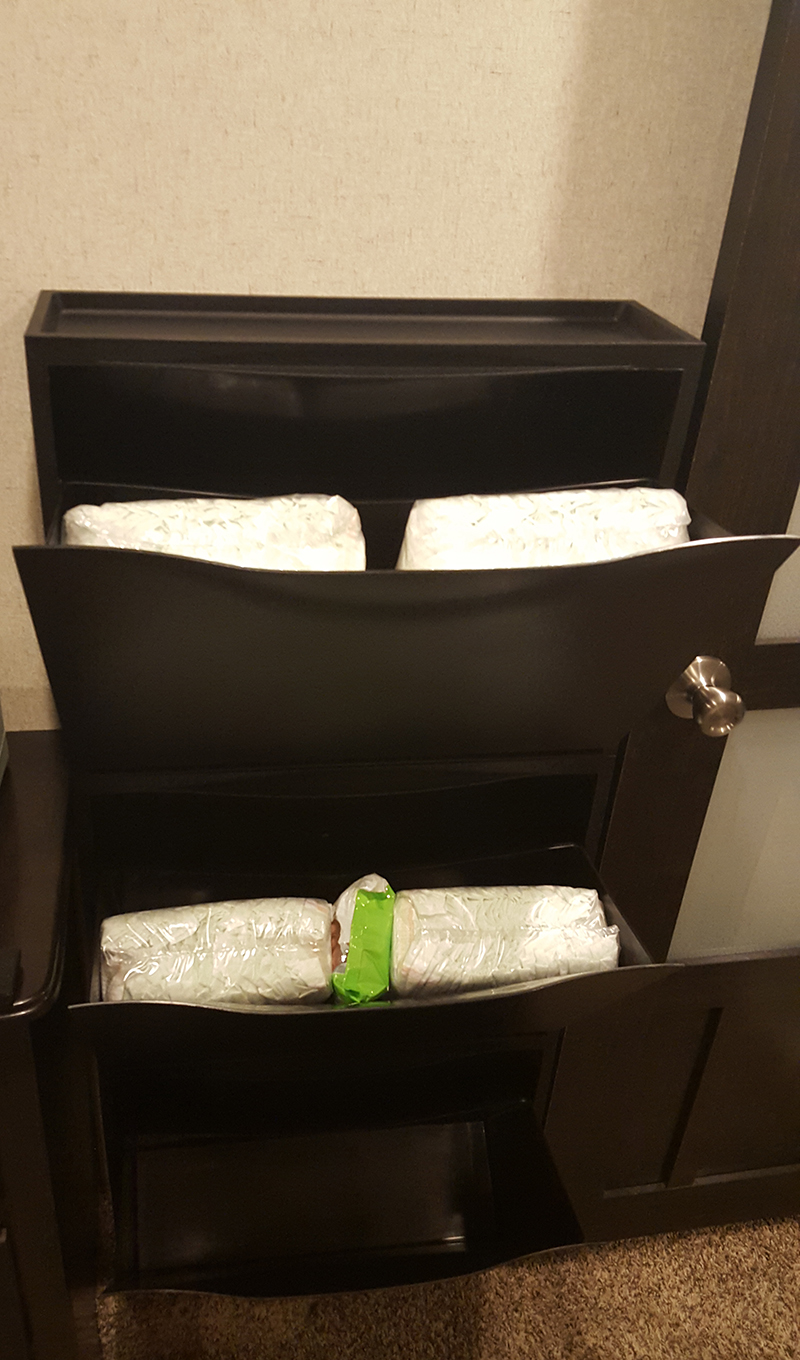
JD at Grand Design really came through for us. We received several packages from Grand Design, including the Furrion DV-1200, the card table (looks like the folding legs may be a separate item), outside shower head, underside TV mount, and some other items. I'll detail everything tomorrow, and I'm going to be very busy. We found out that they are going to induce labor this weekend, so I have about a day to get everything finished in the trailer - finish the LAN cabling, replace the DV-3100 with the DV-1200, replace the seeping valve on the hot water bypass, pull an extension cord from where the inverter will be in the basement to the entertainment center and close up the basement walls, and install several TRONES storage units from Ikea.
Thanks to one of the members of the Grand Design Owners Forum (SMSgt B) for pointing those out to us. I already bought one set of three and I'm pretty sure we will get one or two more sets. They are great for storing diapers and other baby accessories.
I did get the DV-3100 removed tonight, and I'll detail the installation of the DV-1200 tomorrow. It's not an exact replacement, but Grand Design originally designed the stereo opening for the DV-1200 so it will fit, but a plate they put in to facilitate the DV-3100 has to be removed. I got that done tonight so that I can work on the stereo tomorrow. I'll also explain again why we needed the DV-1200.
I got a crash course in PEX tubing work today, so the replacement of that seeping valve should go pretty fast. I decided to buy a PEX tool set so that I can do any other work necessary in the future.
Due to baby stuff, I had to put off several projects for a few days and the updates I was going to post, but I'm back on track now. No baby yet - long story.
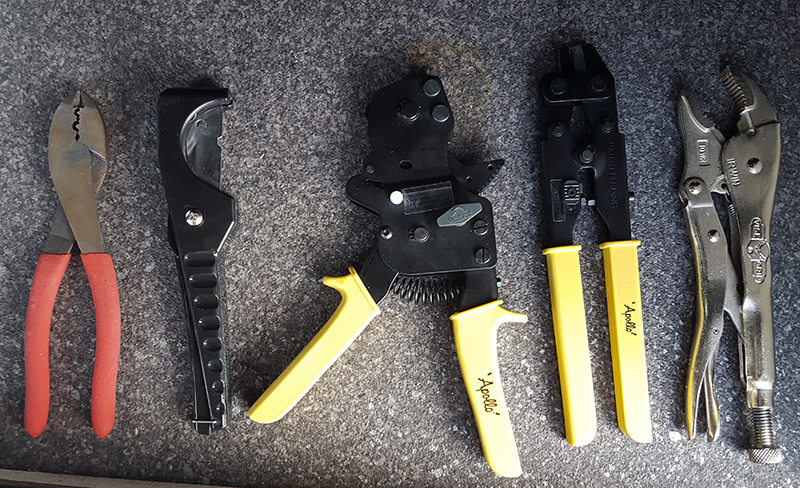
After my crash course in PEX, I went to Lowe's and picked up a number of Apollo tools for PEX work. I especially recommend their One Hand PEX Pinch Clamp Tool (69PTBJ0010C). Where you will be working in cramped quarters to get things done behind the convenience center, it really makes it easier. Their PEX Ring/Clamp Removal Tool (69PTKD0009) is also helpful - although not ideal for Pinch Clamps such as are used in RVs. I was able to cut the existing clamps and re-use the supplementary fittings to install the new valve that Grand Design sent.
Some other helpful tools will you should have on hand include a heavy electrical cutter (which came in handy to finish off one of the old pinch clamps), an Apollo PEX Tube Cutter (69PTKC001), and a pair of vise grips.
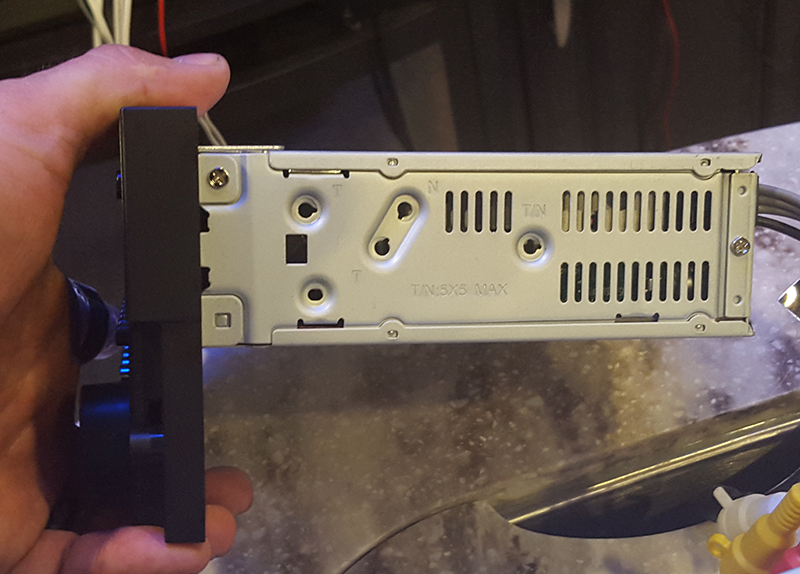
I got the DV-3100 removed and installed the DV-1200 that Grand Design was gracious enough to send us in replacement. I shot a ton of photos and I'll get those up in the next couple of days. You can see that even in the 2016 Momentum 385TH, Grand Design planned for a full double-DIN opening, and then made a filler plate to take the smaller DV-3100. That was perfect as we were able to remove the filler plate (requires getting your hand into the small opening holding a Phillips #2 backwards to remove 4 screws) and get the DV-1200 installed. We now have coaxial digital sound from the Haier TV running to the DV-1200 so we can get some real volume out of the system. We also pre-ran another optical audio cable to it so that we can hook that up in the future when needed.
In addition, I got all of the network cables run for our devices. We decided to use the wall behind the main Haier TV (which was made possible by Grand Design changing to a much better TV mount for the 2016 model) to install the router, modems,
Still waiting on the baby. We were at the hospital Sunday night and all of Monday, but the specialists decided to wait until later, so we are back at home. Working on some last minute projects before we are officially parents.
I finished a few minor projects over the last few days and then we went back to the hospital last night. The baby will be here in our arms in a day or two no matter what this time.
Project completed include...
We are still waiting on a couple of items from the factory to resolve some last issues...
I am working to find out part numbers and manufacturer info (if possible) for the wallpaper in the unit, and a little more about some of the other items for our detailed review.
We have the baby home safe and sound, and my wife is recovering from the c-section. The last two weeks have been one big roller coaster.
We discovered another thing about the Momentum 385TH that we love, but didn't think was necessary at first - the InterVac CS-RM built-in central vacuum. We had a great small Shark unit that we planned to use, but we found that not only does the built-in unit perform well, it also saves on required storage.
Just make sure that your dealer installs one of the two included vacuum bags before they vacuum your unit. Ours didn't, so I had some cleaning to do once we got the trailer.
The bags are InterVac (Dometic) #Y11 bags, and you can pick them up on Amazon at http://www.amazon.com/Dometic-Y11-5-interVac-Vacuum-RVac/dp/B00T36HX5M
It's well worth having the built-in unit, and that was a great idea on the part of Grand Design.
There are a number of write-ups coming. Stay tuned! I'm also starting on the two-way radio gear.
In the meantime, we discovered two other issues on the trailer.
This is another common issue reported by owners. There is a single fuel gauge on the control for the fill station, and a switch to select which tank (generator supply or fill pump) is shown. On our 385TH - as with many others - the switch was reversed. It would read the tank opposite of what it was labeled for. The easiest fix is to use a small flat-bladed screwdriver, push in on the sides of the switch and pull to remove the switch, and reverse the two outside wires (there are three total connected via spade terminals). That will bring the gauge to read the correct tank. You can try to flip the switch over, but the wires going to the switch are not very long and can make that difficult. Swapping the outside wires on the spade terminals of the switch is the easiest fix.
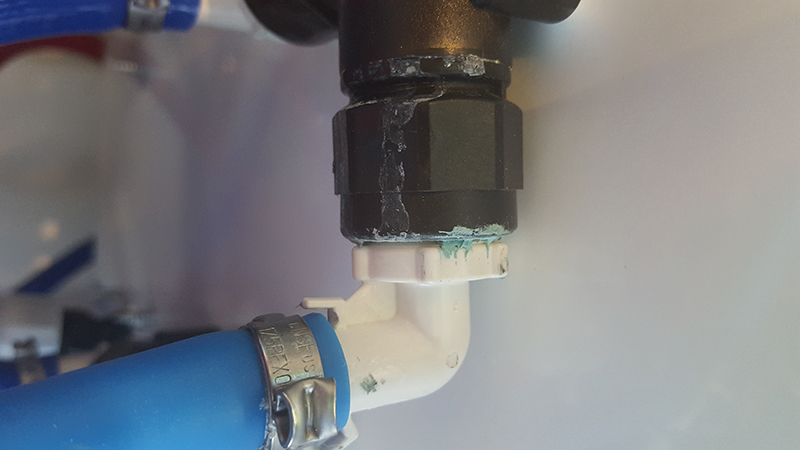
I am working to track this down. A quick check with soapy water didn't find anything, however, the pigtail coming into the main regulator had no tape on the threads, while the other input and the output from that regulator do. I'm starting with that.
I have also located several sources of non-ethanol gasoline. Ethanol in gasoline attracts moisture and can cause the fuel to have an even more limited storage time. It can also be damaging to certain components in engines used in things like off-road vehicles and generators, and provides less power than straight gasoline. For those with toy haulers, non-ethanol gasoline (often called Clear Fuel or Pure Gas) is ideal, but can be difficult to find.
There is a resource on-line that can help you find such fuel - http://pure-gas.org/
I am also adding a page to this site that will have information about the sources I have personal experience with it. If you have a toy hauler and live in Utah, I plan to keep it updated. It's at Utah Clear Fuel.
It turns out that infants keep you really busy. I haven't been posting updates like I should, but we have been having a lot of fun getting to know our daughter and seeing her personality develop. Shortly before she was born, I suffered an injury to a tendon in the index finger of my left hand. Wearing a Stax-splint on it isn't exactly convenient, but the surgeon I saw told me to give it three months to see if it will heal enough on its own. If not, they will have to perform a rather involved surgery to "repair" it. After his description of that procedure, I can't afford to take the time off of work, so I'm hoping it works. He wants to give it until December now. It makes changing diapers, typing, and working on the trailer a little more challenging.
On the Momentum side, things have been good. We received all of the replacement parts from Grand Design for the little things that failed after delivery, and I have them all installed except for the garage stereo. In the next couple of days I'll post some specific details.
I did want to post a photo of our Summer Campsite...
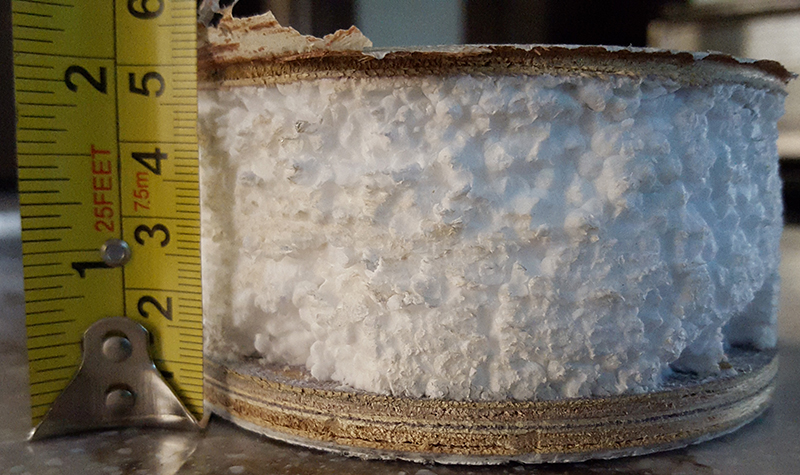
Yesterday, I checked the Suburban 232767 anode rod in the water heater. It went into service on 19-June and it was still about 90% - plenty of use left on it. There was some definite erosion on it, so it's doing the job. I did flush out the water heater since I had the rod out. I used a Camco 11691 Water Heater Flushing Tool, and it made it pretty easy. Insert it into the hole where you remove the anode rod, turn the water on, and run it from the back towards the opening. There were a couple of large chunks of stuff, and a ton of small ones - It looked like some of what was sacrificed from the anode rod. There was a lot more than I would have expected to see with the comparatively small amount of wear on the anode rod. I should have opened it up and cleaned it out after delivery to see if any was from the manufacturing process, but I didn't. I'll check it in another few months and see how it is.
I also replaced the FlowPur #8 MAXETW-975 filter (5 micron) that came with the trailer with a #6 MAXVOC-975 (.5 micron) that should be a little more effective. It will filter more sediment, as well as cysts and other things. We also started using a Camco TASTEPure water filter on the incoming line, but it's 100 micron and primarily meant for chlorine reduction.
A lot of folks have asked me about water hoses - who makes the best? Before your hose, you want to install a pressure regulator. You want it as close to the source as possible, this way it will protect your entire water supply system - including the hose.
We highly recommend the Valterra Adjustable Water Pressure Regulator.
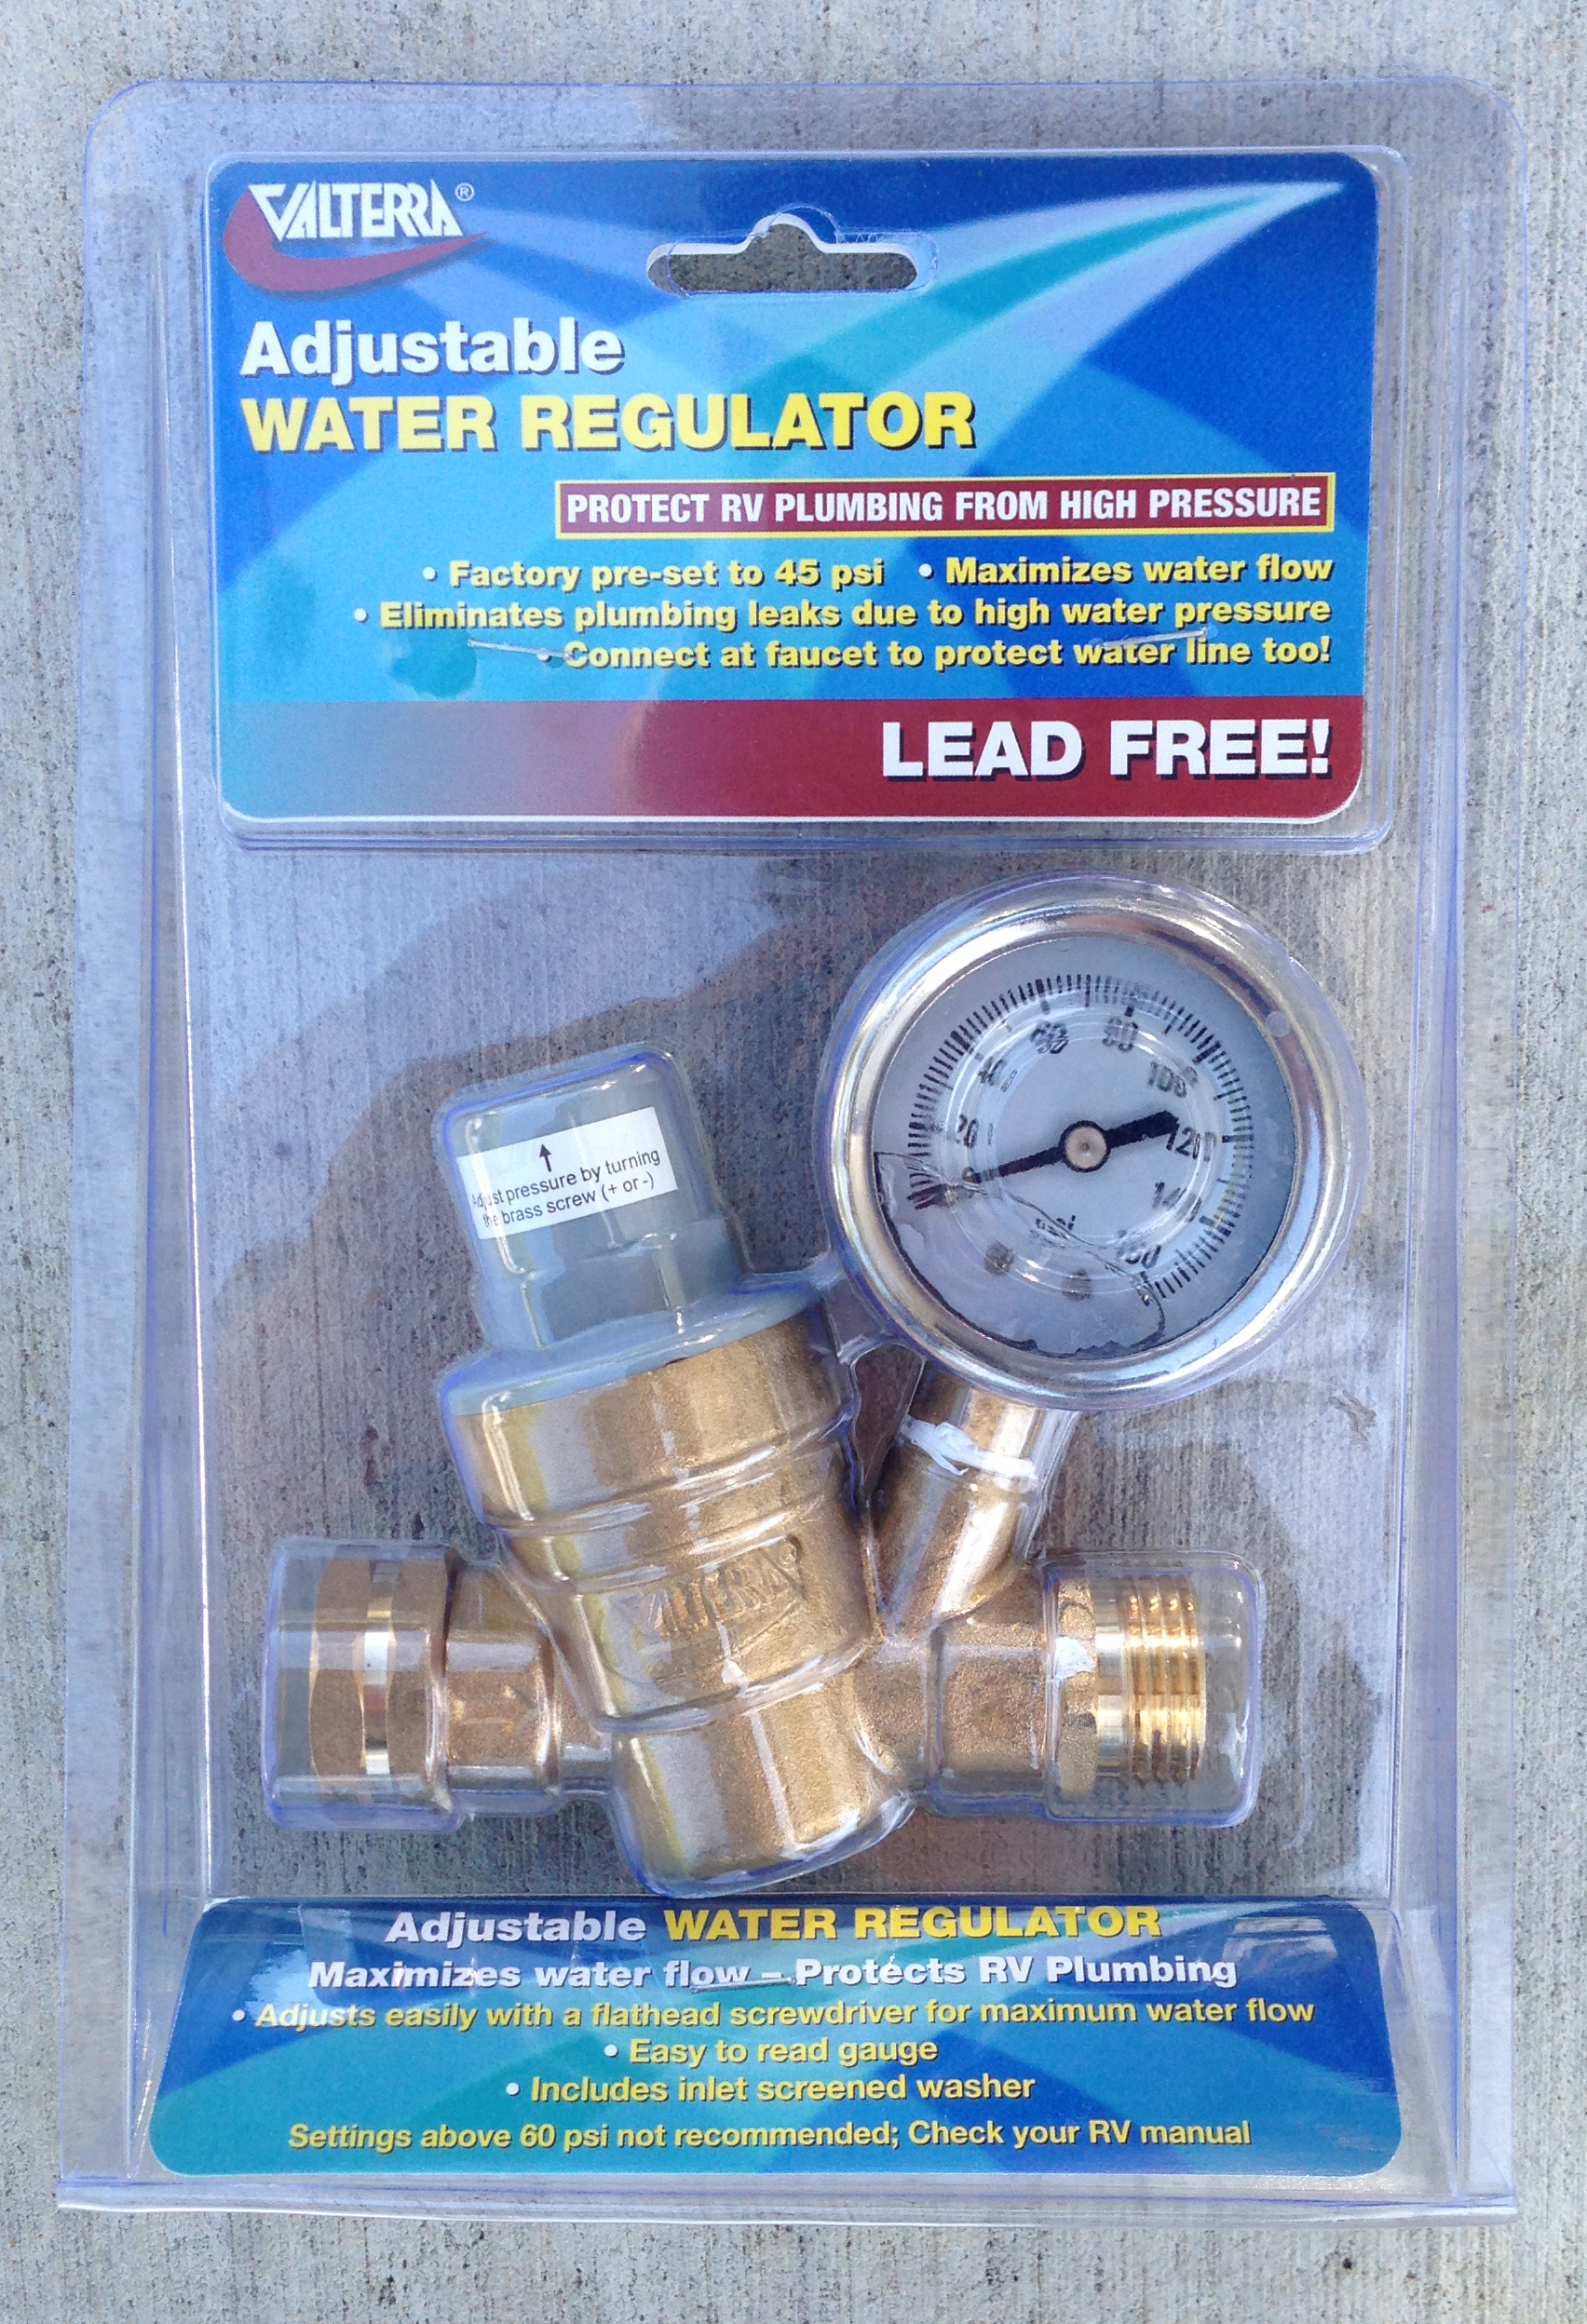
This will let you set whatever pressure you want under any conditions. We run right between 50 PSI and 55 PSI depending on the input pressure. It holds very constant, and it works. The first park we were in had over 100 PSI of water pressure. We had no issues and no leaks.
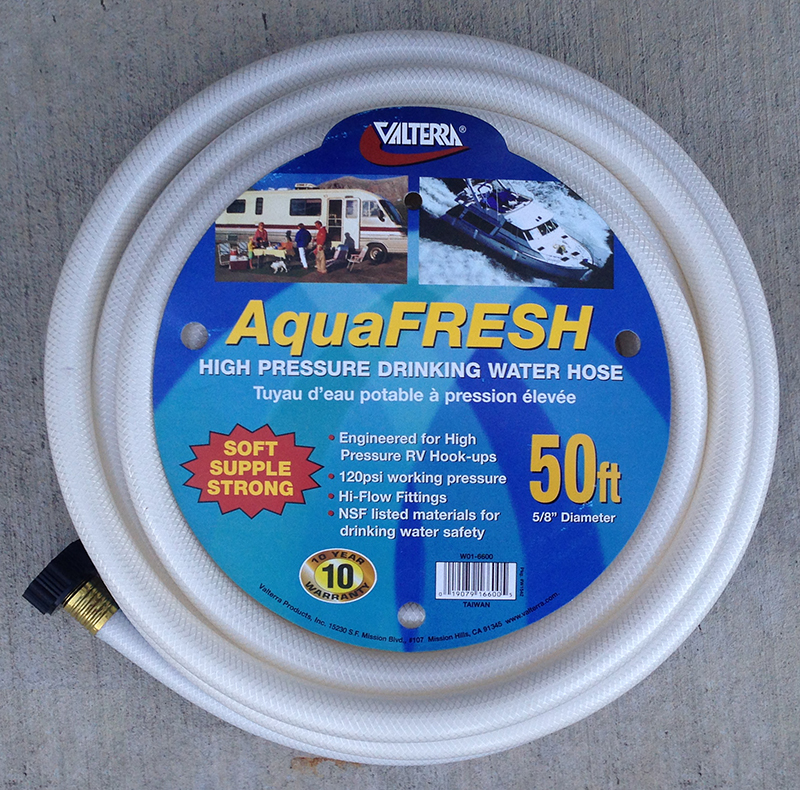
In terms of the hose, we tested several. The best was the Valterra AquaFRESH. We use a 50' x 5/8". We never had any taste issues with this hose, and the 50' length should let you hook up anywhere. The first park we stayed in needed about 30', so a 25' would have been too small. Personally, I don't like daisy-chaining hoses. I prefer one hose to minimize the chance for leaks. My wife and I both hate tasting plastic in our water. That has not been a problem with the Valterra AquaFRESH. It also has a large knurled ring at the hookup point, making it very easy to get on tight.
When winter came around, as temps get well below freezing here, we needed to get a heated hose. They are available from Camco, Pirit, Valterra, and others. We opted for the Valterra, again in a 50' length. So far, it has proven to be as taste-free as the AquaFRESH.
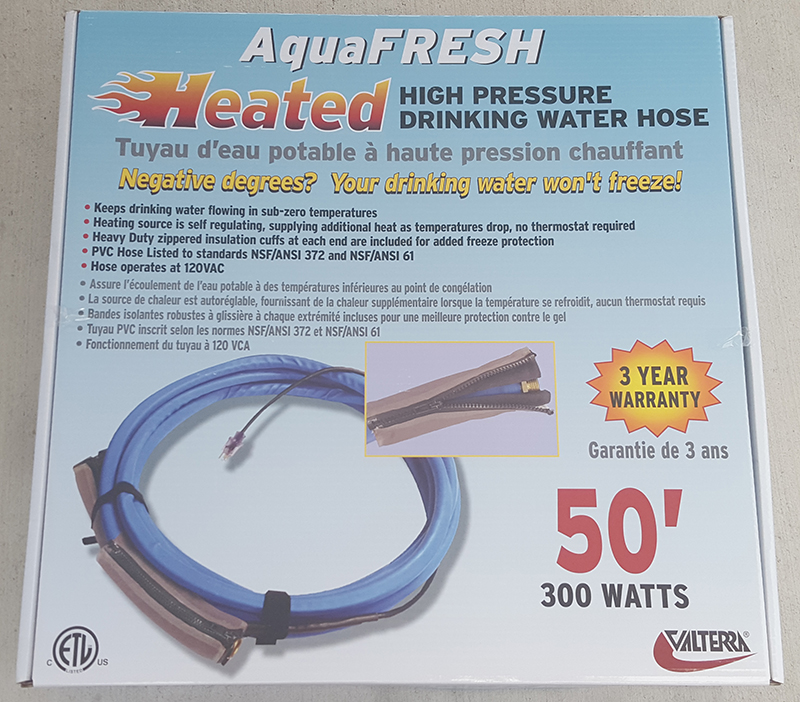
The Momentum 385TH has a heat register in the hookup center, so it keeps everything in there nice and warm. That's especially important as the factory installed water filter is in there. If that's allowed to freeze, the housing will crack and you end up with major issues.
We also carry a 3' section of electric heat tape for water pipes, that we can connect to the water supply line itself. Some parks require this, and it's cheap insurance. I'll cover how that's used in my next update.
Some of you have been asking about the Ham Radio components. I'm working on that. Since our daughter was born, we haven't been able to get out and participate in communications opportunities, but should be able to next year. I'll be working on the radio systems over the winter, getting everything ready. I will also be documented here. Keep checking back.
Many folks have reported "popping" sounds in their Lippert Level Up system. It has to do with static friction (what they call "stiction") in the hydraulic system. We've experienced the occasional pop, but nothing too bad until the last week - which I believe may be related to the ambient temperature. Our daughter startled at a few of them, so today I made the pilgrimage to the local Cat dealer to get one quart of 1U-9891 fluid. You replace one quart of the hydraulic fluid in the system with this, and it solves the problem. The procedure is listed at http://www.rvhome.school/Lippert%20Service%20Bulletin%20Leveling%20System.pdf
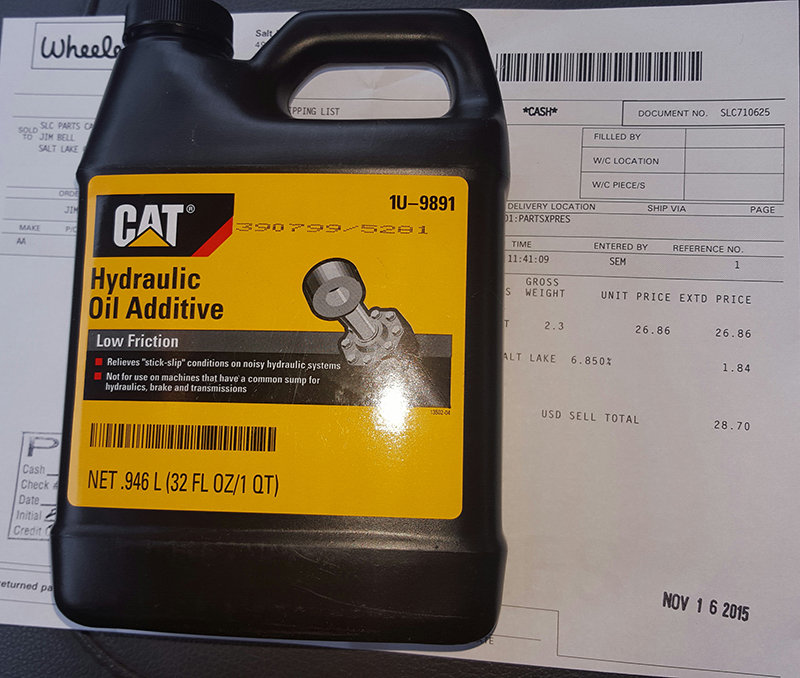
What has been discovered is that IF you use the CAT fluid for this process, you generally only have to do this once. If you use either of the other two listed fluids, people often find that they have to do it twice. It was worth it getting the CAT stuff for us.
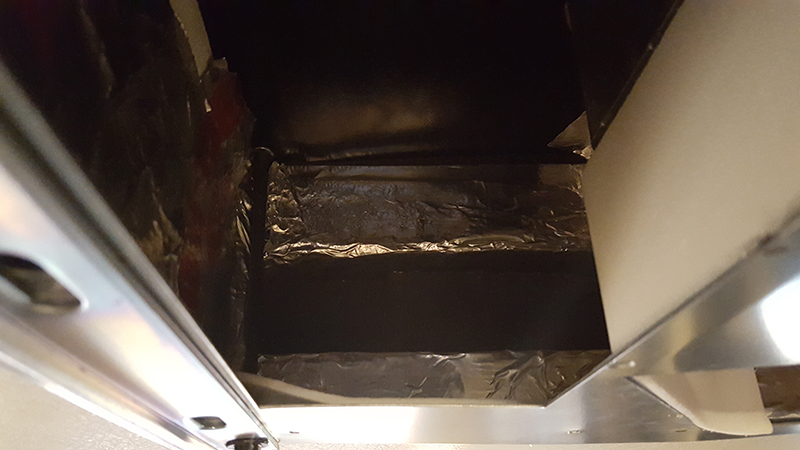
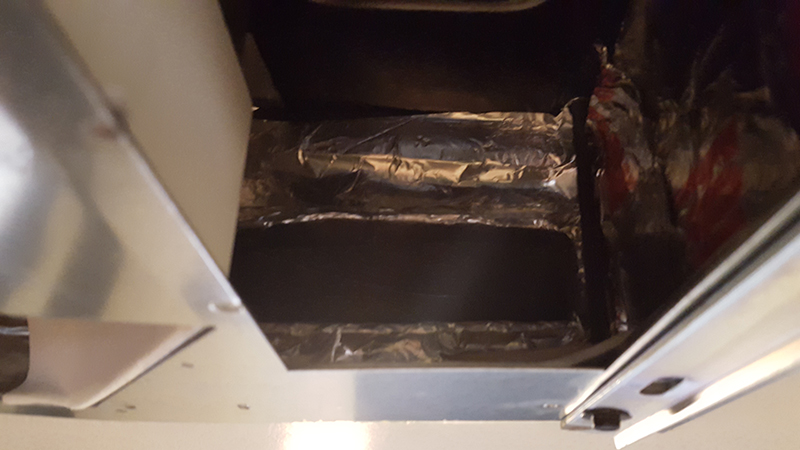
As I noted earlier, we had a minor water leak that was showing up in the basement after a heavy rain. I caulked the hell out of everything I could think of that might have resulted in it, and hadn't really seen it again until today.
We got more than 6" of snow, and when I checked the basement I found water on the basement floor. It was also on top of the controls for the Lippert Level-Up system. In investigating, I can see it leaking, and it's coming from behind a metal flashing above the doors in the basement. This means the leak is somewhere above this.
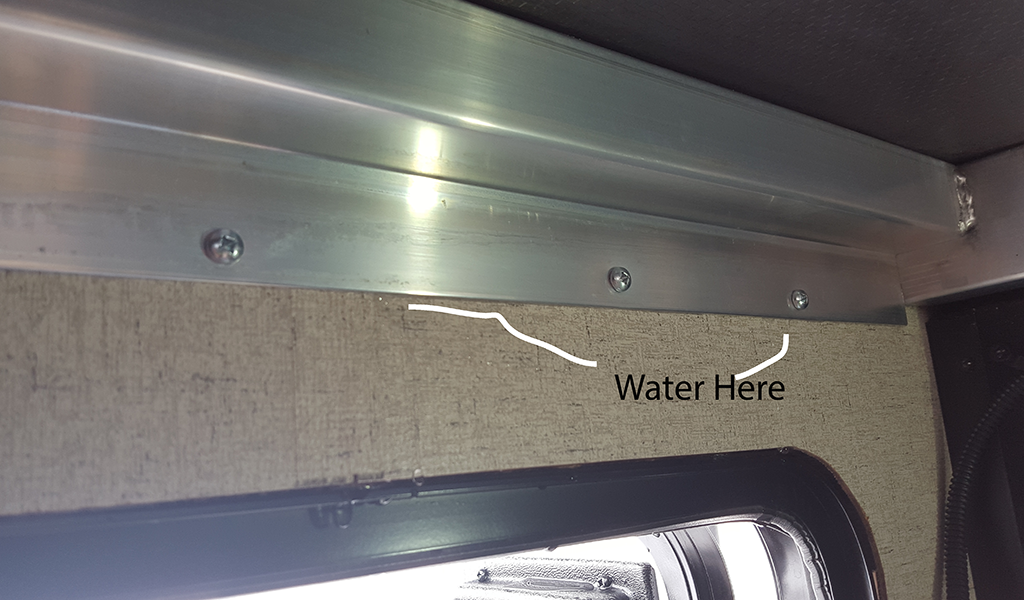
The water is coming down from this metal flashing, you can see the drops forming on the door frame below.
This was the one thing that scared me about buying a trailer like this, you hear horror stories all the time about leaks like this. I hoped we'd not encounter this, especially now that we are full-timing with a 4-month-old. Getting this to the dealer won't be convenient, and we don't have the money to put out for a hotel room while they try to schedule it, etc.
I'm seeking input from Grand Design, General RV, and the Grand Design Owners Forum. I'll keep you posted. Here's to see how General RV will support us after the sale, especially since we paid for an extended warranty.
UPDATE: When I had seen water on the basement floor and on top of the Lippert Level-Up controls previously, I caulked all around the door and door frame - even the locks on the door - thinking that the water was coming in around the door or door frame somehow. I hadn't seen any on the Level-Up controls since I did that, until tonight.
This was the first time I was able to conclusively observe that it was coming in from above the door. Every other time I had seen water in there, it had rained while I was at work or during the night, and I hadn't been able to actually observe the leak as it happened, it was just standing water by the time I got there.
My suspicion is that one of the seals isn't tight enough around the Schwintek slide track on the bedroom slide out. It "looks" OK, but I can't tell for sure. I put some tape over the lower portion to try to rule that out, and will check the upper portion this morning if that didn't make a difference. In the meantime I have placed some towels under there to catch the water. I'll see if Grand Design has any suggestions in the morning when they open, and I'm waiting to hear back from General RV. I'm hoping this is something that has been seen before and that they know what the cause is.
On the plus side - having the heat ducted into the basement allows this to dry out fast. I'm also going to put a de-humidifier in there to help out until we get this solved.
I got an e-mail back bright and early from JD at Grand Design. He said that it could have been from the shower, and gave me some troubleshooting hints (which were some good ones that I hadn't thought of for the future). Since we haven't used the shower at all since yesterday morning, and there is still water coming down, I don't think that's it. I'll still double-check to rule it out, but others on-line that suggested issues with the seals on the bedroom slide.
I keep them treated with a product that keeps the rubber seals flexible, but I hadn't ever really taken a good hard look at the seals on the bottom.
One user noted that he had a glob of caulk on one side that kind of impaired the seal. I had that too. I already had pulled off some of the caulk (and found that a small amount is on the seal too) when I took this photo.
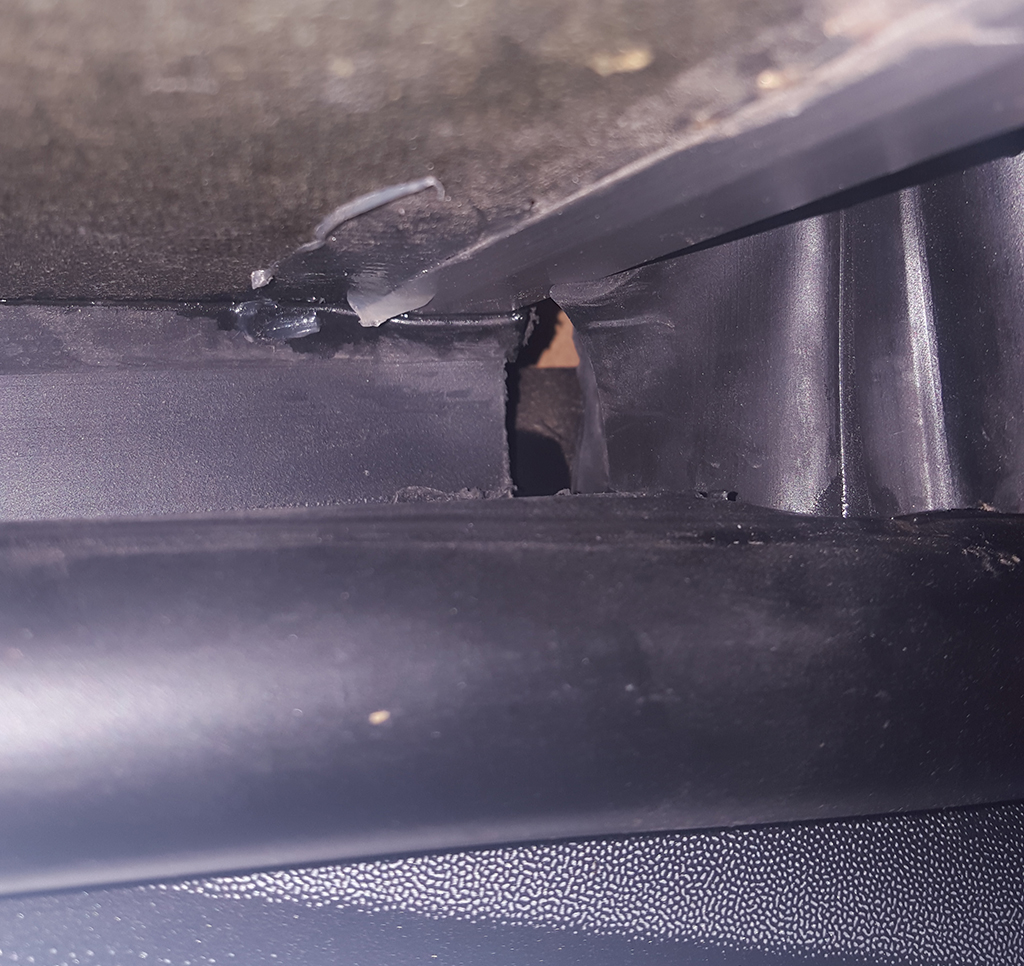
When I was looking at that I found something else. If you look to the right, you notice a gap in there. There was a loose piece of rubber laying on the bottom in there. There is a small wheel visible in there.
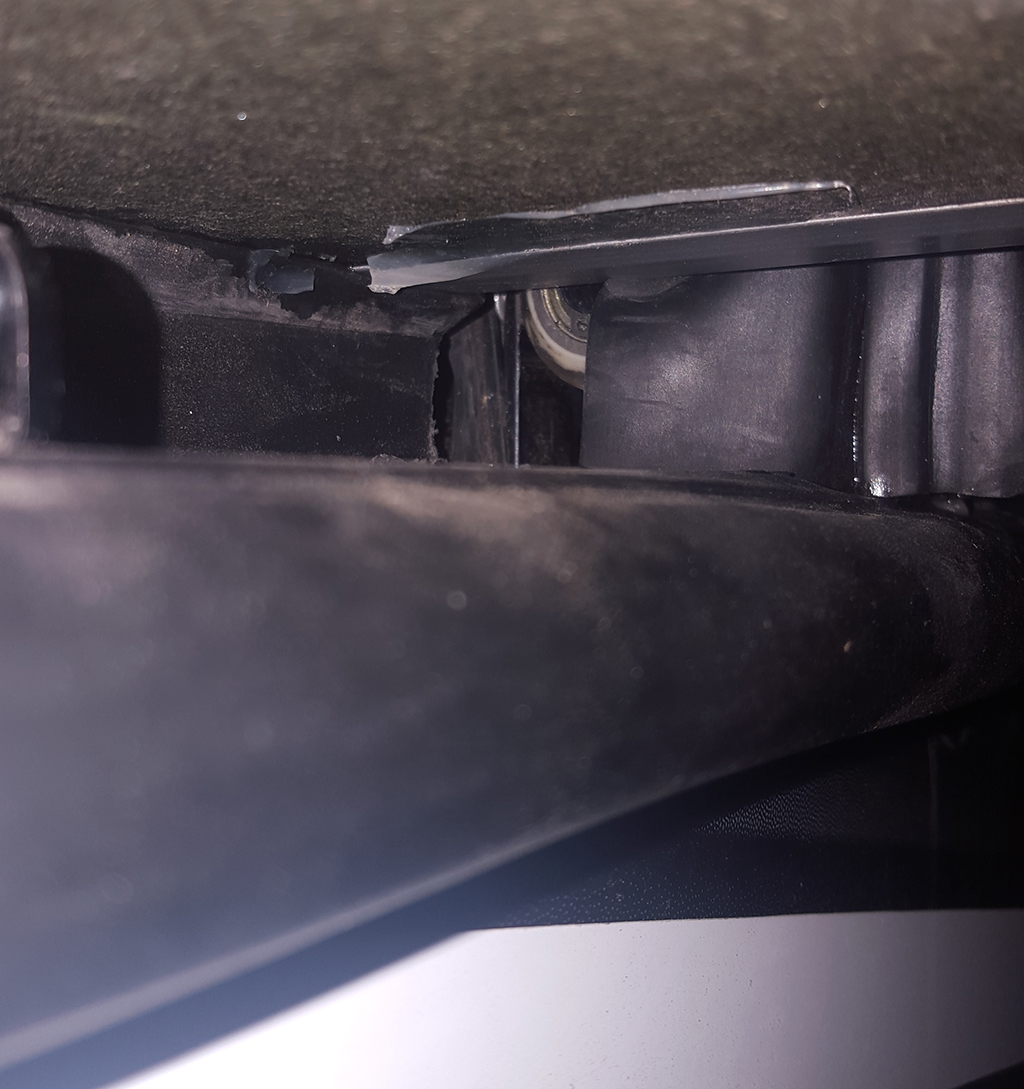
Apparently there is an outer seal that's visible, and an inner seal that's not really visible. It seems that piece came from the inner seal. Here is a shot of the other side (toward the front of the trailer, left when looking at the slide). The piece that's really covering the wheel from the inside is what I believe is missing from the other side.
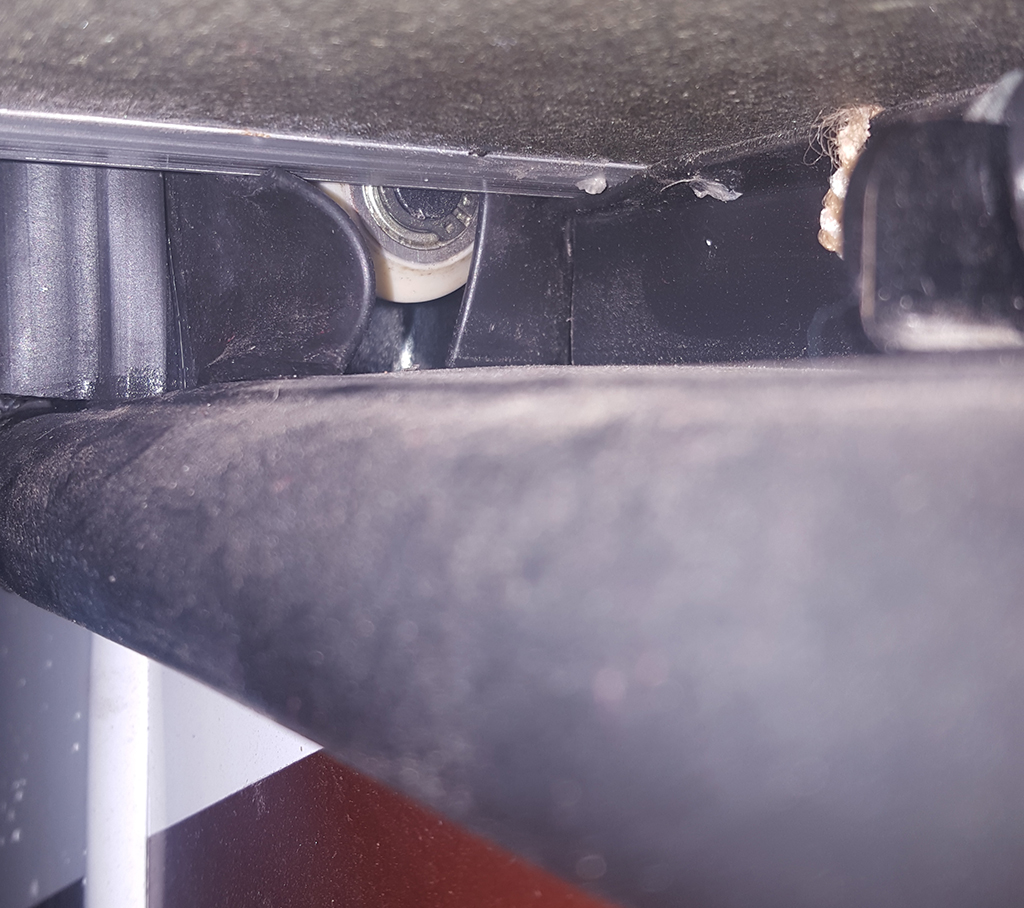
Looking at these, there is a bit of a difference. I'm going to clear the snow from the top of that slide shortly, and send copies of these to JD to see what he thinks. I have to get to work in a bit, so I'm in a hurry.
UPDATE- I heard back from JD and he suggested using tape on the outside of the slide to try to isolate it. Ill work on that ASAP.
It's been a while since I updated the site, and I apologize. Between work and family I haven't had much free time over the last couple of months - but things have been happening.
A couple of months ago I finished a review of the Furrion Backup/Observation Camera system. The review is at http://www.rvhome.school/furrionobscam.html
As you may know, Furrion was bought my Lippert. They picked up the review and put in their dealer magazine.
What I originally believed may have been a propane leak was actually some of the odor of propane that was on the handle of one of the tanks. Apparently when it was filled, some spray came out and hit the handle. It left odorant residue on the handle of the tank.
I taped things as JD instructed, and thought the leak was gone, but it happened even with the tape under a heavy rain. I'm going to have to have General RV take a look at it. I'm not looking forward to that - this is our home now - so I'll be able to report on how General RV handles the issue.
I replaced the anode rod in the Suburban Water Heater a couple of weeks ago as part of my post-winter maintenance. It had a lot of deposits on it, and it took about 40 flushes with the Camco 11691 tool to clean out the water heater after it was drained. I have a video going up on YouTube showing this.
I haven't been on the Grand Design Owners Forum much lately - haven't had the money to renew. We cut all of our expenses and discretionary spending after the c-section.
We were originally planning to get a lot in or near St. George, Utah where we could always return to. It would give out daughter a sense of home and community when not on the road. It was part of a two-year plan, but the place where we really wanted to be started selling a lot faster than planned. With the unplanned c-section medical bills and expenses, our savings was gone, and we don't have a down payment anymore.
My wife talked me into trying a GoFundMe to see if we could get some help with the down payment or to help with the medical bills. I set it up (two, actually, one after the other), and we received no donations. My wife pointed out that if we had a dog that needed a c-section, donations would have poured in (she did a GoFundMe search, and she was right). Oh well, we will find another dream.
I'll keep you posted on how Grand Design and General RV handle the leak issue. I also still need to change the hydraulic fluid for the 1U-9891 fluid. Things got very cold last winter, and trying to find a good time to bring the slides in and landing pads up to do it wasn't convenient in the winter.
Speaking of winter, I have been keeping track of our propane consumption over the first year. We didn't need to refill any tanks from June until September. One 30# tank will run the oven and stove top almost forever. However, once you start using the Suburban Furnace to warm up the RV, your propane consumption jumps.
We ended up buying 4 more 30# tanks, which gives us a total of 6. That way I can limit refill trips to once a week. With my work it's not really convenient to go get propane before work or after, so being able to run through until the next weekend really helps. I found the best deal on tanks at Home Depot. They have pre-purged Worthington 30# tanks for under $70. I couldn't find a better deal on them.
In terms of propane management (imagine Hank Hill saying that, I just did), we make good use of the automatic changeover valve that Grand Design installs at the factory. I check the tank status before I go to work, and when I come home. That way I know within a few hours how long a tank lasts. Doing this, and having 6 total tanks, we never ran out - even keeping the trailer at 70F degrees. With our daughter being so little, we didn't want her to get cold. (By the way, if you have a baby, find a sleep sack. It's like a little sleeping bag that they wear. They work!).
When the daytime high is above freezing, a single tank will run for several days with the way the 385TH is insulated. I also ended up getting a bunch of Reflectix, and putting it over every window in the trailer. That made a BIG difference. It really helped in the coldest weather.
When the daytime high is right around freezing and the low is in the 20's or even high teens, you are looking at perhaps two days on a single tank.
When the daytime high is below freezing (in the 20F's) and the nighttime low is in the low teens, you will get about a day and a half on a tank. When you are in the low 20's down to the single digits, you will get one day on a tank. I have been keeping track of the daytime high and nighttime lows over the last year, and can correlate it with propane use. Daytime highs of 23 and lows of 10 to single digits are where you hit this the day and a half to two days.
Our single coldest days were a high of 20F and a low of 4F, and a high of 21F and a low of -1F. Those were single-tank days.
Even at these temps, the Suburban Furnace (with the insulation Grand Design put in the trailer and the Reflectix I put in the windows in late November) kept the temp from ever going below 67 inside. We were going through a tank a day at these temps.
I'd really recommend that you get a Pilot Flying J RV Plus Card if there is a Pilot or Flying J near your travels. It gets you $0.10 off each full gallon, and that savings can add up. Their prices are generally pretty good, but you can expect to pay quite a bit in the winter when full-timing.
Here is a list of our propane use per month over the winter...
September - 14.02 Gallons
October - 20.18 Gallons
November - 97.86 Gallons
December - 112.20 Gallons
January - 95.85 Gallons
February - 92.86 Gallons
March - 49.23 Gallons
April- 27.53 Gallons
We used the built-in tank heaters and never had a problem with anything in the tanks freezing. I did have water freeze in the drain hoses. I found that the outside shower connection that Grand Design put in came in handy here. Turn on the hot water, and hit the drain hose. After a short time, the ice is cleared and the tanks drain easily. Just watch out, that hot water will cool and freeze very fast.
With the Valterra heated water hose, we never had an issue with incoming water freezing. Grand Design even put in a heat duct to the hookup center, and it keeps everything in there nice and warm. Even at -1F, everything kept flowing.
We did use a small electric heater in the bedroom in the coldest days. The heat vents are all on the wall toward the back of the trailer, and it gets a little cold on the side toward the front of the trailer. That heater made up the difference. I didn't want to rely too much on them as I wanted to make sure the furnace heat reached the underside of the trailer. An electric heater (or the electric fireplace in the living room) won't do that. The fireplace was used a few times in the coldest temps too.
I'll post an update on the leak situation as soon as we get that serviced. I have kept a towel in the underside storage to catch the water that gets in there, but I want this fixed before any real damage is done.
We got in touch with both Grand Design and General RV so that they can coordinate the repair on the leak. They will be doing the work in early July. I'll keep you updated on how it goes. One of the folks on the Grand Design Owners Forum (dsmith681) encountered the exact same leak. It was leaking from the exact spot under the same conditions. In their case, the bedroom slide-out had to be removed, the seals replaced, and some other repairs made. I appreciate Grand Design and General RV working together on this.
Propane usage has dropped to basically nothing right now. When we got the trailer, we used one tank from 19-June to 07-September. That was essentially cooking and supplementing the electric element in the water heater, as we didn't even start running the heat at night until after that. The pilot light for the oven doesn't take much, and the burners seem pretty efficient. Overall, we've been quite pleased with all of the appliances that Grand Design elected to install. The oven is pretty accurate in terms of temperature, the fridge/freezer has been wonderful, and even the microwave has been great. The only problem with the microwave is that whenever it's done cooking anything, it displays "GOOD" on the screen. While it may be true much of the time, we've had some frozen dinners prepared in it which were "OK" or "PASSABLE" at best. A more accurate display would be an improvement :)
I'm working on the main two-way radio gear now. I've had to re-think the setup on a couple of the antennas. I'll be posting details in July after the leak repairs are completed and I've finalized the antenna setup.
Well, today marks one full year in the Grand Design Momentum 385TH. I'm working on a full write-up on the experience and the trailer. That should be on-line shortly.
Overall, we have been quite pleased. We do have the one leak issue, which is the nightmare of full-timers, and will be getting that resolved next month.
I took care of one maintenance task today - changed the oil and oil filter in the Cummins Onan 5500 Generator that came with the trailer. It's a relatively easy process, but I'll give you a couple of hints on how to make yours easier.
It calls for the first change at 20 hours or 1 year. Testing it we hit 16 hours this year. We didn't do a lot of boondocking, and didn't have any major power outages where we have stayed.
Here are the official Cummins Onan part numbers to use with the HGJAB Spec K 5500 watt generator that Grand Design uses in these trailers...
If you are searching on-line for these parts, you may find that adding a leading zero to make a xxxx-xxxx number will help. I bought all of ours on Amazon.
It calls for SAE 30 for 32F and above, or Rotella T 15w-40 for 10F to 100F. I'm told by a reliable source that 5W-40 Rotella T6 full synthetic will also work fine, and will protect to even lower temperatures. It has the additives that Cummins Onan wants the oil to have. That's what we opted to use. It takes 2 quarts.
There is a set of 4 end-cap filter wrenches available at Harbor Freight. Get it. The smallest works with 65mm filters, which is what the Cummins Onan122-0836 filter is. The whole set is less than the cost of the dedicated tool from Cummins Onan.
Draining the oil is simple. Open the fill cap/dipstick, then turn the drain valve. The outlet tube was very short on ours. I pulled it off and installed a much longer one. That way I don't have to worry about wind or other issues causing oil to miss the drain bucket.
Use the cap wrench with a 3/8 socket handle and extension to remove the oil filter. The Cummins Onan factory apparently doesn't use any lubricant on the gasket, so it's on there TIGHT.
You will have to tilt it slightly toward the back of the trailer to pull it out. Expect some drops of oil to come out. I kept a towel in my hand and didn't get any on the ground.
Use some clean oil to lubricate the gasket on the new filter and put it on. Hand tight plus a little is all it takes.
Put the new oil in SLOWLY through the oil fill cap. You might even want to turn the engine over (don't fully start it) a few times when the first quart is in. You can do that from the control right on the front of the engine. That will help the oil settle.
When you are done, put the oil cap/dipstick back on, and give it a run for a few minutes. Check for leaks, and check the oil level when done. It was right at full when we were done. I also noted that it seemed even more quiet than with the factory oil.
It ran fine when done, and we exercised it for an hour to let it settle in. Everything is good until the next oil change.
As you know, I made arrangements last month to get the leak fixed. I had explained to both Grand Design RV and General RV of Draper, UT that we are full-timing, and that we have a 10-month-old. I wanted to make sure they coordinated this for the absolute minimum downtime. I've been getting a lot of questions about this - so here's how it's working out.
We spent the last couple of days getting the trailer ready. As she was cleaning up the bathroom, my wife noted a pretty bad smell in there coming from the cabinet all of a sudden. I remembered a thread on the Grand Design Owners Forum about the Vacuum Break/check valve for the black tank flush causing that due to being defective. There is an access panel in the bathroom cabinet that butts up against the shower. It's how you get to the back of the shower controls. It's not the most convenient to remove, but it works.
I popped the panel, and no check valve was there. I remembered some folks mentioning that theirs had fallen down, and I got my camera and took some photos in the wall.
No check valve visible.
I went down in the basement under the trailer to where the water supply runs up to the check valve. There are two lines for the shower, and a flexible black hose from the inlet for the black tank flush to the check valve. There is a hard blue PEX line going from the check valve to the black tank flush.
I found the issue.
The vacuum break/check valve is supposed to be installed above the highest fixture connected to the black tank. That would be the toilet in the bathroom.
I noted that the valve was right above the hole where the lines go up into the trailer. I could feel something right above the hole, and when I got far enough in there and looked, I could see it sitting there.
That means that whoever installed it put it there intentionally. There wasn't enough slack in the lines to/from it for it to have ever been correctly mounted. They must have just plumbed it right there before the shower went in (the hole is not big enough for it to pass through). That was just piss-poor workmanship by someone being paid piece-rate cutting corners to get more done. It's really a let down from Grand Design.
Given that the only way to fix it will be to cut a larger hole in the floor from underneath, I got on the forum and explained this, and asked Grand Design if they'd send me two lengths of that flexible hose they use (one black, one blue, about 6' to 10' of each). I'll buy a good replacement valve and re-plumb it myself.
Janice answered this morning that I need to contact their Customer Service. I thought that's what she was?
Well, after the rest of the morning, that answer was par for the course. Some folks in the past have mentioned that she's more of a canned response person (some used the term "robot"). That seems to be true, and often, not very helpful.
Another let down from Grand Design. Grand Design should really give her some ability to do something, rather than just being a "please call our customer support person".
As far as I'm concerned at this point, I'm on my own there. If anyone knows where Grand Design gets that flexible hose, let me know. I need two lengths of that (one black and one blue).
As I was closing up the trailer this morning, I noted that the backlight and retract LED's on the Lippert Level-Up control weren't working. The water leak was right over the top of the Level-Up controls, and water had pooled on top of it. It seems it did some damage. Wonderful. At least the buttons function - you just can't tell when in the retract mode, and I needed a flashlight to read the display. I'll see about getting a replacement control.
We left our site early, got the trailer weighed to dial-in the weight, and then hit the road to the dealer. Everything was fine, and we really love the experience of towing with the 2014 Ram 3500. We really picked the right truck for the job.
We arrived at the dealer early, and waited until they opened. Interestingly, the next two trailers in line for service were a pair of Solitude models also from Grand Design RV. One of the owners didn't seem happy at all.
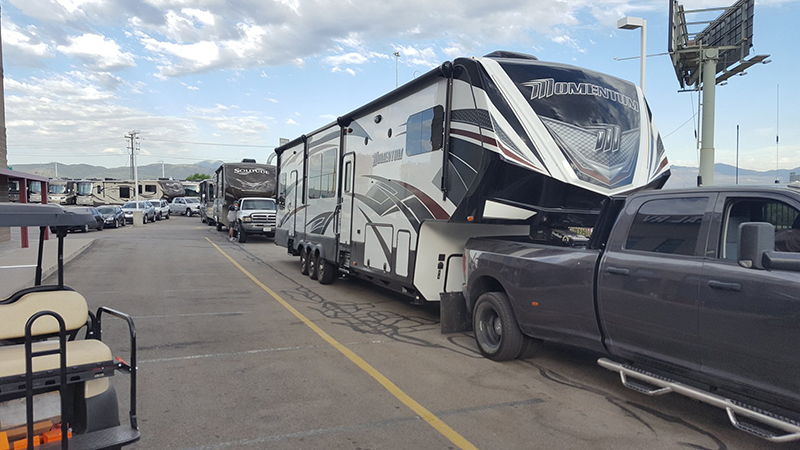
I had coordinated this work with e-mails with detailed information and photos to both Grand Design RV and General RV of Draper, UT starting on the 7th of June. On the 9th of June, Natalia, a service advisor at General RV, had scheduled the work for the 5th of July.
Well, I showed up on the 5th, and the parts weren't there.
According to Natalia, she had requested a pre-authorization from Grand Design on the 10th, received it on the 21st, and ordered the parts on the 29th (which were two weeks out at the time). Two issues there...
So far, I'm not seeing that. Granted that Grand Design was doing their inventory process on the 29th, but why did General RV wait SO LONG to even order the parts? Had they been more diligent, as I was promised that they were, that would not have been an issue.
I contacted Grand Design and they are going to overnight the parts as soon as what's needed is confirmed. Thanks VERY much to Brad Smith at Grand Design for that.
One of the service folks at General RV came out at looked at the trailer, and he thought they could start now anyway - but the repairs are going to take at least 3 days. We need to get it fixed before any structural damage or mold happens, so we left the trailer. I grabbed what I thought we might need for 3 days out of it, and we set out to find a hotel.
We located one that's not roach (or bed bug) infested for about $72 a night, and hopefully, where a teething 10-month-old may not bother the neighbors too much (you will notice that I'm typing this at 02:55 AM, she's not very happy right now).
This is turning into an expensive warranty repair. Under normal conditions, I wouldn't worry about that. This year, however, we are still paying off the bills from the C-Section (and 6 nights across two hospitals) my wife needed last year. Until those are paid off, money is really tight for us.
I'll keep you posted on how this goes. Leaks are the nightmare that all full-timers dread. They can destroy trailers and make life in general a living hell. It looks like we drew the short straw. Yay!
It's 02:30 on the 7th as I type this. My daughter had another rough night teething. I'm hoping to get to bed in a while so I can get up and go to work.
Grand Design is shipping the parts priority overnight to General RV Draper. We really appreciate Brad Smith at Grand Design. He has been great! They should arrive today.
General RV wasn't able to update us on the progress they have made so far, so we got the hotel for another night, as I doubt they will get the work completed the same day the parts arrive.
The good news is that we are now only $1000 away from having the medical bills from the C-Section paid off. Two more monthly payments of $333 and one of $334 and it's done.
The bad news is that the hotel is costing us $216 so far. We don't know how much longer it will be, but that's going to make this month very difficult.
I want to expand on what I mentioned about Janice at Grand Design RV. She's their person that monitors and responds on the Grand Design Owners Forum. Several people mentioned to me that she's little more than a "please call our customer support" robot. I don't want to be too harsh, but I think the perception can't be dismissed.
In all fairness, she has been able to come forward with good information in the past. Apparently she has no authority to actually "do" anything if the customer needs anything other than a quick answer. I'd recommend that Grand Design change that.
This is the "Online Age". People do business via e-mail, and even SMS and chat. One of the systems I program and maintain is for a specialized medical call center. It can take voice calls, faxes, e-mail, SMS, on-line chat, and even video calls (I'm in the process of implementing the video part now) and route them to agents. There are call centers today that see more contacts via E-Mail and chat than they do via voice. That's a major shift in the industry - some actually have more data circuit capacity than they do voice circuit capacity - and that's counting H.323 and SIP trunks (Voice over Internet) as voice, not data.
As an example, there's a company called Adtran that I work with frequently. They make equipment for telephone companies and some CPE (Customer Premise Equipment) as well. I've installed some of their systems that cost anywhere from $4000 to ones that come out costing as much as a Grand Design 5th Wheel. Their website has information, instructions, and OS software updates for both past and current products.
If you get on the forums for their products, you will see customers explain issues, and both customers and Adtran reps come back with detailed information and solutions. They don't usually come back with canned responses such as "please call our customer service" - but they do occasionally have people get in contact with an engineer (not a customer service agent, but a real product engineer) for additional diagnosis. If someone posts about a defective item, they also offer to - and do - ship replacement parts based on posts in their forums.
People do business that way. I'd love to see Grand Design embrace that. It would be another thing to set them apart and above the competition.
I don't really think that requesting two 10' lengths of the 1/2" flexible hose that Grand Design uses in the plumbing in their trailers, based on the information I posted, needs much more than an "OK, we can do that". I'm willing to pay for a more expensive replacement for the vacuum break/check valve from Amazon, but I can't find that hose anywhere. I did find one supplier, but they want me to order a minimum of 1000'. I only need 20' total.
Sure, I can make a separate contact to customerservice@granddesignrv.com, but making your customers jump through more hoops - especially in a situation where someone at the factory was lazy, and the customer is willing to buy the expensive part and make the repair myself (and am already dealing with a separate major issue on the trailer) - comes across as "robotic", to use the term others have applied. Granted it's been a bad week, but I am trying to be fair here. I appreciate her efforts, and I think a lot of it is that her hands are tied by company policy. Hopefully that will change.
I mentioned on the forum that I have defended Grand Design in the past, and that I still want to believe in the company. I still do. They are working to make the leak issue right, as much pain as it's causing us now. Most of the issue I can honestly attribute to General RV Draper based on the timeline quoted to me, versus what Grand Design indicated.
General RV dropped the ball in requesting the authorization in a timely manner, and then in the delay in ordering the parts. We are now paying the price for that ($72 a night), on top of the price of the extended warranty we bought from them with the understanding that it would also help move things along in the event of issues.
I'll post another update on the 7th. It's now about 03:30 and my daughter and wife are asleep. I'm going to try to do the same.
Our daughter doesn't seem to be having the teething issues she had the last two nights. Hopefully we can get some sleep, but I have some vendor updates (Avaya) to supervise for the company I work for tonight, so depending on how those go, it may be a long night. Being on call 24/7/365 can be a real pain sometimes, but it pays the bills.
I was expecting a contact from General RV Draper this morning - the service advisor told me in an e-mail she'd get back to me this morning - but it never came. I e-mailed and called and left voice mail, and finally got a contact back at 14:46 today. She told me it will be ready tomorrow. That is great news, I'm just hoping that everything is back together correctly, and that the issues are resolved.
I've had a couple of people ask me if I felt that I was over-reacting on the issue with the vacuum break/check valve. If this were a Thor product, I would have expected to find something like this. But this isn't a Thor product, it's a Grand Design. I expected better because I think that Bill Fenech, Ron Fenech, and Don Clark would expect better. On their own website, one of the attributes they state is...
"EXPERIENCED WORKFORCE Our local workforce has been hand-picked, and has an excellent reputation for quality craftsmanship that is second to none."
That's why I had such a strong reaction to finding out how that was installed. This was craftsmanship no better than any other manufacturer - someone working piece rate that cut corners to get more done, and I know that Grand Design is supposed to be - and wants to be - better than that. It was honestly a surprise to see how it was done. I expected to pop that access panel, find the vacuum break/check valve tied up there, and be able to fix it quickly.
As for the leak, yes, we would have much preferred to have no leaks in the trailer. Fortunately, the leak wasn't into a living area, and I don't think any structural damage has resulted. We were able to dry everything out that we know of, so I don't think we have any mold issues. With our baby growing up in the trailer, that was our biggest fear. Another thing that Grand Design did right was installing heat vents in the basement storage. That really helped to dry things out.
My only concerns now are that it's resolved correctly, sealed against weather now, and that no harm was done to anything else such as the Schwintek slide rails/motors. Grand Design has been great on that, and I'm really, really hoping that General RV was able to handle the repairs properly without hurting anything else. I'll report on that after we are back in the trailer.
After this is taken care of and we are settled back in, I'm planning on working on a couple of the radio antennas this weekend - after the rest of the vendor updates are done at work. I'm also looking at running a separate line for power back to the radio setup, but I may be able to use what the factory put in. I have the garage stereo pulled out in preparation for this job.
The garage setup is another thing that Grand Design really did right. The pass-through cabinet between the garage and living room is perfect for the radio gear, and I can connect the audio outputs to the garage stereo, which is in-turn connected to the outside speakers. We can then pipe communications in the garage or outside as needed. Not bad!
On another matter that I'm asked about, we are looking at a way to add a 3rd seat to our 2014 Polaris RZR 800 for our daughter (when she's big enough to ride with us). There is a seat that's about $300 that mounts between the drivers and passenger seats and has a 4-point harness. There is also another option that's about $1500 (ouch!) that adds 3 additional seating positions in the bed - along with a roll-cage extension.
With the medical bills, we can't afford either option right now. I'd be tempted to add the rear seat/roll-cage option in case we do decide to have another baby, but another option has come up that might also be worth looking into.
Historically, I have always preferred Honda machines. They are reliable and nearly bullet-proof. However, in terms of their side-by-side machines, they have never been able to compete with Polaris. Polaris has more comfortable seating, tilt steering wheels (great for my 6'1" frame), and more articulation front and rear and more ground clearance for better trail performance. The Walker Evans edition we have incorporates Walker Evans shocks from the factory, and the ride is great. At 50" wide, it will handle ANY trail.
Honda recently released their Pioneer 1000-5. It's wider (62"), but designed with 5 seats from the factory (3 front and 2 rear). It will easily fit into the garage in our 385TH (as would a RZR-4), and looks like it would also fit into our 2014 Ram 3500 long bed with the tailgate down - something that a RZR-4 won't do. If it were 50" wide with just a little more articulation, it would be a no-brainer. It is their first machine that can hold a candle to Polaris.
I want to keep an eye on them for a while. They have had a few issues with the transmission, which I expect to see ironed out quickly. Now that they are attempting to compete in terms of articulation, ground clearance, and better seating and tilt steering, it's possible that we might end up with a Honda in the garage again someday.
By the way - here's a shot of our trailer and truck just after we got it weighed, on the way to General RV Draper.
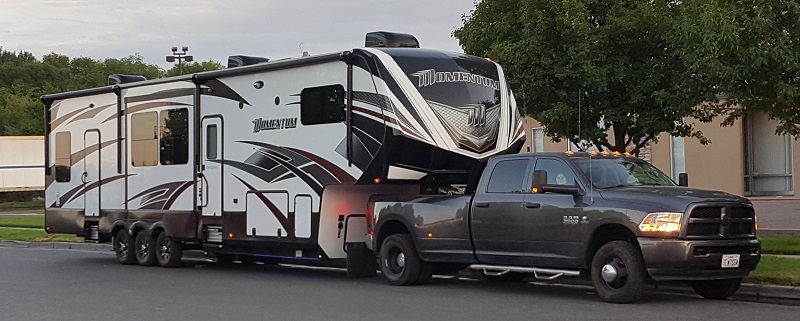
I'll post another update on the repairs tomorrow. Have a great evening!
We are preparing to check out of the hotel and awaiting a call from General RV Draper that the trailer is ready to pickup. I'll update later today as soon as we have it.
I got a call that the trailer was ready and we were there within 30 minutes. Natalia ran through the paperwork, and I took a good look at the outside and inside of the trailer, and ran the bedroom slide-out to make sure it worked. Everything worked, and I could see some of the work that was done. It does look like it's sealed better now.
We buttoned up, hooked up, and pulled out. We stopped just down the street next to a storm drain, and dumped the contents of the fresh water tank. It was full, so it took a few minutes to drain. Then we got on the road, stopped at the same truck stop Cat Scale we used Tuesday, and got weighed again. The smart phone app for Cat Scales wasn't working, so I had to use the old-fashioned method. When your truck isn't as tall as the cab on a tractor, it's a little harder to hit the call button. We got it done, and I'll run the numbers in the morning.
The site we are renting is a little short for our trailer. We fit, but the approach is terrible for one this size. I'm not ashamed to admit that it took me three tries to back in. The first was terrible, the second was really close, and the third was right on. The wheels and leveling pads are within a couple of inches of where they were when we left on Tuesday.
The auto level system worked and we came right back up. It was really hot when we got back, so my wife and daughter stayed in the truck with the AC while I hooked up the power, got the slides out, activated the AC in the trailer, and got the fresh water supply and Internet cable hooked up. I'll do the waste hoses in the morning.
The trailer seems to be in very good shape, and are VERY thankful for that. You sometimes hear horror stories about things being worse after a repair. So far, so good. I'd say that General RV has competent techs, but their service advisors may not be quite as good as advertised.
I still need to ask them a question about the extended warranty. I never got any paperwork on it after the sale, but it shows on the sales documents. I'm wondering if someone failed to submit some paperwork.
We are very glad to be back in our place again. The hotel that we used was one of the "extended stay" types. The rates were somewhat lower than most of the regular hotels in the area. I had figured that most of the folks staying there would be business people on extended assignments, folks working on construction projects, things like that. That assumption was incorrect. It seems that the majority of the people staying there were in "I just got evicted and don't have anywhere else to go" situations.
We saw some pretty shady characters, and I wasn't exactly comfortable leaving my wife and daughter while I went to work. My wife, however, is an excellent shot, and was appropriately equipped while I was at work.
My daughter is finally asleep, and I think we are going to try to go to bed early too. I need to do some work this weekend after hours for my day job, and I want to be fresh for that. I'll post more of an update tomorrow.
I'm going to hook up the waste hoses in a bit. When we were getting ready to pull out the other day, I noticed that one of our Valterra Viper hoses had been damaged either the previous day or evening. I suspect it was caused by the lawn maintenance folks with a weed wacker. It wasn't massive damage, but it was enough that the hose seeps a little, so I ended up getting rid of that one. It's survived well over a year of everything from greater than 100F to lower than -1F, with ice, snow, rain, wind, and all of the usual hazards.
We had three, need two, so we should still be OK. I hate to buy another replacement, but they are durable enough that they are worth it I like to carry three in case we have to junction the two outlets closer to the trailer at a Y, and then run a single hose to the sewer port.
I'm also looking at the antenna mounting. I'm trying to find a way to run the antenna cables in such a way that they can be easily replaced if needed. I think I have a way to do this...
It felt VERY good to sleep in our own bed last night. Aside from our daughter waking up once on the night, we slept like rocks.
We were interested in how things would move around in the trailer based on how we have them packed now. Aside from items on the dresser in the bedroom, not too much else moved. We kind of anticipated the stuff on the dresser, but it was all lightweight (daughters clothes, diaper supplies, etc.
Grand Design DID do a good job at making the trailer usable even with the slides in. You can access 1/2 of the fridge/freezer with the Living Room and Kitchen slides in. You can also access the bedroom, use the bed, and get into the closet. You have to go over the bed to get to the closet, and the dresser drawers are blocked by the mattress butting up against them, but you can sleep in there.
The main bathroom is completely unobstructed. You can also get to the aft 1/2 bathroom by going in the back door and walking around any toys back there (our Polaris RZR 800 in our case).
We found one item of trim that popped loose in the main bedroom closet - it's right above the doors. I'll get out the air nailer and fix that this afternoon. I don't think it was from the work General RV did, it looks more like it just popped loose. That sort of thing happens in trailers as they go down the road, and you learn to deal with it. Overall, everything else seems solid.
Here is a shot of the other side of the trailer when we were on the way home from the dealership. You can see that we just dumped the fresh water tank, so that we could get the weight on the way home.

I heard back from Customer Service at Grand Design, they are sending me the lengths of the flexible hose I need to correctly install the replacement vacuum break for the black tank flush.
The one for the aft black tank is correctly positioned in the back bathroom, but it's the same plastic one that went defective up front. I'm going to replace both of them with Watts units that I found on Amazon. To replace one, you need the following items...
1 of Vacuum Break https://www.amazon.com/gp/product/B00467HJBQ/ref=oh_aui_detailpage_o01_s00?ie=UTF8&psc=1
2 of 1/2" NPT Nipple https://www.amazon.com/gp/product/B00835URES/ref=oh_aui_detailpage_o00_s00?ie=UTF8&psc=1
Teflon Tape for the threads
I'll cover the procedure as soon as all of the parts arrive.
Well, this was a wonderful day.
First, the 4 interior LED lights over the main sofa failed in the Living Room slide-out It seems to be a loss of 12VDC power somewhere going to the slide-out It still has 110VAC and the fuses and switch to the light are fine. I looked at the exposed areas under the slide and found no connectors. I also didn't find any frayed or cut cords. Looks like I'll have to drop the coroplast to find it. Yay!
Then, one of the shelves in the pantry collapsed. It didn't have too much weight on it, the failure is in how the Grand Design worker that installed the rails onto which the shelf brackets attach. There are dents in them, and the rails were not installed with the best of care. The brackets depend on a very specific spacing, and dents make the spaces longer, making the bracket too loose. Two are also installed upside down.
I need to go to a hardware store in the morning and find something to replace or augment what GD installed.
This is another case of a piece-rate-paid installer going as fast as he/she could, and the resulting work isn't up to the standards I expected after talking with the Executive Staff at Grand Design. To be honest, I don't think they would be pleased either, but the only thing that's going to change stuff like this would be for them to adopt an hourly pay model, and abandon the piece-rate model. Otherwise, people in a hurry will cut corners and otherwise make mistakes.
No matter, I'll come up with a way to fix it. Just a few dollar$ out of my pocket, that should never have had to be spent if the installer had taken a little more time and care.
I received the Watts 1/2" LF288A Vacuum Break units today. I assembled them to the couplers with Teflon tape, and I'm waiting for the hoses to arrive from Grand Design so that I can fix another issue caused by a piece-rate-paid installer that was going too fast and cutting corners. At least Grand Design is sending the hose - that IS appreciated. I still can't find that stuff anywhere. I'd love to get another 10' of red and 10' of blue to have for future repairs/enhancements. I may see if I can buy some from them - but I expect to be told to go through my dealer - and I'm not overly pleased with them right now.
Eventually, I want to add another two-stage water filter on the incoming water supply line that will filter EVERYTHING coming in for lead and VOC's, down to .5 micron, not just the cold to the faucets. I think it would help extend the life of the water heater, and given some campgrounds, make things safer for my family too.
Here is a photo of our current setup (which I've built over a period of several years). It's mounted on the wall behind the television in the Living Room. When the TV is locked into the travel position, everything is completely covered. It includes...
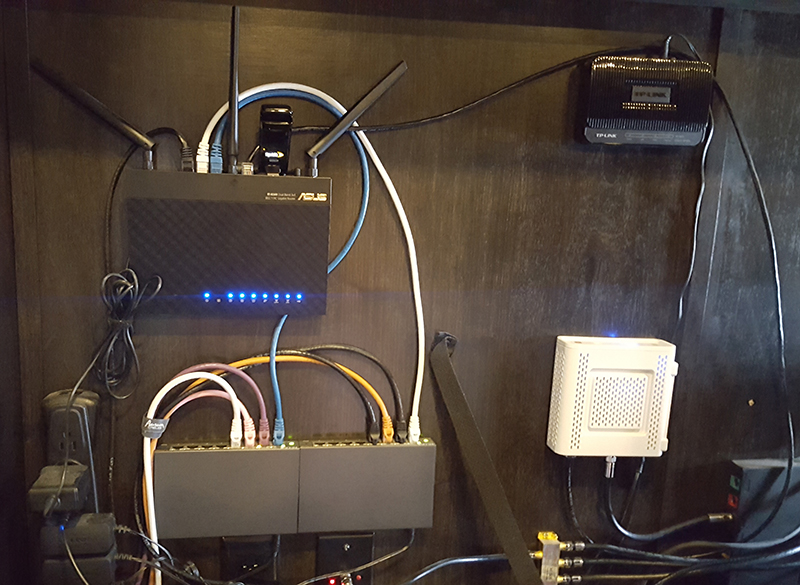
Asus RT-AC66U Router (with broadband and Ethernet WAN support)
TP-Link TD-8616 ADSL2+ Modem (DSL support)
Motorola Surfboard SB6141 Modem (for high-speed DOCSIS 3 cable Internet)
U301 Wireless Broadband Modem (says Sprint but has been re-flashed to work on Verizon)
Two TP-Link TL-SG108E 8-port Gigabit Ethernet Switches (connected to two Gigabit Ethernet ports on the RT-AC66U)
One TrppLite Internet Office 900U UPS (provides over 45 minutes runtime with everything we have hooked up to it)
You may note the RED and GREEN jacks above the Coax on the interface box in the lower right. Those go to the matching ports I added in the hookup center on the trailer.
I found a way to fix the issue with the pantry shelf brackets that wasn't too expensive. At Lowe's this morning, I found some of the same track used by Grand Design. I also found the brackets that attach to the track - but these were better. They seem more sturdy, and they have a hole in them so that you can run a screw through them to secure them! That's what Grand Design should have used in the first place. They were only about $3 for a package of 12.
Here are the brackets I bought in case you are looking...
Here are the tracks that Grand Design installed...
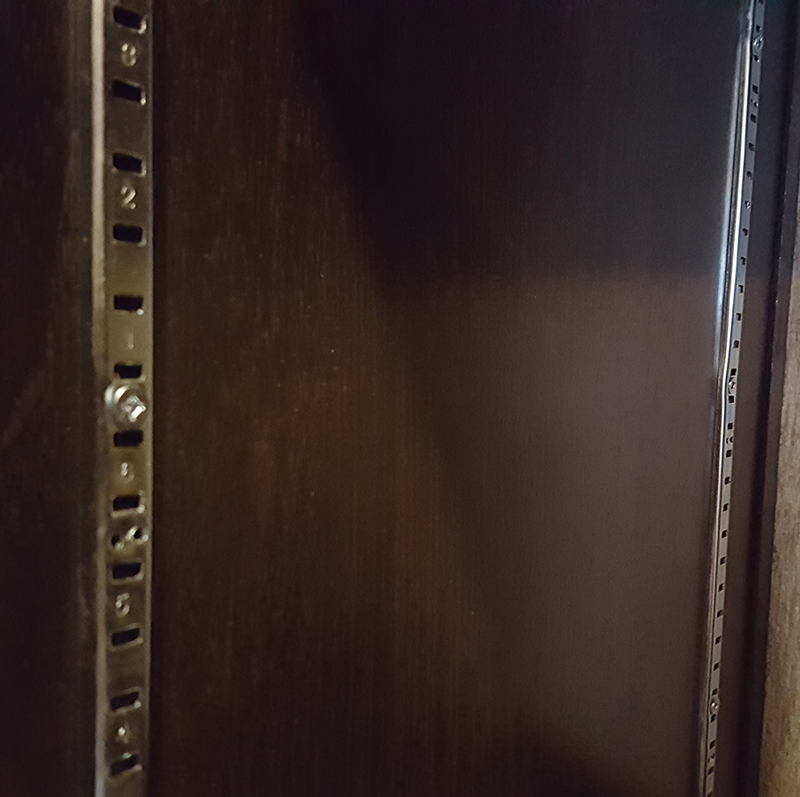
Here is the new bracket with the screw hole (bottom) compared to the ones Grand Design used (top, lacking the screw hole). Once installed this way, these will NEVER come out.
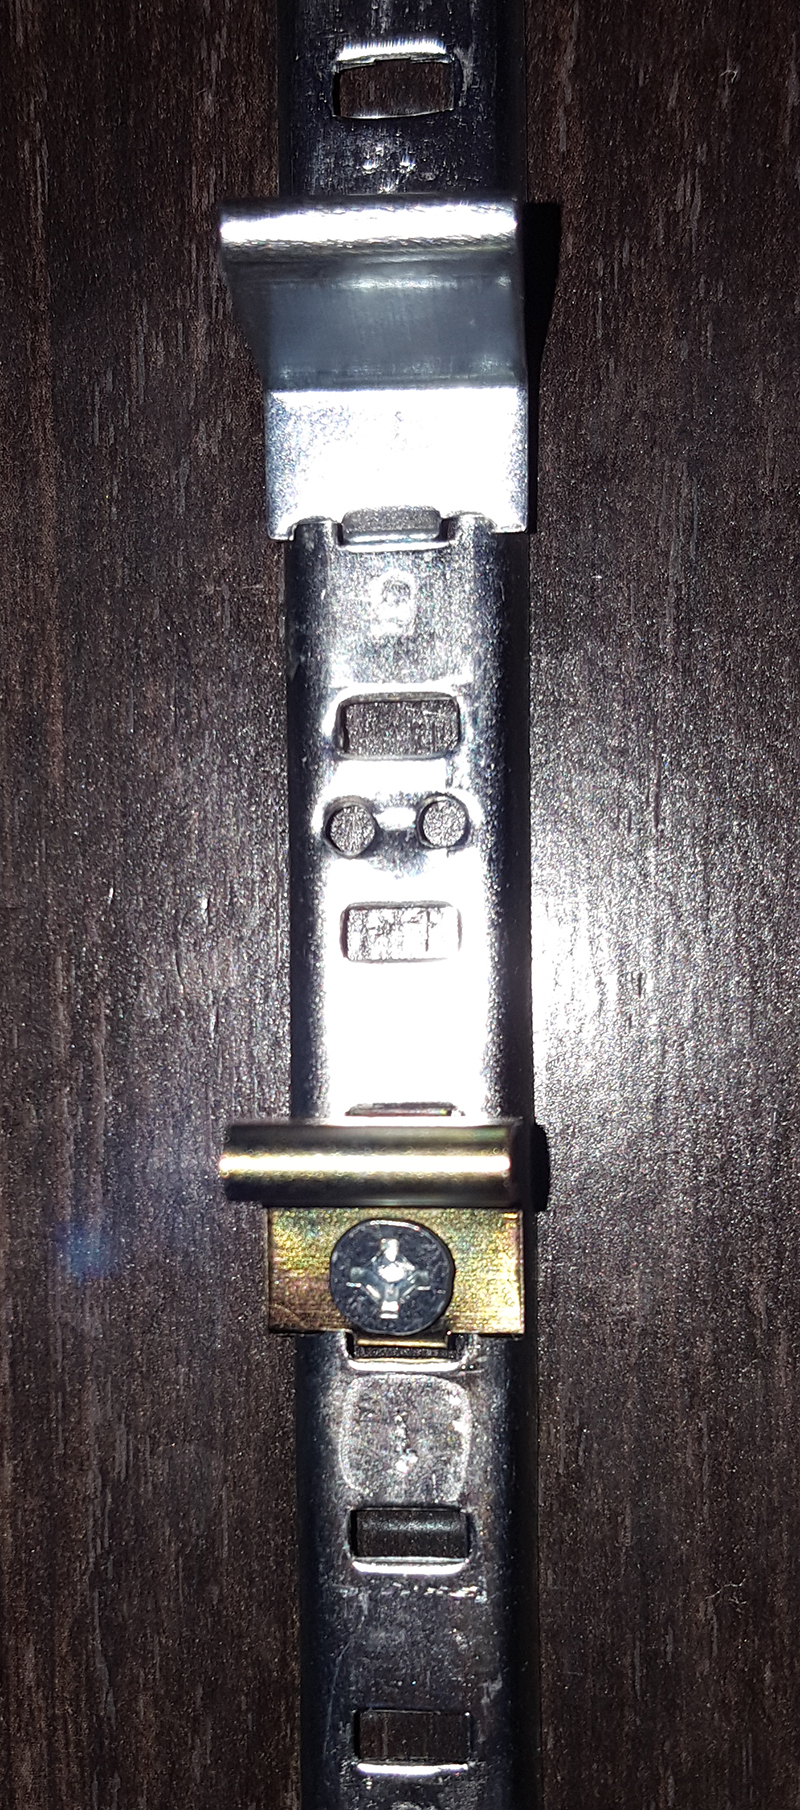
The only issue is that the Grand Design installer put two of the tracks in upside down, so they don't line up with the other side 100%. I would normally just take the ones Grand Design put in and flip them so they match the other side, but the tracks have some dents and folds in them. The track isn't the most durable stuff until it's mounted, but any installer using a modicum of care would have used another piece on at least one of these. I'm going to buy one more length of it at Lowe's, cut it in half, and use it to replace what the Grand Design installer put in so that it matches with the other side - then I can install the brackets on that side with screws too, and this will never happen again.
Here is a photo of the Watts LF288A units assembled and ready to install. I'll do the one in the aft bathroom this afternoon, and then do the forward unit as soon as the hoses from Grand Design arrive.
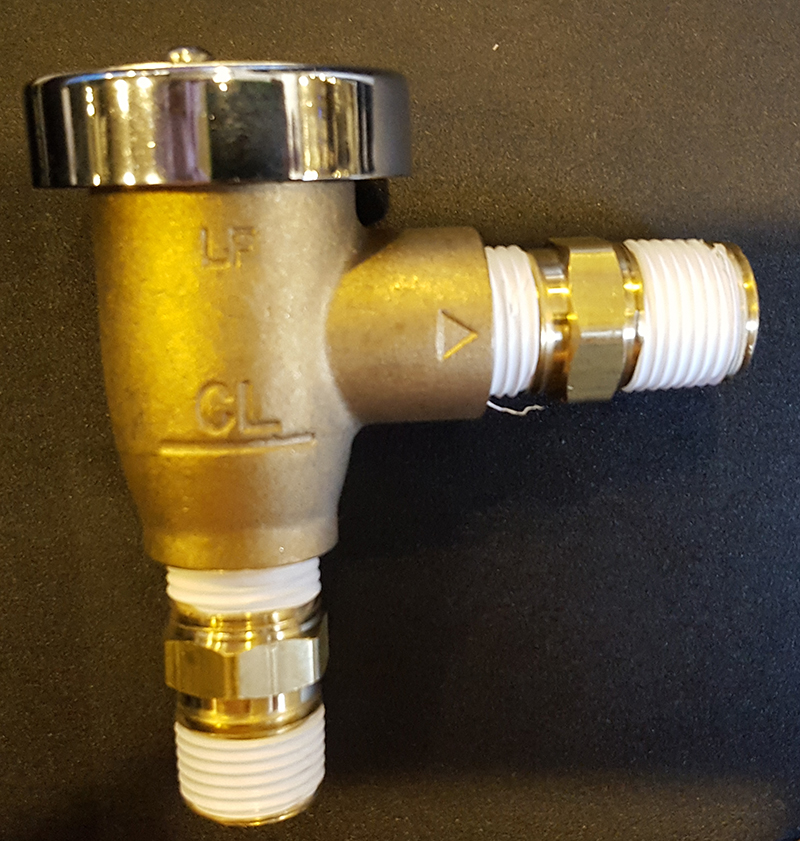
I haven't had time to go under the trailer and drop the coroplast to find the electrical connector for the slide-out I have a ton of other things to do this weekend for my day job, so that may have to wait until Monday or Tuesday night.
I did order a replacement for the oven temperature knob on our trailer last week. The oven is a Suburban SRNA3LBSE, and it uses Suburban Oven Thermostat Knob 140255. The markings tend to wear off of all of the oven knobs fairly quickly. It doesn't really matter on any but this one - being able to see the temperature is important on the oven. I found these at PDX RV at http://pdxrv.com/catalog/i3507.html for $2.85 each. I ordered a few of them to have as replacements over the years. I also sprayed Krylon Matte Clearcoat over one of them, and we are using that one first. It may hold up well enough that we won't need anymore, but I have a couple of spares just in case.
I ordered from them on 11-July-2016 using PayPal, they shipped on 12-July-2016, and the parts arrived on 15-July-2016. Not too bad!
I'd love to make a recommendation to Grand Design. Offer a "parts kit" with each trailer. Charge something reasonable for it if you want, make it an option. It comes in an 8' cardboard tube. It includes 1 length of each type of the trim used in the trailer (already papered/stained), a small roll of each type of wallpaper used in the trailer, a small roll of each type of wallpaper seam tape used in the trailer, a small bottle of each type of stain used in the trailer, a few of the little metal clips used to hold the window screens in place, and a set of the different screws used in the trailer for main items (like the ones with the black paint on the screw head used for the radio, light switches, etc). If you wanted to throw in a length of the flexible water hose line used in the basement (in red and blue at least), that would be a plus too. These are things that aren't readily available to the consumer, and that would be very helpful for small repairs. Just a thought.
More to come...
I dug up a 6' USB extension cable to use to hook the modem up to the router. It gets it out from between the WiFi antennas on the router - I was able to put it up on top of the hutch where the TV is located. It still keeps dropping the connection, even though a separate device shows a good 3G Verizon signal. When it is connected the speeds I'm seeing are still very slow. SpeedTest.net shows the following to a local server: 99ms to 100ms ping time, 1.07 Mbps to .96Mbps download, .71Mbps to .64Mbps upload. Not the fastest I have seen, but its good enough to keep us connected. The signal is much more stable having the modem up high, but it still drops too frequently.
I still have one more trick up my sleeve to try to boost that speed. I will try it on Friday when I can get another 6' USB cable and a power-supply Y cable.
The hose (and some PEX and pinch clamps, plus a coupler) arrived today from Grand Design. That means I can work on fixing the forward vacuum break this weekend. I appreciate Grand Design getting that out here to me. They really do provide the support after the sale.
I re-cabled the Franklin U301 today. I got a Y-cable that's designed to pull power from 2 USB ports. i was thinking that, just maybe, the modem might be trying to draw too much from the router. I hooked it up, and plugged the second USB cable into a known good power supply. That should give the modem plenty of power. Alas, the signal is still slow BUT it does not drop as much. It looks like peak times we will be limited to about .5Mbps down and about .3Mbps up. At off peak times we are just over 1Mbps down and .5Mbps up.
I don't quite like what we see. Compared to another Verizon device on their 3G service, I think we should be getting something a little faster. At $5 a month for service (with 6 months included in the purchase), it's certainly good enough as a backup. It's fine for web and e-mail work.
Today was productive! I replaced the vacuum break in the aft bathroom in the morning. I'll tackle the original problem, the vacuum break in the main bathroom, either tomorrow morning or Monday morning. Monday is a State holiday, so I'll have the day off.
I also got a call late in the afternoon from General RV that the replacement control panel for the Lippert Level-Up system arrived. The original was damaged by the water leak we had - the backlight on the LCD failed, and the LED indicating that the unit is in retract mode had also failed. The only way to know if it was in retract or extend was to try.
I removed the original control from the cargo bay door (our HAL 9000 wasn't any help at all, but it's only 4 screws and 1 electrical connector), and took it to General RV and swapped it for the new one. I went back home, attached the new one, and tested the controls. Everything - including the LCD backlight and all of the LED's, work fine now.
At least that worked. I still haven't got the lights working in the LR slide-out I'll work on that either tomorrow or Monday as well.
Well, this was a day.
I was a little too tired to work on the vacuum break, so I decided to troubleshoot the LR slide-out LED's.
I pulled the coroplast and found a quick-disconnect for the AC power, and a couple of the "crimp nuts" used for the 12VDC line. One of them was very loose. I checked the voltage at that point and it's just shy of 4VDC (meaning not enough to run the LED's).
I cut the crimp nuts off and used a couple of ScotchLok IDC couplers to put it back together. They are waterproof and designed to never come apart.
So now I need to trace this line back and find out where the voltage drop is coming from. I suspect another loose connection. Here's where a wiring diagram would be really helpful, but since we don't get those, I asked Grand Design to tell me what the sequence of connections is from that point, back to the switch at the kitchen island, back to the power panel and fuse. I have 13.25VDC at each fuse block output, so I know the problem isn't there.
I've e-mailed customer service, they said they are asking the service department.
I have checked every other light and 12VDC device in the trailer, and all of them are fine. It's most likely at the point between the switch at the kitchen island, and wherever that is spliced to.
For anyone interested, the 110VAC quick connect is located just ahead of the forward hydraulic cylinder on the inside of the frame rail.
I also went through and pulled the stereo and re-did the factory splices on the power for that in case it taps off of that.
I also pulled the fireplace and can't find any splice points behind it. Without any info from the factory on what path the wiring takes from the fuse panel to the switch on the kitchen island, I can't proceed.
I did disconnect the source side from the switch and hook up straight 12VDC (pulled from the lighter plug on the entertainment center). The lights and switch operate properly under that condition. There must be another bad splice or device in the line between that switch and the fuse panel
I'll let you know what I hear from Grand Design.
Those of you that have been following this are going to just LOVE what I discovered. This is one of those days you just wish was a bad dream.
I contacted Grand Design last week hoping that they could give me some clue about how this wiring is routed so that I could have an idea of what to trace. On Thursday 28-July-2016 I received the following...
"Good morning, I talked with the old group leader and what he remembers is that they ran their wires from the LP compartment, up to the island, and then to the slide. We haven’t run these units in almost a year so we’re all a little fuzzy on it. Hopefully that helps, if not let me know how else we can help."
I thanked them for the response, but had to take some time to ponder it. Why would a circuit going to a set of lights in the living room slide-out (midship on the trailer) originate or pass through the LP compartment forward on the trailer? I couldn't figure that out.
This is one of the reasons why the factory having a working diagram and using standard wiring in all of their trailers would be a MAJOR help. In this case, I'm working based off of the memory of the folks that built it.
In the meantime, I traced the circuit to which fuse kills the 4VDC on the circuit. It's a 15A labeled "slide-out". I started to get a real sinking feeling in the pit of my stomach.
The wiring runs forward, then aft. It's labeled "slide-out".
Remember the work I had done at General RV? The work on the bedroom slide-out? I thought we got through that repair unscathed. Is this problem connected to the work that was done?
As they say in the Ronco commercials, "Wait! There's more!".
This morning I decided to see if I can trace that wiring down. I remembered that there is a white wire visible in the storage area when you lift the bed. I went up there and just looked at the slide-out for a minute before lifting the bed. What I saw had me getting my tape measure out because I wasn't sure.
It looked like the left side of the slide-out (on the interior looking out) was slightly lower than the right side - a small enough difference that I hadn't noted it before. I measured and I was right.
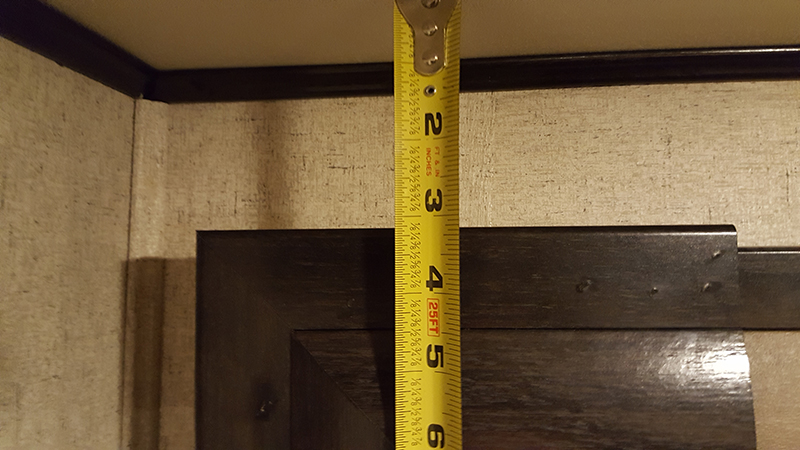
The left side of the slide sits about 1/2 inch higher...
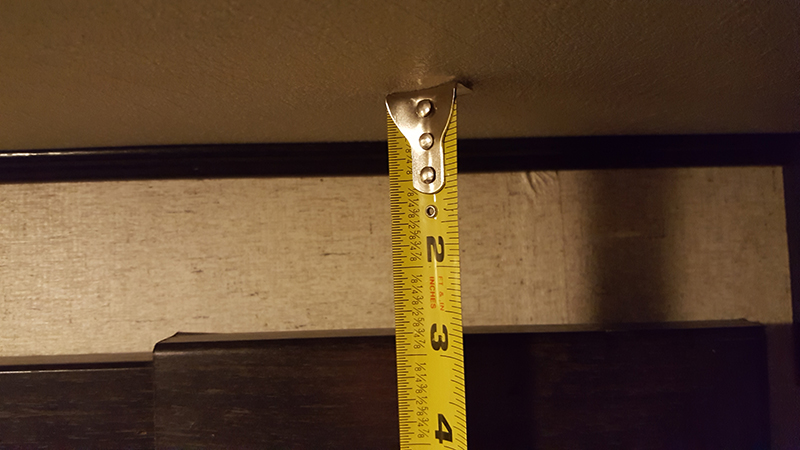
than the right side.
I took a look on the floor at the edges of the slide-out The left side (that we see all the time) is fine, but the right side, well, see for yourself.
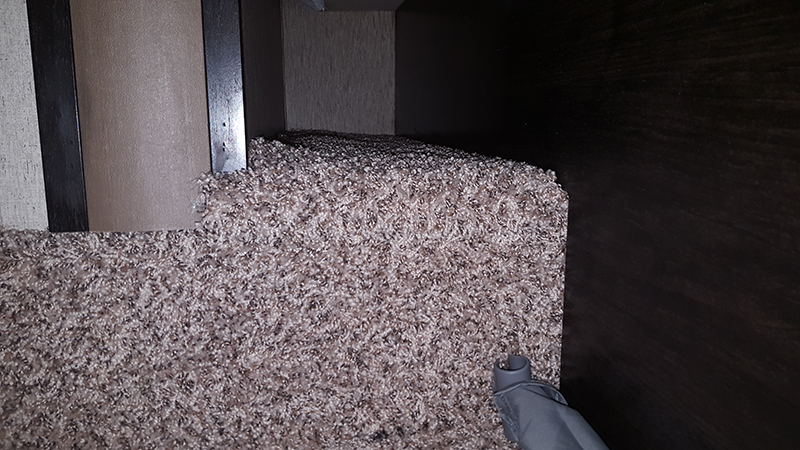
As you can see, the trim and the carpeted base in the slide meets the carpeted base on the trailer. But on the right side (which we don't always see)
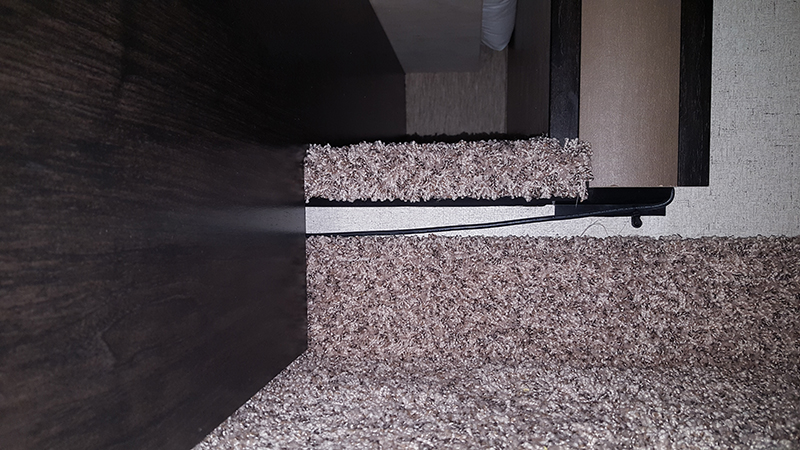
There is a big gap between the carpeted base on the side and the carpeted base in the trailer, and the trim doesn't meet either.
That's not how I remember it before, the last time I got in there and took a good look I know it was level.
It looks like either the repair as instructed by Grand Design intentionally leaves the slide-out out-of-level, or when General RV put the slide-out back in, someone made a major error. The right side sits much higher on the inside. I checked outside and it looks fine there. If I hadn't been staring at it trying to imagine what the wiring looks like, I would not even have noticed it.
My suspicion is that there is a set of rollers along with the Schwintek tracks, most likely similar to what you find on a normal roller drawer in a kitchen. When you install a drawer, you drop the back rollers in the track, then slide the drawer back in, and drop the front rollers in the track as you close it. It looks like the rear left roller (looking from outside as if putting the slide-out in like a drawer, the front right roller if looking at the inside of the slide-out) ended up on top of the track, instead of inside of it.
In this case, the drawer is slanting with the the rear-left corner (looking from outside), the front-right corner (looking from inside) being higher than the other corners.
It looks level on the outside, but I'm concerned that this may be torquing the slide-out box and that eventually, something will either bind or break.
I took these photos and I'll get in touch with Grand Design tomorrow to see if it's supposed to be that way after the repair.
After I recovered from finding that, I started tracing the wire. I found another connection that needed to be re-done. Once I fixed it, we had 12.25VDC at the switch and the lights in the living room slide-out work just fine now. I am thankful that the folks at Grand Design gave me an idea of where to look. Because I found a couple of loose connections on that run, I suspect that the person that ran it was just tired or something. If they used ScotchLoks instead of those crimp nuts, I think it would have held better even if someone wasn't entirely careful in installing it. They are a little more forgiving as long as the IDC's (Insulation Displacement Contacts) are hitting wire.
I also replaced the forward vacuum break. Grand Design sent me the black hose and some PEX to fix it, as well as some of the crimp rings and a plastic coupling.
I was planning to remove the vacuum break the factory installed. It's sitting right on top of the penetration hole for the plumbing in the shower, but it's too big to come back through the hole with all of the plumbing that's in there now. So I cut the connections to it and left it in there. Someday I may enlarge the hole to remove it, but not for now.
I ran the blue PEX and black hose up through the hole, and terminated the connections right by the valves for the shower as it was supposed to be originally.
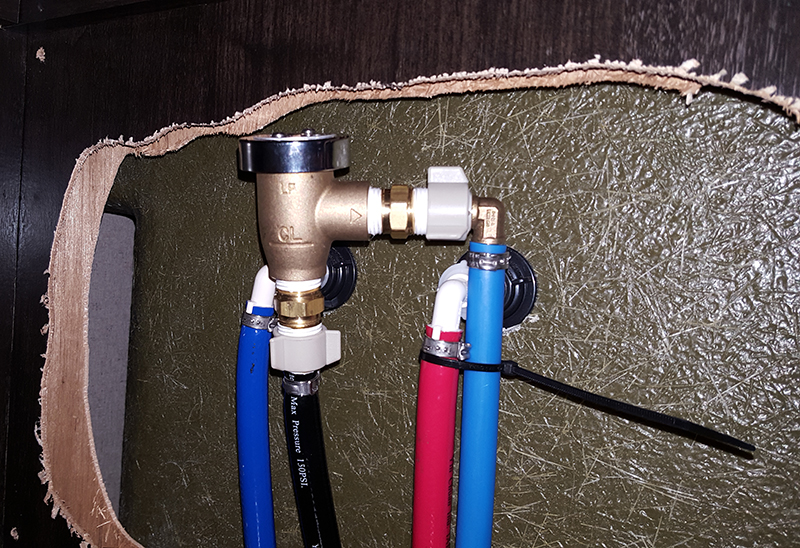
The new vacuum break correctly positioned and connected
I spliced the output connection into the factory blue PEX going to the tank sprayer, and removed the factory black hose from the hose input connection and replaced it with what I installed. I put a new end onto the black hose and screwed that onto the black tank sprayer hose connection. I tested the connections with lower pressure first, then full pressure. No leaks and it works well. I flushed the tank for about 30 minutes. For the first time in a very long time, the black tank level indicator showed empty.
So, electrical issue fixed, vacuum break fixed, but another issue with the slide-out discovered. The nightmare of dealing with this issue continues...
According to Grand Design, as long as the slide-out operates correctly, then it is assembled correctly. It does work fine, but I'd be seriously surprised if I missed the gap at the floor on the side.
Either it was always this way, or I tend to suspect, a piece of trim was left off of this side when it was put back in. It's also possible that the trim was installed out of level, but I suspect a small piece on the bottom is missing. At this point, that's the way it is.
We are not fans of General RV at this point.
As soon as we have the medical bills paid off, I'm planning to start working on the rest of the radio gear in the trailer. That's going to be a few months.
It's been a while since I did any real updates to this part of the site, but a lot has happened.
First - if you have a baby that's teething, get a "Baby Banana". It's a silicone thing that looks like a banana, and they really do help, once you get the baby to actually chew on it. Ibuprofen also helps more for teething than Tylenol. Aside from when she's teething, our daughter is amazingly happy and pleasant.
On the trailer side of life, we finally got the medical bills paid off. That means that I can finish the projects that I'm working on. The first was to finish the A/V distribution system.
You may remember that we had HDMI cables run from the main entertainment center to both the garage and bedroom TV's at General RV. After seeing how they did it, I wish I would have done it myself. I left them two cables (that I ZIP-tied together) to run to the bedroom TV (one as a backup if anything went wrong with the first). They only installed one of them (which meant the tech had to cut all of the ties I used) and the second was no where to be found. The one to the garage made it, and I ZIP-tied two Category 6e network cables (cable only, no terminated ends) to that one in case I needed that as a backup.
I later terminated those Category 6e cables into a box that I mounted on the wall.
I pulled my own cable to the TV mounted in the pass-through, and we installed an older TV we already had down there.
We have multiple HDMI devices that can be used as video sources...
This gives us 6 current sources. We may also add a satellite receiver at some point in the future.
The plan was to install an HDMI Matrix Switching unit. These usually have some even number of inputs, and either an identical number of outputs or some lesser number. In our case, a 6x4 would work for what we have today, but as we may add a DISH tuner someday, an 8x4 would be ideal. When we started looking, we found that most of the 8x4's end up costing the same as an 8x8. Among the features we were hoping for...
We found several of these from a number of companies, but suppliers like HDTVSupply were way too expensive. We found an ideal unit on Amazon from a company called Technology NOW. It ended up costing us $999, but it does everything we were looking for - plus control via RS-232 or Telnet via Ethernet as well as via a web page that you access by entering the IP address for the unit. I'll cover all of that in a future update.
https://www.amazon.com/gp/product/B01GKFQNG8/ref=oh_aui_detailpage_o09_s00?ie=UTF8&psc;=1
I installed a set of extra brake/turn signals on the back of the trailer based on http://www.granddesignowners.com/forum/showthread.php/4321-Extra-visibility-added
It worked out, and it really improved the visibility on the trailer.
Here is a link to the lights. https://www.amazon.com/gp/product/B0069TND14/ref=oh_aui_detailpage_o03_s00?ie=UTF8&psc;=1
After that repair last summer, everything looked good. During the last good downpour I found some more water in the basement. We are having another one right now, and I went to see where it’s coming from.
It’s different this time, it’s not leaking from the slide-out into the basement, but it’s a leak around the pass-through storage door on the street side. It almost looks like the seal on the metal around that opening has shrunk and it’s allowing water that gets onto the top of the door to run down the inside of the door and then pool on the floor of the pass-through storage.
I contacted JD at Grand Design to find out about getting another seal to replace the one on those cargo doors. He asked for some more photos, and then stated that he's sending me a replacement door.
While it doesn't relate directly to the trailer, we did make one modification to our Polaris RZR 800 EPS LE. We added a seat for our daughter.
We never go crazy with the ATV, I don't like to take chances when I'm riding. We do plan to take it out on our vacation in April. I found a kit that let us add a center seat perfect for our daughter at this point.
http://www.pureoffroad.com/utvma-front-bump-seat-polaris-rzr.htm
I also changed the oil, oil filter, and rear differential fluid. I used Valvoline VV975 for the rear differential. It runs cooler than the factory fluid, and that is one of the big things to prevent problems on this model of RZR.
I used Schaeffer's Supreme 9000 5W-50 for the oil. A lot of folks will use Rotella T6, but for the number of oil changes I end up doing, the Schaeffer's oil isn't that expensive.
https://www.amazon.com/gp/product/B00JF2LPSA/ref=oh_aui_detailpage_o00_s01?ie=UTF8&psc;=1
It was nice being able to do the oil change in the garage while it was raining outside.
I installed a Genius GC016 interface so that I can hook up the charger without pulling the drivers seat. It's harder to get the seats in and out with the jump seat in between.
https://www.amazon.com/gp/product/B009MI9L6U/ref=oh_aui_detailpage_o09_s00?ie=UTF8&psc;=1
I'm also going to install some 8' vertical E-Track in the garage of the trailer so that I can better secure the ATV. The factory tie-down points aren't in the best positions for our application. I'll use Erickson 08314 E-Track wheel bonnets with it.
https://www.dccargomall.com/8-Vertical-E-Track-Tie-Down-Rail.aspx
http://www.motoparthub.com/08314_Erickson_Performance_Tie_Etrack_Adjustable_Tire_Strap
The Suburban SF-35Q furnace failed again.
Since I had really cleaned it out the last time, I didn't even bother with the sail switch. I went right to the limit switch, and it was bad. I found a replacement at a local RV supply place for $6.99 and bought two. Used one to replace it, and will keep the other as a spare. It lasted just shy of two years (with some degree of use about 9 months of each year). I also picked up a replacement sail switch for the future.
The part number for the Sail Switch is 232261
The part number for the Limit Switch is 232504
From the time we picked our 2016 Momentum 385TH up at General RV in Draper, UT until today, we have put less than 100 miles on it. I used all of my vacation time when my wife had the C-Section, so we didn't have the time to go anywhere. That's changing this year, and we are getting ready for our first vacation in two years.
In preparation, I was checking the brakes and seals this afternoon. I started at noon. In anticipation of re-packing the bearings, I had purchased a set of seals before we even got the trailer. I had budgeted the rest of the afternoon to repack all of the bearings.
Surprise, surprise, surprise! I pulled the curb-side rear and what did I see? Well, it wasn't nearly as bad as many of you other owners have encountered, but there was grease where it wasn't supposed to be.
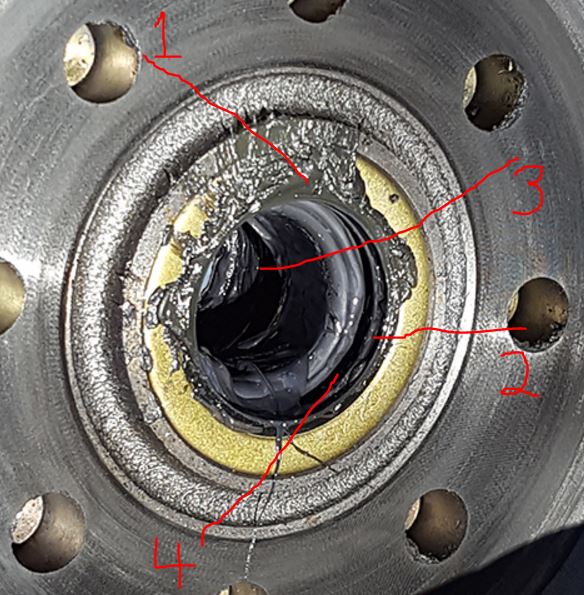
I stopped taking pictures after the second wheel on the curb-side, but the third looked the same.
Six hours, six cans of BrakeKleen, and 8 rolls of shop towels and various rags later I had the grease removed, the bearings re-packed, and the three curb-side wheels done. I didn't even get to the street-side yet. I know that cleaning the pads won't be a permanent solution, but full-timing, we can't afford to drop the unit off at the dealer for a week for them to do it. This is just to get us through our vacation trip.
There is a complete thread about this on the GrandDesignOwners.com forum at http://www.granddesignowners.com/forum/showthread.php/8531-Poll-How-many-of-you-have-had-your-grease-seals-fail
I have contacted Grand Design and Lippert, as well as filed a complaint at NHTSA.DOT.GOV. I have already heard back from Emily at Lippert that a file has been opened for me.
I haven't heard back from JD since I sent the follow-up photos on the leaking cargo door. I'll keep you posted.
The decal for the replacement cargo door arrived today, so once again, JD at Grand Design has come through with a fix. I'm pretty sure they have to have the door manufactured at Lippert (unless they have a stash of them in their shop), so I don't expect to see that very soon. It will be really nice to have that leak resolved.
I heard back from Emily Stahley at Lippert this morning on the brakes. I do have to say that they have really stepped up to the plate for us.
Because I'm doing the labor myself (they can't reimburse labor costs to an individual) they are sending us replacement self-adjusting brakes and seals. That will be a welcome upgrade, and makes it feel like the work was worth something other than fixing a problem. I really do appreciate they way they are handling this, but I hope for the sake of others that they really do have that issue under control at the factory.
I'll cover the installation process on those self-adjusting brakes when they arrive and I have some good weather to finish the process.
I did clean up the street-side drums and brakes today, one during my lunch time and the other two after work. I didn't get many photos as "my assistant" took the baby for a walk. The magnet was completely covered on the top toward the spindle. Each on this side took two cans of BrakeKleen. They were a mess.
I'll also mention that the dust caps on each hub were COMPLETELY filled with grease. On all but one you could not even see the EZ-Lube grease zerk, it was totally buried in grease. Cleaning them out was another part of the process.
Emily sent the replacement self-adjusting brakes and seals via UPS Overnight. I was very impressed! The two boxes were over 100 lbs.
She sent 3 left-hand brakes (part number 296651) and three right-hand brakes (part number 296652).
The brakes are assembled, retail packages and just need to be bolted on and have the electrical connections made. They include the connectors to facilitate that.
I'll work on installing these when I have good weather again (sometime late next week it sounds like).
The weather was crappy yesterday, so I picked up some more BrakeKleen, shop towels, and some Green Grease to re-pack the bearings once more when I install the self-adjusting brakes later this week.
Then, after raining most of the day, it snowed last night. Today, I got some things done in the garage.
I installed a Uniden 980SSB CB in the ATV. I'd been meaning to do that forever, and got the time to do it today. I need to tighten up the antenna a bit (I used a FireStik 2' no-ground-plane CB antenna) but everything works well.
The left-right positioning of the tie-down points Grand Design installed in the garage floor just isn't great. They tried to put them on the sides and down the middle (3x3 matrix pattern), but depending on the machine(s) that you are carrying, you will most likely find that they aren't quite perfect. I like to install wheel bonnets to secure the ATV, but the positioning of the tie-down points really only works with basic ratchet straps.
Others have installed E-Track in floor of their trailers, and I decided to do this too. However, I opted to use vertical E-Track and run 8' sections from left to right across the garage floor so that I can get perfect left-right spacing no matter what we carry back there.
I got the E-Track sections from https://www.dccargomall.com/8-Vertical-E-Track-Tie-Down-Rail.aspx
I'm using Erickson #08314 E-Track Wheel Bonnets to hold the ATV down. http://www.motoparthub.com/08314_Erickson_Performance_Tie_Etrack_Adjustable_Tire_Strap
I started by removing the factory tie-downs. They are secured by three long self-tapping screws each, and each has a circular cutout drilled in the floor for it. I then caulked the holes where they were using some black Red Devil-brand caulk. I then installed the E-Track sections using #14x1" tapping screws, essentially right over the holes where the former tie-downs were.
The only difficulty I encountered was that on our model of trailer, they had gone back to the hole-and-peg table legs for the table that goes in the garage - something they had gone away from in previous model years. The holes are fully braced metal units, but the factory tie-down points toward the rear of the garage were in-line with two of the peg holes. That meant that I had to move the E-Track a little forward to avoid covering them. The positioning still works, and I'll add some photos shortly.
Our 2014 Polaris RZR800 EPS LE is now 100% secure in the garage.
I was able to listen to the DV5600 radio while I worked. You will recall that we had an issue with the DV5100 that the factory installed in the garage (as did many others), and they sent us a DV5600 to replace it. That has worked fine since I replaced the old unit.
I'm planning to do the brakes when I get home from work over the next few days. I picked up a tool that REALLY helps to make lifting any individual wheel really simple. It's a 20-ton air-powered jack. http://www.harborfreight.com/20-ton-air-over-hydraulic-jack-95553.html
I got a coupon that lowered the price to $89.99. I tested it yesterday and it will make this job easier. Just position it between the U-Bolts on the axle and let it go. It takes a few seconds to lift the wheel, and cuts the effort to almost nothing. Work smarter, not harder. It's the way to go.
Having an air compressor on board is enough of a necessity that I'd almost say that the factory should just install one. The unit we bought a long time ago has continued to provide great service and meet all of our needs without breaking the bank. It provides enough air (and pressure) to run just about any air tools and to inflate both our truck and trailer tires. http://www.harborfreight.com/10-gal-25-hp-125-psi-oil-lube-air-compressor-62441.html
I will admit that I have been cheap on a few of the air tools (I bought a $25 impact wrench at WalMart). However, the riveting tool, Bostitch brad/nailer I bought for trim repairs, and the Lincoln grease gun have been especially useful on the trailer, ATV, and truck. The air-powered jack is another one.
I got a call from my mailbox supplier that a large crate had arrived for me. I picked it up, and I believe it's the replacement cargo door that JD from Grand Design had sent to me. That was much faster than I expected to see it.
JD is one of the folks that is a real asset to Grand Design, and I really, really appreciate his willingness to go the extra mile to make things good! Once this leak is taken care of and the brakes are replaced, that should take care of pretty much everything.
I'm going to install that in the next couple of days. I ended up working later than usual tonight, so I didn't have time to unpack it or anything tonight.
When I got home from work, I unpacked the replacement street-side cargo door. It wasn't too difficult to install, it just took some time cleaning up after the old one was removed and getting the new one prepped.
I had to take the Level-Up control decals and control off of the old door, and then transfer them to the new one. The screw holes also didn't line up, so I had to drill new pilot holes. I had to move the magnet that holds the utility door up from the old door to the new one. These items took mere seconds each. Once I got the new one caulked and in place, it was a pretty simple process.
I did notice some major differences in the construction of the door. Instead of rivets at the top and bottom, they now used screws. They also have a new gasket that looks much beefier than what was there.
I transferred my locks over, and the process was complete. I do need to see if JD has a any more of the decals for the alternative water control system. That was the one decal that would not come off of the old door.
Since I had the day off of work for Good Friday, this was the day to install the new brake assemblies sent by Lippert. Once again, I'd like to thank Emily for her offer of the forward self-adjusting brakes. That made the 7 hours I spent working on them today worth it.
I started at 8:00 and ended at 15:00, which included time to prep the tools and work area, then clean up when I was done. They sent the replacement brake assemblies and seals, so I re-packed all of the bearings (again) and installed the new seals. Each one took about 1 hour, but I was pretty meticulous about how I cleaned the hubs.
I also set out a plastic tarp and some absorbent pads on top of it to eliminate the possibility of making a mess on the site. When I was done, you couldn't tell I had done anything.
In the end, everything looks good, and I'm looking forward to being able to report on the difference in braking when we get done with the first leg of our trip on Friday.
The basic process is
I also got a replacement for the faucet in the rear bathroom. The one that was installed at the factory barely made it into the sink, and washing your hands in it wasn't easy. I found a replacement on Amazon through another seller, and it is much more useful. For $25.95, I figured we couldn't lose on that one. https://www.amazon.com/gp/product/B06XBY1VJJ/ref=oh_aui_detailpage_o00_s00?ie=UTF8&psc;=1
I ordered it on Wednesday, it got here today, and it took literally 5 minutes to remove the old one and install this one (I had previously installed shut-off valves in the PEX under the sink). That was surprising because my body hurts from doing all of the brake assemblies. It's still not perfect, but it's so much better we are quite happy.
Tomorrow I have a couple of additional projects - I need to put a hole in the roof to pass a network cable through, and I need to install our inverter. It's an old one that I've had for several years, but I want to get that finished now.
Once that's done, the only projects left will be to get the Ham Radio gear installed. Now that the medical bills are paid, I can start to look at that after our trip.
I still need to document the HDMI video distribution system and the new router/LAN setup. Expect that see that in the next week.
Another busy day.
It turns out that it's supposed to rain starting Monday, so I need to finish all of my outside projects by tomorrow.
First, I drilled the hole in the roof to bring the network cable down for the WifiRanger system. During testing I had run it down the side of the trailer, then up into the connection bay where I installed a number of network and cable connections.
I was able to use a long Klein bit to drill up through the roof in the space behind and next to to the switch center. That got it pretty close to where the router/antenna will be installed. I then used graduated bit to go back down the hole to a size of 3/4", which is the size of the small conduit I put in for possible future uses. I then sealed the penetration with Alpha Systems 1021 sealant. It will have a couple of days to cure before we have any rain.
I also got the inverter installed. I'm going to re-do the way General RV installed the batteries (including the one battery marked bad that they put in) later this summer, but the inverter is in and working. It's a 2500 watt constant/3000 watt surge unit from Cobra. I have a remote switch for it mounted inside above the controls for the galley fan.
I picked up a 14' fuel hose today to use with the refueling station. That's another upgrade a number of owners have done. The problem is that it requires a VERY big wrench to install it. I have wrenches up to 1 1/8" and it's bigger than that. I need to go pick up an adjustable wrench that goes that big tomorrow.
I also took the opportunity to clean and organize the basement storage today, and stow our cold-weather water hose and heat tape for the water supply unit and sewer hose. I switched to our summer water hose. Since we don't use the aft bathroom much, I rinsed that tank and stowed the sewer outlet hose for it. One less thing to do when we leave.
I got up this morning and our daughter was in a great mood. It was a perfect way to wake up.
I took a number of items to the storage unit to free up weight and space in the trailer, and then stopped at Harbor Freight for a BIG adjustable wrench. I used that to replace the 6' fuel hose installed at the factory as part of the EZ-8RV fuel pump. I installed the 14' hose that I got from Tractor Supply yesterday. A couple of hints on that...
Apply 3 to 4 wraps of Teflon tape to both ends of the new hose, leaving several threads at the end uncovered.
Unscrew the nozzle on the existing hose.
Pull the existing hose back through the hole in it passes through in the side of the refueling bay. It will need to be free to spin for the next step.
Unscrew the existing hose from the pump.
Attach the new hose to the pump. It helps to have a second person to hold the hose and twist it as you attach it to the pump.
Feed the hose through the hole in the side of the filling station.
Attach the nozzle to the new hose.
Start it up and check for leaks.
Keep in mind that there is about 1' of hose between the pump and where it sits in the filling station. That means the 6' hose the factory installs is really only about 5' outside the refueling station. The 14' hose reaches clear around the back of the trailer. That's MUCH more useful.
I then took the lock from my old cargo door and put it on the new one. Once again, everything is keyed the same.
So, that was a ton of projects over the last three days, really over the last week,. Everything I have done has either made things more useful, added new capabilities, or enhanced safety. It was worth it. Now, I can work on the Ham Radio antennas when we get the money together for that. In the meantime, we are ready to go on a trip.
We are starting the first day of a 9-night trip with the trailer. It turned out to be a real adventure.
I worked a half day for my employer, and nothing came up while I was working. I got a lot of cleanup work done, which was a change of pace. I logged out of our systems at 11:00 and started to get ready to leave. Just as I was starting to prep for the trip, I got a call from work. Had to take care of that first, and we ended up behind schedule.
I weighed the truck early this morning and went straight back to the trailer. We then weighed right after hooking up. Turned out we were 60 pounds over the GVWR of the trailer, but under on all axle and tire weights on the truck and trailer, under all all hitch weights on the truck and trailer, under the GVWR on the truck, and under the GCVWR on the truck. That's not uncommon for folks that are full-timing, but I'll work on losing that 60 pounds.
Less than 50 miles into the trip something didn't feel right. The truck started pulling to the right. I switched to the TPIS display on the EVIC and the front passenger tire was down to 60 PSI from 80, and was dropping more as I watched. It was slow enough that I had enough time to pull off at the next exit in Orem, UT. There was a Discount Tire at the exit.
I parked where I could in their lot and the pressure was already down to 40. I went in and found that a replacement tire would be just shy of $275. Kind of stuck, I said go ahead, but then they said the wait was going to be over an hour. With the baby and my wife waiting in the truck, I asked if there was anything we could do to speed that up. The answer was "not really", even when I offered him an extra $20. I asked if it would speed things up if I got it all ready for them. "Maybe".
If I could have made it to a Big O Tires, it would have been covered under the road hazard warranty. Well, that's life.
By the time I got back out to the truck, the pressure in the tire was essentially zero.
I started the generator, charged up the compressor, and used the air jack to raise the tire for them (since we were still hooked up). Selecting a 20-ton jack was the right decision - it raised the tire with the truck hitched up to the trailer with no issue, and I didn't have to wear myself out. When I rotated the tire, it looked like a large screw head was embedded in the tire.
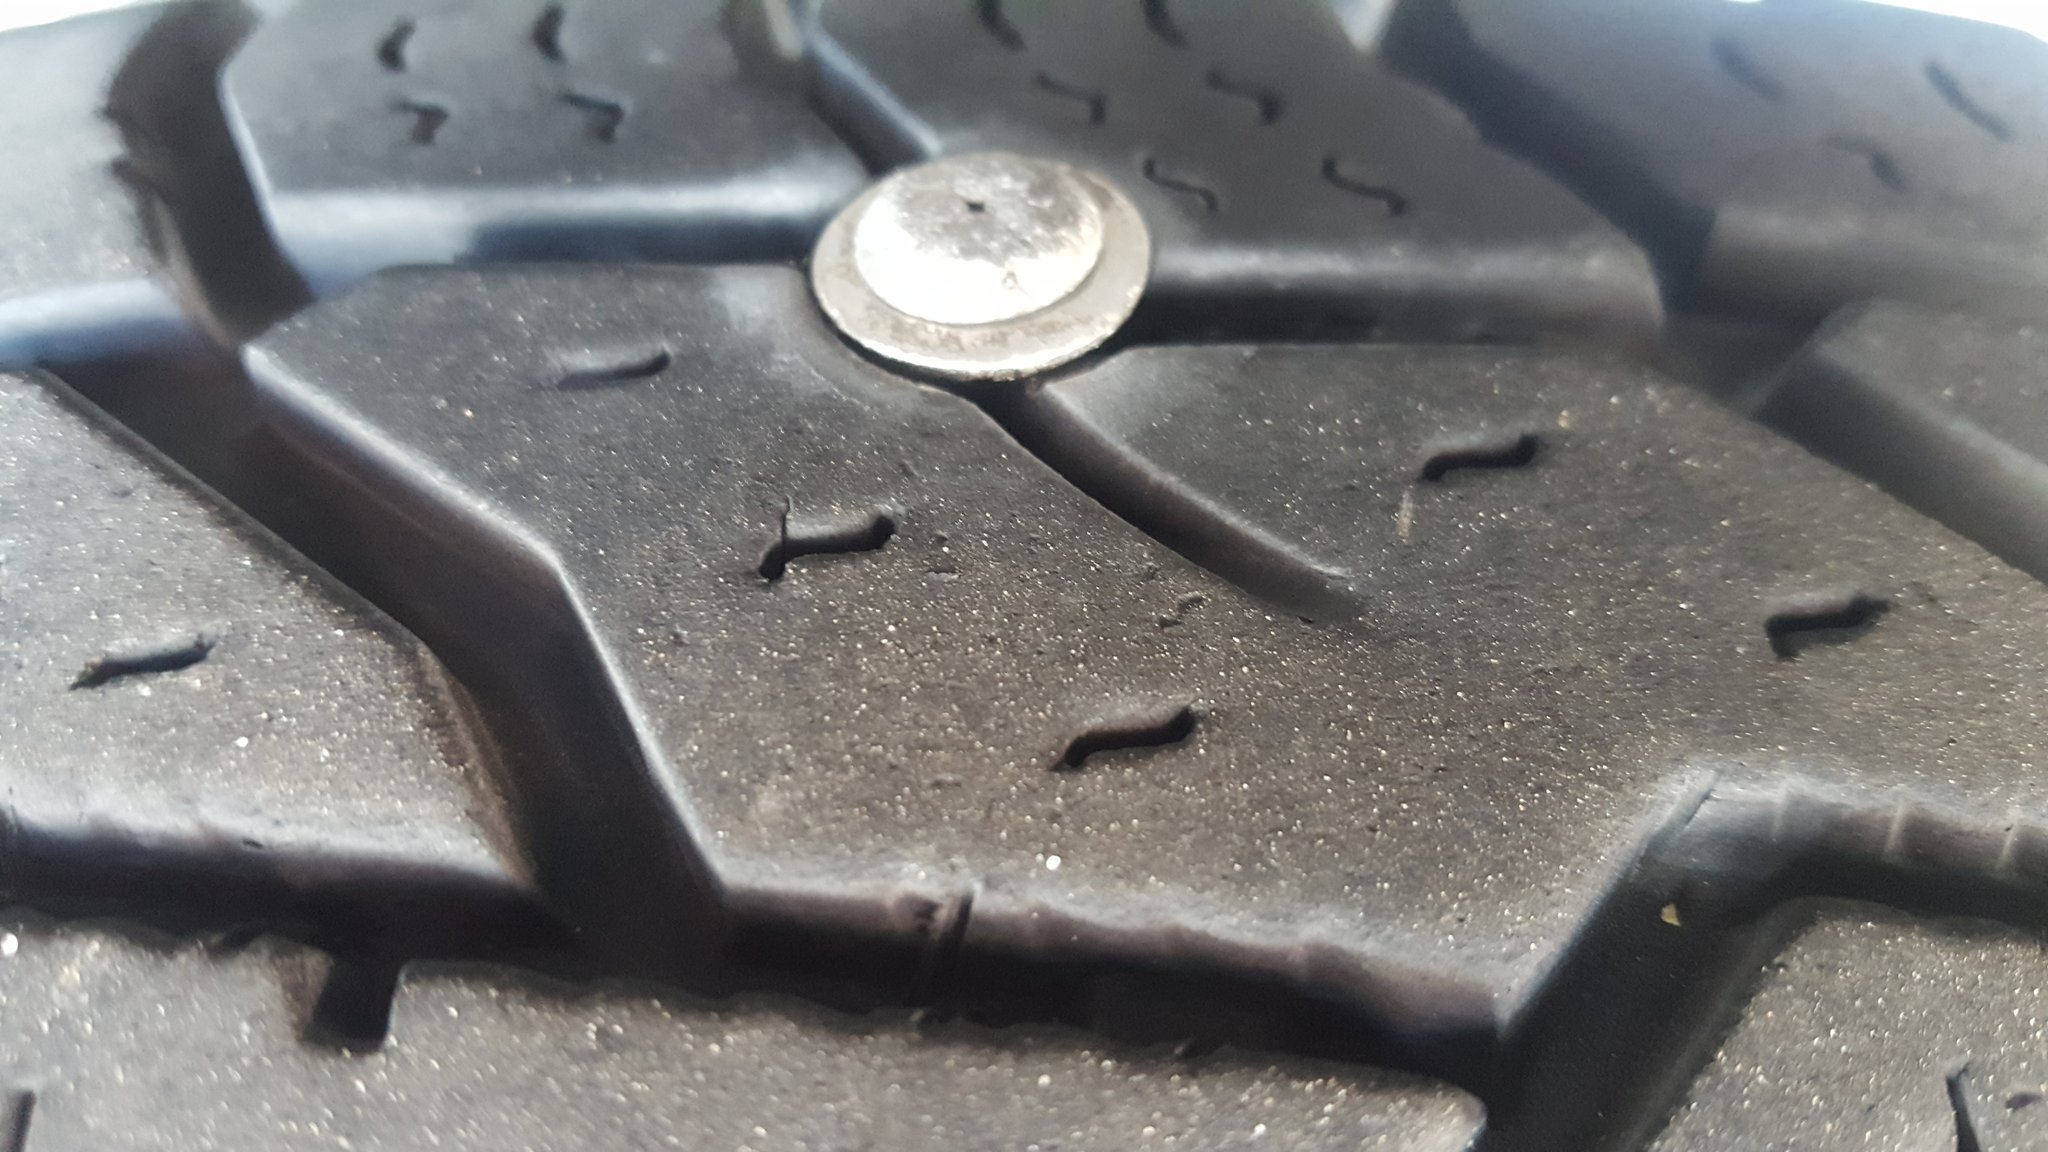
My neighbor had borrowed my impact socket for that size (22mm, why didn't I get it back?) so I set my air impact gun out and had it ready to go for them. Sometime later they came out, got the wheel off, and replaced the tire. They got the new tire installed and torqued down for me, I paid them a bunch of unexpected money, and we headed down the road.
When the TPIS started reading again, I found that they had only inflated it to 65PSI instead of 80 as needed for maximum towing. Well, my wife was getting very hungry, so I pulled off at the Pilot Flying J in Springville, UT a few miles down the road, and I filled the tire while she went in and got something to eat. That put us further behind schedule.
Things went well until a little before Beaver, UT. I got a check engine light, and a warning to "Service DEF System". We later got a "you have 150 miles until government regulations cripple your truck" message. We have a CTS engine monitor, and it showed a code of P207F.
Then the baby woke up and was hungry right as we hit Beaver, UT. I had already planned to stop there to re-fuel and clear the P207F error, so we stopped at the Pilot Flying J for a diaper change and to let her eat. That was yet another delay. Fortunately, we were towing our house, so feeding her was easy.
After refueling, I pulled off into the truck-stop as far to the back as I could so that our temporary stop didn't bother any working drivers. I used the CTS Monitor I installed in the truck (it doesn't have any tuner functions) to clear the code. The code and message didn't come back between Beaver and St. George.
One other issue came up, we had several instances of No Signal on various sensors on the Tireminder A1A that I've been testing. I think it was interference from something else, as all of the errors cleared quickly. I do feel better having a TPMS on the trailer.
We got to St. George about 7 hours after leaving our previous location. I had figured a 4 to 5 hour trip at most. It was getting late, but we were able to check in at the campground shortly before 8 PM. I'll write more about my impressions of the campground later. We drove into Hurricane, UT to get something to eat, and I'm going to bed.
So, we were staying at the St. George/Hurricane KOA for the last 3 nights. We paid for their largest style of pull-through sites. The site was still pretty short, and we could not park the truck on the site. The first night, I had the truck parked some distance away. The next day I was able to find a parking spot much closer to the site. Not really impressed, but not a total buzz kill.
The site itself was gravel with a small dirt/grass area. That was tolerable. The big issue was that the site was seriously unlevel. Our Lippert Level-Up system handled that in terms of keeping the trailer level, but all of the curb-side tires were completely off the ground, and the curb-side pistons were almost fully extended. Even worse, the site was so unlevel that I could not safely drop the rear ramp to deploy the ATV. We had planned to do some riding, but we will have to wait until we get to our destination today.
It also made getting into the trailer a real chore for my wife. The entry steps were very far off the ground. I need to get a step platform for situations like this. We had one that she used when she was pregnant, but it broke sometime after the baby was born. We didn't need it then, and we haven't had to replace it since.
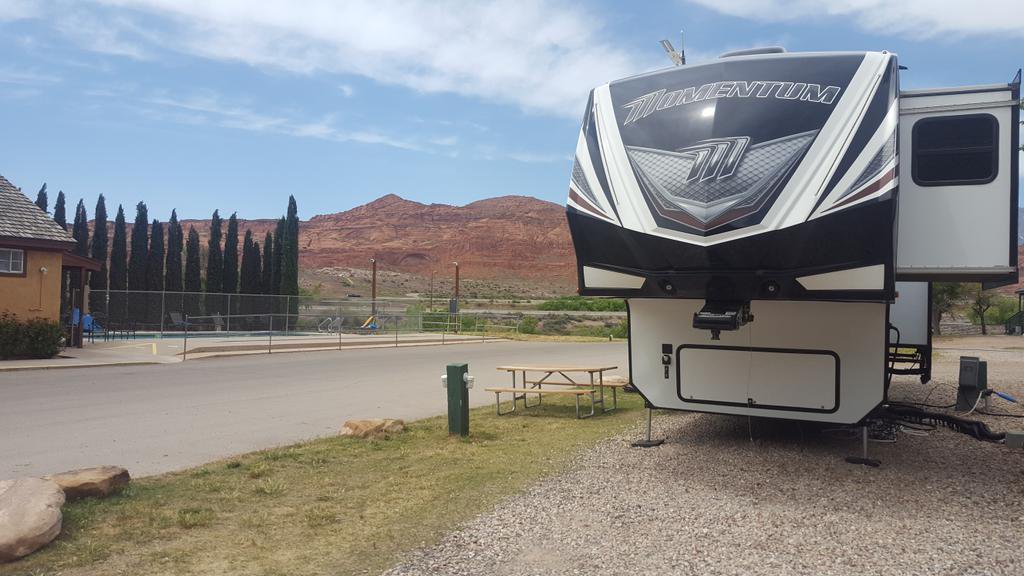
The campground also advertises free WiFi. There is a network there, and we could connect to it, but the network had no connection to the Internet We were able to connect to T-Mobile using our hotspot device USB-tethered through our WiFiRanger GoAC Router, so that was good. I was impressed to see that T-Mobile had great service in the area of the KOA.
All in all, the people in the office were very nice, but it's not my favorite KOA. The show stopper for me is how unlevel the sites are, and how short their largest sites are. I think I'll look at the other campgrounds in the St. George area on our next trip.
Today, we headed south to Las Vegas. We got a later start than we planned, but got a quick breakfast and re-fueled the truck by 10:15. I also found a gas station that it is big-rig friendly AND has not only diesel but also Ethanol-free gasoline! We will be stopping there on the way back to my work site at the end of our trip to top off the on-board fuel tank.
Check out time was 11:00 AM. I was able to get the trailer into travel configuration, hitched up, and ready to go in about 40 minutes start to finish (about 10:55 AM) . I'm sure I can get faster, but I prefer to take my time to make sure that I do it all the right way.
The first thing I noted when we were hitched up was that the new forward self-adjusting brakes are MUCH better after bedding-in on the trip. I was able to get the gain on the trailer brake controller at 5.0 and have the trailer brakes hold the truck in position. With the old brakes, that didn't happen until 9.5. I'll check them on the third leg of the trip and see if I can lower that even more. I think they bedded themselves even more on this leg of the trip.
We made a stop in Mesquite, NV at the WalMart there since we needed to kill some time as check-in at the Las Vegas campground wasn't until 13:00. The truck and trailer are 60 feet front-to-back when hitched, but they handle easily. It takes a little practice, but it's sure nice to have all of that living space inside, plus space for the RZR and some other things in the garage. The WalMart is easy to get in and out of, and has a big parking lot with lots of trucks and RVs usually found on the periphery. Some of the casinos have good parking areas too.
The truck towed perfectly between St. George and Las Vegas. There were no warnings or errors on any systems - no DEF issues or issues with the Tireminder A1A. Everything worked perfectly. A couple of 18-wheelers passed us (we hold 62 to 65 when towing) and there was no sway from them passing. There was a bit of a crosswind around Bunkerville, NV (Google it and this too) but it wasn't a real issue for the truck or trailer.
When we got to the campground in Las Vegas, check-in was fast, easy, and the folks at the campground were very friendly. The site was easy to level on, as large as advertised (enough for the trailer AND the truck), the cable TV had MUCH better quality than the KOA in St. George, and the weather was even better. The WiFi at the campground worked, although our T-Mobile hotspot USB-tethered to our WiFiRanger GoAC Router was faster.
The trailer didn't heat up much on the trip, and the main AC was able to hold the temperature at a comfortable level. So far, we are very impressed with the campground, even though the patio areas have no grass.
I have to mention that we love to watch the reactions our daughter has. On the trip, the view out the windows has changed every few days. I'm pretty sure she realizes that, but her crib and everything else inside are in the same places! I just wish we could understand everything she says, because I'm pretty sure that's what she was carrying on about this morning when she was looking out the window.
We went and got Round Table Pizza for a late lunch/early dinner. It's our favorite pizza, and they don't have any in Utah. We will spend the rest of the day looking around, and will drive by our old apartment.
I was also able to very easily drop the rear ramp, back the ATV out, and then re-fuel it from the filling station. I have Ethanol-free fuel in the generator and aux tanks, and the fuel pump station worked fine with the new 14-foot hose. I had previously drained the old fuel from the ATV. I need to top off the aux tank in the trailer with Ethanol-free fuel now that it's down to 1/4 tank. I'll do that when we head back "home". The ATV runs really well on the Ethanol-free fuel.
Today has been an adventure. As we drove around, we remembered all of the reasons we wanted to leave Las Vegas and get back to Utah full-time. We also learned that things are worse now than when we left. The last straw for us when we decided to leave Las Vegas was a stabbing just down the street, a shooting just up the street, and several random muggings on the street in front of our place.
The apartment we lived in had a vacant lot next to it, and at the time there were plenty of successful efforts to keep it secure. When we drove by yesterday, it seemed those efforts had been discontinued. There were a ton of homeless people living in there, and some had built "structures" into the wall that separated the lot from the apartment complex. Someone had mentioned that there were now holes in that wall (and people entering and leaving through some of them, and break-In's happening to vehicles in the parking lot), and I can see how that could happen. We don't miss it.
The WalMart we used all the time (when we needed to get something at WalMart, that is) now has Securitas security officers at the doors checking receipts and packages. They didn't need that when we lived here, so that was interesting to note. Apparently, even that area has gone downhill.
We checked the Camping World in Las Vegas to see if there was anything we could use on clearance. Not this trip. We did get some deals at the outlet malls. Neither one of us has bought new clothes since just after my wife had the baby, so it was time to update our wardrobes. We were able to do it pretty cheap.
It's also interesting trying to dine out with a 20-month-old. She threw a fit tonight at the buffet at Sam's Town and we ended up leaving before we were done. I don't know what her deal was. We totally love her, but we do miss being able to eat out more. There is only so much you can do to try to teach table manners to a 20-month-old.
I got the ATV out again and made sure the E-Track was all secure, and it was. I also took a few minutes to clean the garage. The trailer is in great shape now, and I'm excited to get to installing the Ham Radio antennas and some radios as soon as the money is available. We want to get back out and serving the community and SAR in an emergency communications role. I think we will be able to do that again next spring if things go as planned.
Here are some more photos from the KOA...
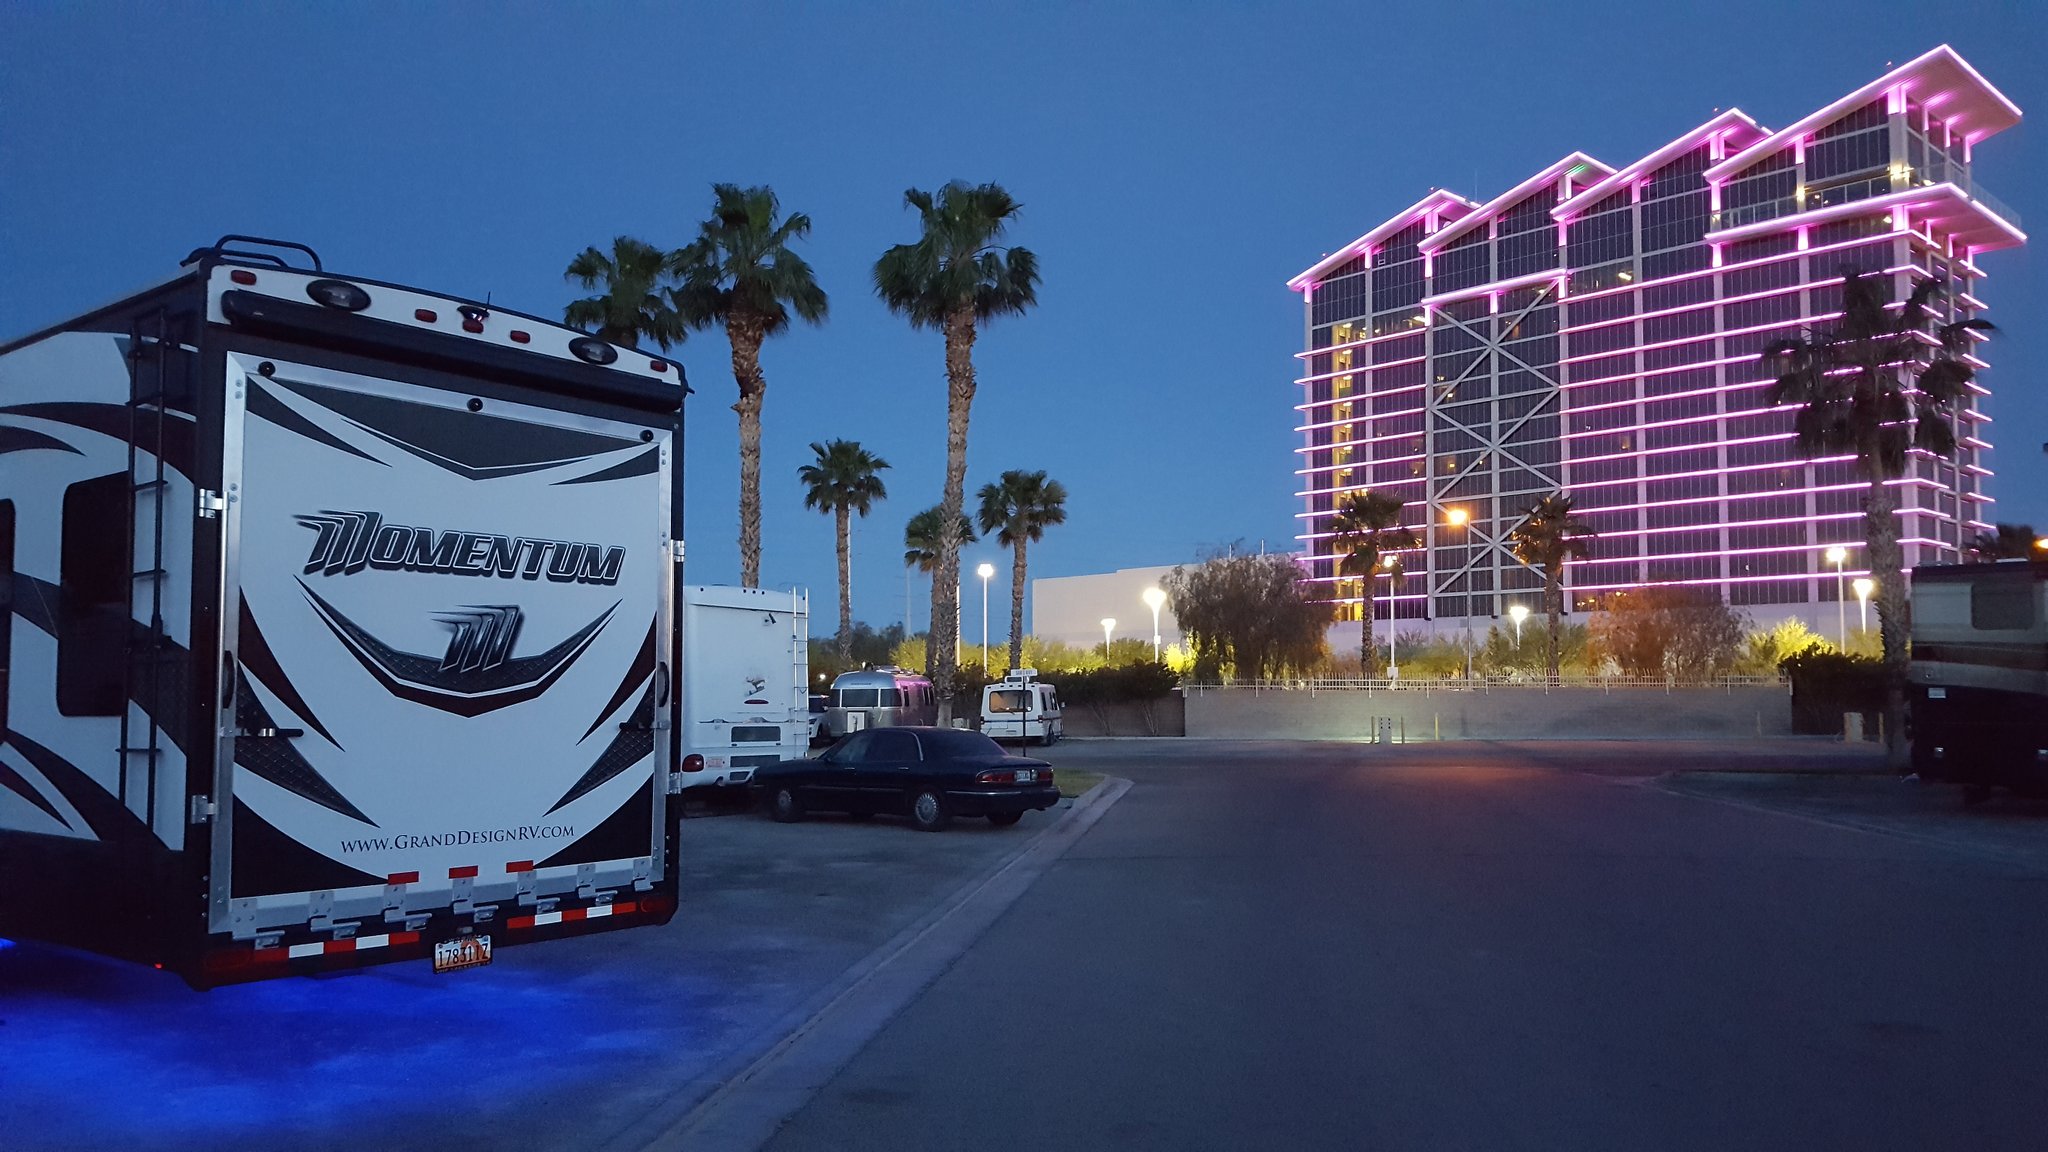
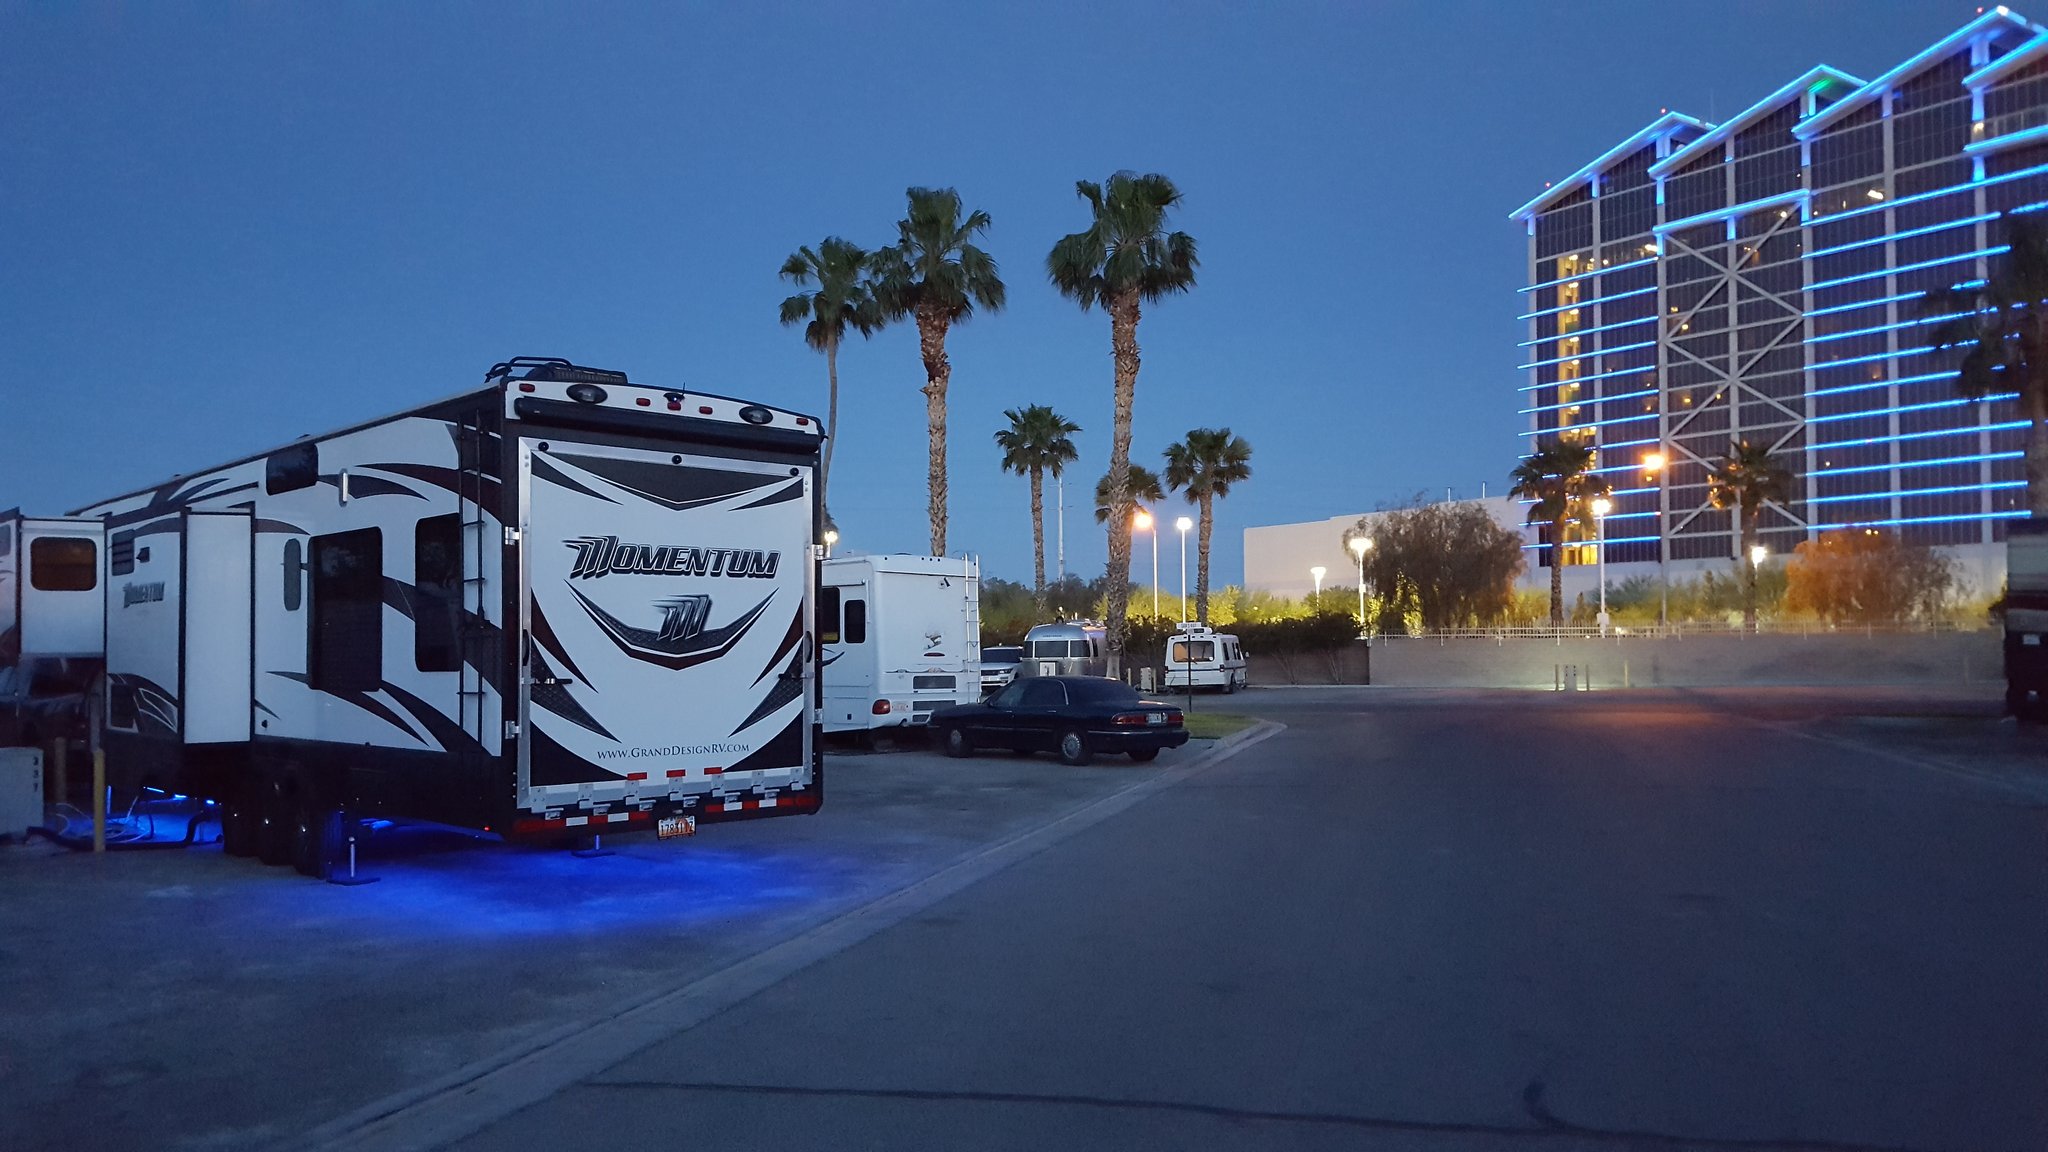

More to come.
Well, we had our first - and hopefully only - issue on the trip we returned from yesterday. One the last day of the trip, getting ready to head home. This trip to the St. George/Hurricane KOA, their WiFi worked (quite well, actually), and I discovered the secret to putting our trailer on Site 22 there. We took the ATV out, but not as much as we had planned because my wife was feeling crappy.
The even worse news, however, is that their KOA wasn't designed around long, tall rigs.
As I was leaving, I was unable to make a U-turn to get out of the facility. I had to drive around the perimeter of the park.
Well, where I planned to go was blocked by someone with their vehicle sticking out too far. As a result, I had to go to the next row to turn. In order to get to the next row, you have to go past a tree that has a curve in the road around it. The tree has been trimmed, to a certain height - something around 12'. We were taller than that, plus I wasn't in an optimal position because I had intended to turn left, not the right turn I was forced to make.
I caught the tree. A substantial branch caught on the TV antenna (which was down) and bent part of it. We were worried that it snagged the roof, but I couldn't see anything obvious. It didn't damage the siding.
We drove as far as Beaver without knowing what was damaged. We stopped, yet again, at the Pilot Flying J there because out daughter was once again hungry and so was my wife. I pulled into the same spot in the back so I was totally out of the way, got some Wendys for my wife and daughter, then got the Little Giant Ladder out (you need one of these!) and I checked out the damage.
The branch dragged along for some distance after it had bent then snapped forward. We ended up with one 1/2" hole, one about 1/4", and a number of others only a couple of millimeters across in the roof membrane. The small ones are right where the roof starts to curve down. Fortunately, I had needed some roof sealant for the WiFiRanger installation, so I had several extra tubes. It's Alpha Systems 1021 self-leveling sealant.
I got up on the ladder, got the material together on the 1/2" and 1/4" holes, and covered them with sealant. I then "painted" the others with sealant since they were so small but covered a substantial distance. I won't say it's the most beautiful repair, but they are covered, it will work, and back "home" they are expecting possible rain. I didn't want to get back there and have to deal with water damage or trying to fix it in the rain.
It turned out to be a good thing. It rained about 22:00 last night.
I noted on our last trip that there was no hole in the skirt of the trailer to insert the tool to lower the spare tire. They forgot that step on a few around the time ours was made.
In order to make the hole, I brought the slide-out all the way in. There is something over 1' of space in there between the skirt and the crank point when the slide out is in.
I was able to get an extension up there and used a marker to mark the right point on the skirt from the inside, then drilled it from the inside with a 2" hole saw. I painted the edge of the hole temporarily, and ordered a 2" rubber grommet on-line that will permanently protect it.
One of the things we wanted to improve was our water filtration. Our Momentum came with a filter installed that filters only the cold water to the faucets. It's located in the connection bay. The water to the water heater or to fill the tank is not filtered by that one.
We wanted to add another filter on the incoming water side.
I moved the factory filter down about an inch and changed that one to a MAXVOC-975 filter element.
I then installed a new filter canister - from The RV Water Filter Store - their B2103. It's a 9.75" canister with 3/4" fittings. https://www.rvwaterfilterstore.com/B2103.htm
I also required three 90-degree hose connections. I used Valterra A01-0020VP units. http://www.valterra.com/product/hose-saver-90-brass-lead-free-carded/?pcat_id=1226 I sourced these from a local RV parts place.
I also needed a very short fresh water hose. I used a Valterra W01-5048 from the same RV parts place. http://www.valterra.com/product/drinking-water-utility-hose-1-2-x-4-white/?pcat_id=1508
I connected the 90-degree fittings - one each to the input and output of the filter canister, and one to the factory water inlet. The short hose went between the canister outlet and the factory water inlet. Now the incoming water connects to the inlet of the canister, and all of the incoming water is filtered. I also don't have to worry about it freezing.
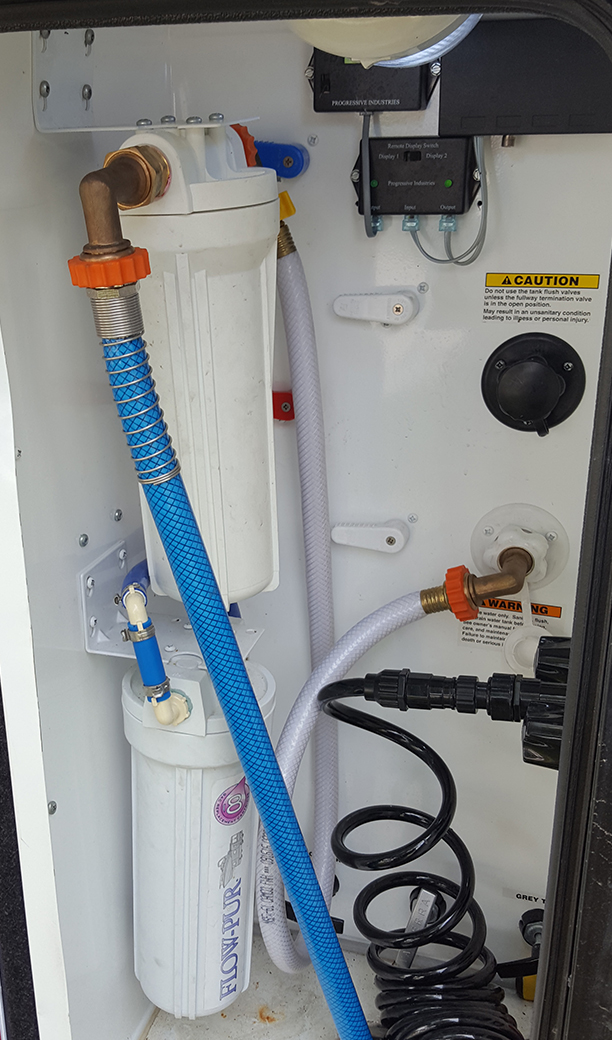
I used a MAXPB-975 filter element in this canister. These filter to .5 microns, is more focused on lead, and it covers everything including the water heater and the water storage tank.
We use a MAXVOC-975 in the factory canister. That also filters to .5 microns and is more focused on VOC's.
Between these, there is NO taste to our water, and everything stays cleaner.
We plan to swap out the MAXPB-975 every 3 months. The MAXVOC-975 in the secondary filter will be changed every 6. We might change that frequency, but for now I think it will work for us.
It's kind of like the Fuel filters in our Ram truck. The first one (the MAXPB-975 in this case) takes the brunt of everything and does most of the work. The MAXVOC-975 (which I replaced at 3 months the first time) didn't even look used when I changed it. I'm pretty sure it can go for 6 months with no issues.
We had to go out today so I could take my wife to the Dr. Getting in and out of the truck is a real process right now (I had Achilles tendon surgery earlier in the month and can't put any weight on my foot). I took a late lunch time so I could use it to take her to the Dr.
I noticed some interesting tracks in the snow when I got out of the trailer, and we shortly discovered that the hand truck was stolen last night. Apparently, some stupid son-of-a-**** decided that he needed it more than we do. Normally it's safely locked up in the truck, but I got it out just before my surgery so that my wife can use it to take the garbage to the garbage cans more easily.
Because the surgery was a little more expensive than originally planned, we don't have any extra money to replace it right now. It wasn't exactly cheap, but it's what we need to help us get things done - especially with my foot out of commission for the coming weeks.
https://www.homedepot.com/p/Milwauke...0137/203875537
Thank you for making our lives just a little more difficult right now, you b*****d.
They also took our daughters stroller, which was folded up under the trailer. What a wonderful place.
I slept VERY lightly last night. This was one of those mornings when having a foot that can't carry any weight was VERY inconvenient.
About 04:30 this morning I heard a car pull up, and I could hear footsteps outside our trailer. I was already getting out of bed and I heard someone "quietly" yell "something something bolt cutters". Shortly after there was a whole bunch of swearing. I yelled "Get out of here" as loud as I could while hitting the outside light switches, then called park security. Apparently they were already aware of them, he saw one of them trying to get into the storage shed on the lot we are renting (which I keep locked), and he hit him with pepper spray. You can smell it outside.
They haven't caught them yet, but are actively looking for them. I'll post more when it happens.
Update - 06:30
No word back from security yet, so I'm afraid they got away. They didn't get into the shed, and didn't apparently take anything else from us this morning (we still have our small $25.00 barbecue and a few other cheap items out).
I'm sure people will blame us for leaving the hand truck and stroller outside. My wife is 4' 9.5", so it's not easy for her to get bulkier / heavier things in and out of the back of the truck or the trailer. It's the best way for her to get the garbage from the trailer to the dumpsters since I can't walk yet. She did make efforts to conceal them under the slide-out on the trailer. Since I can't put any weight on the foot yet, it was the best compromise setup at the time. It's too bad people don't obey laws against theft.
For the future, when I can get around, I'm going to get some heavy chain to use to chain up anything we leave outside. The guy apparently had, or was yelling to a buddy about, bolt cutters, so I want to get something extra heavy. Of course, that will create more inconvenience for her. It's too bad people don't obey laws against theft.
Our neighbor came out and we talked for a bit. Apparently the thief took a couple of their bikes and a case of beer they had left outside. The thief did leave another bike which was not even theirs - is was most likely stolen from someone else, I suspect he ditched it this morning when security caught up to him.
UPDATE: They never physically caught him, but they got his bolt cutters and a bunch of other things he dropped after he got hit by the pepper spray. I'm hoping that after that, he doesn't return, and tells his buddies about the experience.
We had what I consider the second issue with actual Grand Design construction. The first was the bedroom slide-out leak.
NOTE: It turns out that the door was NOT built by Grand Design. They outsourced them from a company called Genesis Products (https://genesisproductsinc.com/)
This time, the bedroom door came apart.
My wife opened it in the afternoon and it literally fell apart while she was holding the door knob. The door is made up of a set of frosted glass panels, flat wood pieces, and some wood cross-pieces that hold everything together. It is factory part number 660266. When I got home, the pieces were still laying where they fell. There was no way to put it back together. I moved the mattress and put it on the wooden base to see if I could get it to lay flat and if there was any way to fix it.
It would take external brackets and screws to do anything, and even then, the existing wood is pretty thin. Doors like this really have to be put together well from the beginning. I'm afraid that the weight of the glass and moving down the road just isn't a good idea.
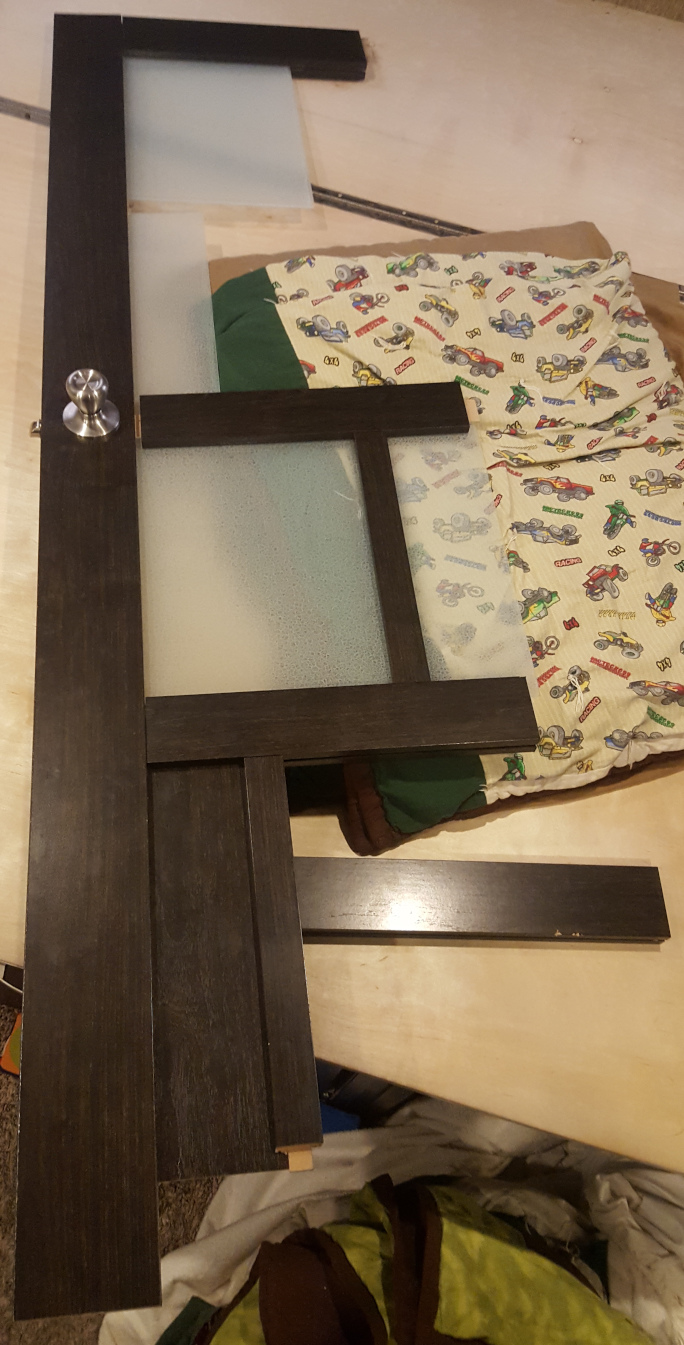
https://www.granddesignrv.com/owner-support/parts/detail/19118
The same door is used for the aft bathroom - between it and the main living area. NOTE: That one also failed in the same way in November, 2018.
We contacted our dealer (General RV, yay, NOT!) and found that it was going to cost almost $400 after shipping (about 2x what the door costs alone). With the amount of money we are looking at having to pay for our home base lot, we can't afford that right now.
The door is 72" x 24" x 1.25"
It turns out that the door between the aft bathroom and the garage is the same dimensions, but one solid piece of wood. It's factory part 660265.
https://www.granddesignrv.com/owner-support/parts/detail/19117
We took that door from the aft bathroom and moved it to the bedroom. In all honesty, we like it better without the glass in it.
At some point, when we can afford it, I'll get a replacement 660265 to put back between the back bathroom and the garage.
In case you are interested, the part number for the all-glass door between the garage and living area is 660077.
Just like everyone else in the RV industry, Grand Design RV gets their furniture from Lippert. Many folks have reported that the sofa system starts to fall apart in a very short time.
We have been living in ours full-time since June of 2015, and had some of the stitching start to fall apart on them within the first year. Three years in, we are seeing what some others have reported - the "leather" on the sofa beginning to flake off. It's pretty bad in a couple of spots, and we are finding little pieces in various places. Here are a few photos.
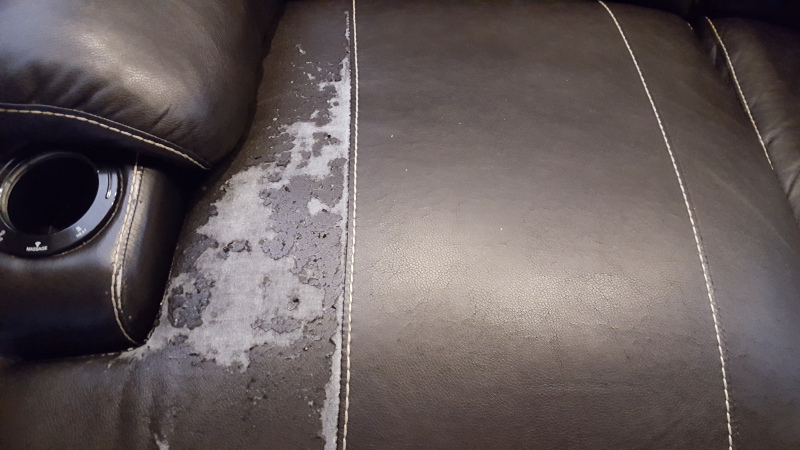
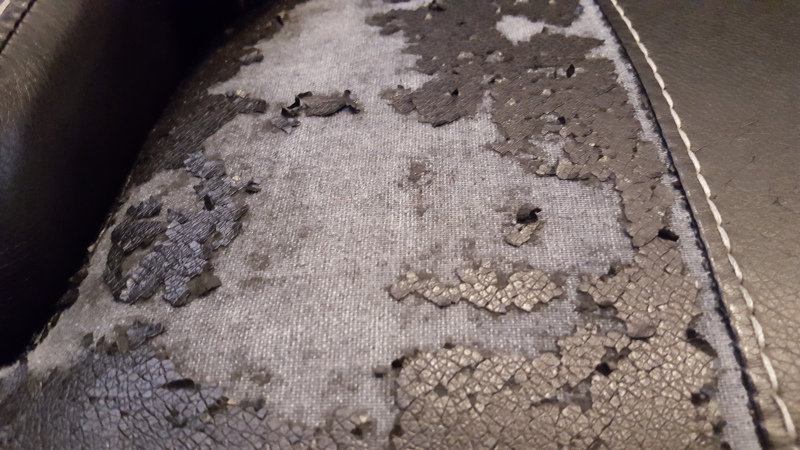
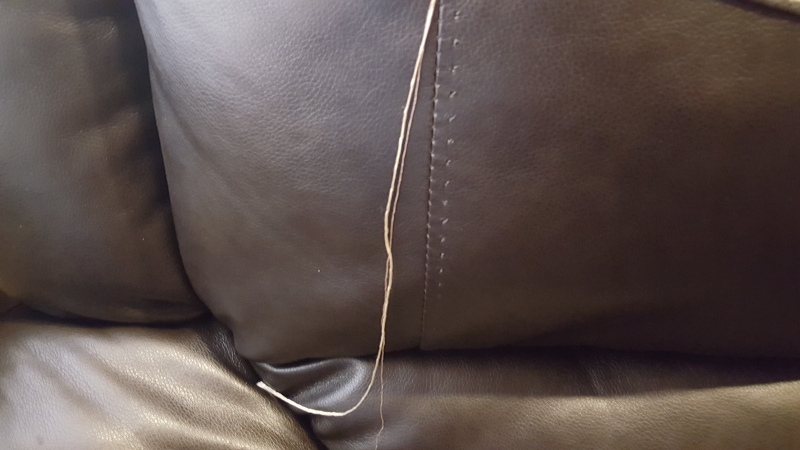
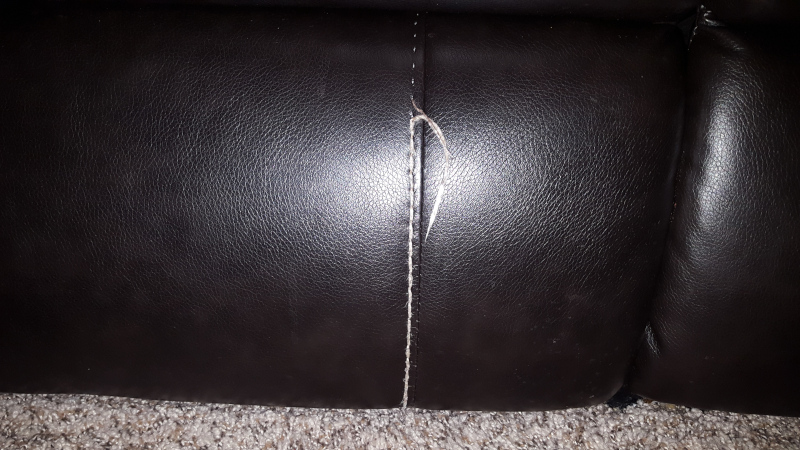
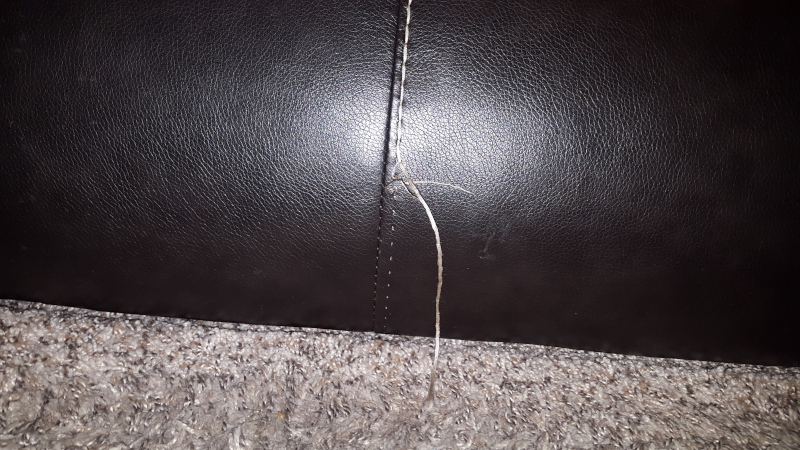
You would hope that it would last a little longer, and it should. This is, sadly, pretty common.
Some folks say it's because RVs aren't meant for full-time living. Grand Design RV specifically mentions extended living, and their warranty applies even when full-timing. The problem appears to be that these Lippert furnishings aren't up to the same standard. They are, of course, way out of warranty.
We have been running the Pinnacle Washing Machine and Dryer since 2015. Less than three years later, both the Washing Machine and the Dryer suffered fatal failures. The dryer (model 18-850) went first, followed only a few months later by the washing machine (model 18-820). Both were BER (Beyond Economical Repair). They worked really well when they worked, but when they failed, they failed fast and completely. Getting parts or service was impractical. The manufacturer wasn't really any help with information.
I could get a buzzing sound out of the dryer, but that was it.
I did a ton of research on replacements, and we opted to replace them with Ariston (under the Splendide name from Westland Sales). I saw them when I was in Europe many years ago and they were a good brand then, Overall people seem to be pretty happy with them now.
We ordered them from RV and Auto Parts (https://www.rvautoparts.com/).
The dryer shipped very quickly, while there was an issue with the seller on the washing machine. They did eventually get it to us, but far later than promised. Phone calls are the best way to reach them, I found out that they don't seem to respond to e-mail messages (I sent several and received NO response), which was unfortunate from an on-line reseller. Overall, though, they did come through.
The dryer failed in January, and the washing machine in May. Getting the dryer installed when I could not use my left foot was not easy, but the guys at the UPS store we had it shipped to were really good about helping to load it in the truck, and my wife and I were able to get it out of the truck and inside the trailer after we had replaced the stolen hand truck
The dryer doesn't weigh as much as the washing machine, but my foot was in reasonably good shape when we had to get the washing machine in. Again, I used the hand truck and brought it up the rear ramp with the ATV out. That made getting it to the stairs to the bedroom easy.
From there I used three movers blankets. I put one over the stairs and leaned it over on top of that. It went up the stairs just like they were a ramp. The other two movers blankets were at the top of the stairs. I tipped it back upright onto those, and then pulled on them to get it into the bedroom, and walked it to the final position. I removed the shipping bars just before putting it in the closet.
Both installed easily, and so far, perform at least as well as the Pinnacle units did. The Ariston dryer reverses the tumble direction every two minutes, which I think works even better.
We will see how long these last. I'll keep you updated.
I'm currently looking for new employment. The company I work for has been promising work-from-home/working remotely since before I started there, over 4 years ago. A couple of weeks ago they effectively announced to a limited group of us that it's never going to happen.
We now have a permanently deeded home-base lot in the southern part of the state, but we can't use it except when I can take vacation time. We are forced to spend about $700/month to rent a lot in the Salt Lake area, while making payments on the place down south.
I've been in touch with other companies and have one standing offer already - it's just not quite what I want. It would be working for an Avaya reseller doing remote support, and I prefer to work when I'm dedicated to the systems for that company only. I've had a few other contacts and a phone interview, so I'm hopeful something is coming soon.
I did finally get to use some of my vacation time, so we went down to our permanent RV lot and spent the next week there. It was a lot of fun, and we even made a day trip to Las Vegas to pickup a Round Table Pizza. It was a great trip, and we really enjoy being down there so much more than in the Salt Lake area. As soon as I can get a WFH position, we will be there, and will be able to start taking frequent trips from that location.
I also made a discovery about the Tireminder A1A that we are using. I originally mounted the signal repeater on the back wall of the front generator compartment. We would sometimes get a signal loss from there.
I moved it to the main living area, on top of the hutch with the main TV. We didn't have any signal losses this time. It worked perfectly. The height and better proximity to the rear tire sensors makes all the difference.
We made another trip to our home-base for the last few days. On the way back to Salt Lake, something interesting happened with the Tireminder A1A.
Around Scipio on I-15 northbound, we passed through a major thunderstorm. The ambient temperature dropped from about 93F to 63F in a very short distance. The storm was moving south and we were traveling north, so it was very fast. When we got out of the rain, the A1A gave us leak warnings on all 6 of the tires.
I had a really good idea of what was going on, but I pulled over anyway, physically checked all of the tires, and then went back to to the monitor. The pressures never went below 80 PSI, but they had decreased from what they had been when the tires were hot. The pressure dropped so fast because the tires cooled off so fast. The monitor perceived it as a leak. It makes perfect sense. I'd prefer to be safe versus sorry. It's really a great system and we are very happy with it.
We also discovered that we may have to replace the MAXPB-975 filter on the primary water filter on a much more frequent basis. It filters at .5 microns, and we have now had two incidents were our water pressure dropped dramatically (to a trickle), very suddenly (over about 1 minute). When I opened up the canister, the filter weighed a ton compared to when new, and it had clearly caught a bunch of rust. Compare it to the MAXVOC-975 (blue end caps) which appears new and is in the system after the MAXPB-975. The MAXPB-975 (with the black end caps) was just as white when it was new. These filters were the same age - about 2 months old.

We are starting up a new website (RVHOME.SCHOOL) now that the stalker issue seems to be resolved. We shut down RVGunner and MomentumGunner but will keep the same content.
We are going to keep a sharp eye out. For those of you that don't know the story, it's too long and way too involved to relate here. We had an issue with a stalker that turned out not to be related to the thefts we had earlier this year - but were originally suspected to be related.
We lost a few photos from the old site. The backup copy failed. They are mostly from when we had to deal with the greased brakes. I've recovered almost everything else.
After our last trip, I've grown a bit more tired of the bayonet-style sewer hoses. The Valterra Dominator and Viper hoses are very good, but there are some inherent problems with the way they connect. I'm looking into alternative products now. I hope to have some reviews up soon. We have had folks ask about the Waste Master system. Someone else in the place where our deeded space is had two of them (an original and a replacement) come apart in the heat. I contacted the manufacturer and they gave me an explanation that makes perfect sense (relating to a manufacturing defect at the time the hoses were made), and assured that it isn't going to happen again. I'm working with them to see if we might be able to test a system in the same conditions.
I've also had a few ask about what faucet we used to replace the factory kitchen faucet that had a really low water flow through it. We got one from Ikea. https://www.ikea.com/us/en/catalog/products/60305951/
I did a little preventative maintenance today. We have started to use the furnace for a bit in the mornings, but are still using the air conditioning in the afternoons.
You may remember that a while back, in the winter, the furnace shut down one night. It was about 20F outside, about 2:00AM, and I noticed that the trailer was getting pretty cold inside. It turned out that the Limit Switch in the Suburban Furnace had failed. They have a coil of wire inside that breaks a connection if they get too hot - they shut off the furnace. According to a tech I spoke with, they wear out after some random number of heating and cooling cycles - the coil breaks from the flexing. If you are a full-timer, you can expect them to last for a couple to three years before they break.
The part number is 232504. They cost about $7 each. I bought a number of them when I bought the replacement for the last one, and I plan to replace them every 2 years as a preventative measure.
The most common symptom is that the furnace starts the blower motor, then shuts off after about 30 seconds.
There are a couple of Phillips-head screws on the back of the furnace - where the output ducting is connected. Pop them off and the back will open up. Right under this you will see the limit switch.
Remove two more Phillips screws and two slide-on wire connectors. The new one goes back in the same way.
It was a lot easier to do this on a 75F day when I had plenty of light and wasn't freezing to death working on it. In a couple of years I'll replace this one with another new one. It's $3.50/year ($7 every two years) to hopefully avoid another 2AM furnace shutdown.
It's worth mentioning that there is another part that will cause a similar symptom if it fails. It's called a Sail Switch, and it detects airflow when the blower motor starts. The part number for that one is 232261. I bought a couple of spares for that one. It is reached by opening the part of the furnace on the outside of the trailer. It does not fail as often as the limit switch. When it does, it's usually a dust bunny blocking it.
I'll install the cold weather gear if we are still here when the temperatures drop to freezing. We are hoping to be in Southern Utah by that point.
On the truck side, we are thinking about getting a fuel transfer tank. We have hesitated to do so since it means that the ATV will no longer fit in the bed of the truck. Since we have the toy hauler for long distances and the ATV is street-legal in any place that offer reciprocity with Utah, we are thinking it may be more advantageous to have the ability to more easily get fuel. When hooked up to the trailer, we tend to use truck stops. We also use Ethanol-free fuel in the ATV and both the generator and pump tanks in the RV. Getting the trailer into stations that have it isn't as easy.
We'd like to be able to carry extra diesel and have the ability to get Ethanol-free gasoline when we find it in stations that may not be convenient for the trailer. Having a pump tank or two in the truck would be great.
I'm looking into options for that now, but the purchase will have to wait at least until we get the back bathroom door replaced, and we have the second loan on the permanent site paid off.
First snow of the year - YAY not! I was hoping to be on our permanent lot by now, but things are going slow finding a new job. I'd rent a 420# propane cylinder from a local supplier up here to save some money, but I don't want to get one and then find out that a work-from-home job came up and that we can move to southern Utah after all. It would eliminate any potential savings, and depending on placement, it might make it impossible to move the trailer until the cylinder was drained down a bit.
I did get our Reflectix put up in all of the windows, which makes a big difference.
Today was a day from hell. We noticed that the door between the aft bathroom and the living area is starting to sag. I think this is what happened to the bedroom door before it fell apart on us back on 4-April-2018. This door is identical, with the same glass panels in it. I don't know if this is happening to other owners, or if we are just lucky. We want to buy two replacement 660265 doors (the plain ones without the glass panels) now, but the shipping on them is as much as the part itself and we will be about $800 for the two. I need to find a better option for getting them.
Unfortunately, driving to the factory isn't an option right now.
We also had the glass on the Suburban SRNA3LBSE stove top cover shatter while cooking. It's safety glass, so there weren't any really sharp pieces, but a billion little round ones. I'm trying to see if I can find a metal replacement, which would be much better anyway with a 3-year-old around. My wife barely managed to keep her from breaking the big glass door between the living area and garage earlier today.
I did get a lead on a work-remote Avaya Systems Administrator position, and I'm hoping that comes to fruition soon. They want someone that knows Orchestration Designer, and I have a LOT of experience in it. I've written entire call centers from the ground-up, and done some pretty specialized stuff with ZIP code routing of calls. Yes, I know you'd normally use Area Codes and do it based on the caller-ID, but this call center is WEIRD.
The former director didn't want to be like any other call center. He wanted clients to always have a dedicated agent, and they are decided based on their ZIP code. Each agent also has their own voice mailbox, and if the agent is busy the caller is offered the option to hold for the agent, leave a message for the agent, or speak to another member of the agents team. If all of the team members are busy, they are offered options to hold for the next agent on the team or leave a message for the team. I also have scripts to take a ZIP code and route the call to the right agent or team. The programming to accomplish all of that makes the call center LOOK larger than even a Teleperformance or a Convergys (the biggest ones in the USA). We have more CDN's, skillsets and scripts than any system I have seen at either of those companies - but far fewer agents.
Each agent has their own CDN, their own voice-mailbox (in a separate Modular Messaging system since the AACC does not have enough built-in mailboxes), and their own skillset for their own calls. They also have a team skillset for team calls, a VDN with a variable referencing a vector in the PBX to allow for calls to be transferred to their voice-mailbox directly without hearing ringing, a CDN for their team, a voice-mailbox for their team, a VDN for the team mailbox, another skillset for the team voice-mailbox, and several other settings in some very long scripts to make it work. We also intercept incoming calls at the outside trunk to the agent DID (each agent has a DID too!) and re-route them to the agent CDN as they come into the PBX, as well as allowing callers to enter either the agent extension or their CDN in a menu on a different TFN, and cross-referencing to get the call to them.
Of course, this creates a lot of problems on the back end, both when agents quit and when agents switch to other teams or job functions. There is no draagging-and-dropping of agents in this call center.
There are also a number of unintended consequences from the original system vendor (before they hired me) not planning for the growth the company has encountered. The system should have gone in with a 5-digit diaplan at the minimum, with specific ranges for agents, stations, etc. None of that was planned out for as big as the organization has become - and they still have a comparatively small number of agents. Fixing all of that, with the mandate that stationary, business cards, and other literature can not change is yet another story.
I enjoy the work, but being up in SLC and renting a space there while paying the loans on our permanent lot in St. George just isn't working out. Things are just a little too tight, and any extra expenses end up being a major issue.
I have standing offers from two Avaya dealers, but I really don't want to go that route. I prefer to work for one company where I can really dedicate my time and attention and try to do everything right the first time.
I've also had a bunch of people ask about the process of finding a full-time lot and how to finance one. I get that question a lot from folks that are perpetual renters. I wanted to cover the process as we found it, and include some of the details on the challenges of even finding a lot, and then how to finance it once you do. Click here to read more.
Happy Thanksgiving!
Sometimes you wonder about your decisions, and in hindsight they turn out to be really good ones. When it rains, it pours.
A few weeks back the microwave started making some odd noises, but we later found that's only when using that for an extended time (about 10 minutes). We have been watching it, but it seems to be holding up OK for now.
We decided to do a ham instead of a turkey for Thanksgiving this year. We got one that's fully cooked, and were going to heat and glaze it in our Suburban SRNA3L oven - the same one that the glass cover shattered on in our last post. Well, it looks like the ham will have to be microwaved tomorrow, and we can forget about the rolls and cookies.
Our oven failed this evening while getting ready to make pumpkin chocolate-chip cookies. It started then failed, and now I can't get the pilot to stay lit. Gas pressure is fine, and the thermocouple is positioned correctly. I even cleaned the surface on it. According to the service manual it's either the thermocouple or the valve on the manifold. The valve has a small electromagnet inside that is triggered by the thermocouple, and the electromagnet actuates the supply valve.
I think it's the electromagnet in the valve on the manifold. If I tap it just right it works for a minute or so and fails again. It could be the thermocouple (I'd check it but my voltmeter battery just died too and I don't feel like going out to get one when I can't get a part until next week anyway), but the tapping on the valve kind of puts that off. The sad part is that the valve isn't available as a separate part, so we will have to save up to replace the entire manifold which includes all of the supply valves.
You need to check very carefully when looking at Suburban parts. In the case of the manifold, they have a number of different part numbers based on manufacture date and other factors. In our case, the manifold is about $135 on-line I'll also check State Trailer Supply in Salt Lake City when they open next week to see if they have one and what their price is. We use the oven a lot, and it's really inconvenient to have it fail the day before Thanksgiving.
Keep in mind that this would be much easier to afford if my employer would allow me to work from home.
Thanksgiving went very well, except for the oven not working. We were able to microwave individual slices of ham, so it worked out. We were together and healthy, and that's what really counted.
Our daughter said she loved the "Thanksgiving food, it's really good!", so it was a hit.
One of my favorite dishes are sweet potatoes. Note that I use real sweet potatoes, not yams. Yams are more of an orange color, while sweet potatoes are more white/yellow. The recipe is REALLY simple, and you need two pots for cooking this on the stove-top.
Get about 6 to 8 good-sized sweet potatoes (not the very fattest, they can be a bit hard), peel them, put them in a large pot with boiling water. It helps to cut larger pieces in half to cook faster. Bring them to a boil until they are soft to the fork.
Just before they are done, in another small pot, melt 3 or 4 sticks of butter. I prefer four but you can get by with three.
Drain the potatoes.
Add one 32oz package of Pure Cane Dark Brown sugar to the melted butter. When it's fully combined with the butter, pour it over the potatoes, and mix well.
I did NOT say anything about this being low calorie!
Because the sweet potatoes are very fibrous, this part of the meal is VERY filling but so EXTREMELY satisfying. We like it much better than doing candied yams with marshmallow on top. The cool thing is that the dish gets even better the next day. The butter soaks into the sweet potatoes and carries some of the brown sugar with it, They are amazing.
My wife is getting a present or two this year and our daughter is getting plenty. I got one of her presents ordered this afternoon, a Poo Emojii Pillow. She thinks that Emojii is soooo funny, so we got her a pillow shaped like it for one of her presents. She will love it.
I found out about a sale today that I REALLY wish we could take advantage of.
TransferFlow is offering a 20% discount right now. That would cover all of the shipping plus some on the tank we'd like to get. If you go to their site (https://www.transferflow.com/) and enter Promo Code TFBF at checkout, you get the 20%. That's a really good deal. Everyone I know with their tanks love them. We'd love to get the 50/50 split model 0800113244 or the 50/50 split 080BL13244 (https://www.transferflow.com/shop/product/0800113244#080BL13244) with the sprayed-on bedliner which is supposed to last forever. It would be perfect for re-fueling the truck and the ATV, even the trailer generator or pump tanks when boondocking.
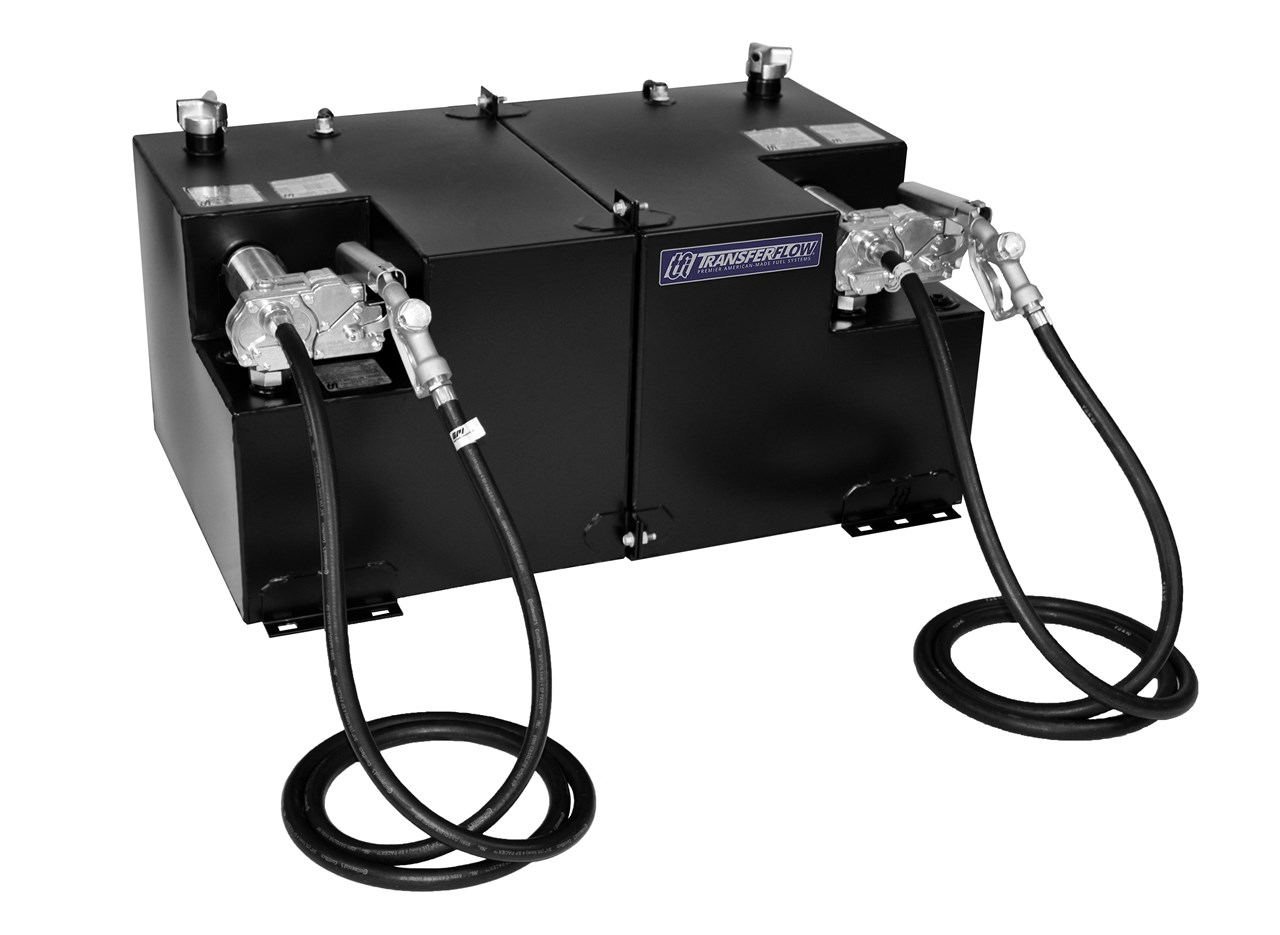
Keep diesel in the driver-side, and ethanol-free in the passenger side.
The best way to use this is to re-fuel your truck from this first, then fill this back up. It keeps the diesel fuel in both of your tanks as fresh as possible.
We have a couple of stations both at home and in SLC that have VERY inexpensive ethanol-free fuel, but they are also VERY inconvenient to get the trailer into. This would make it much easier to get that cheap fuel and take it to the trailer or the ATV to fuel it up. While the ATV is street-legal on everything except the freeway, getting to one of these stations without using the freeway requires some creativity.
I figure I'll post this deal here in case anyone else can take advantage of it. We just can't do it right now.
I also took some time looking at RV oven/stove options in the event we needed to replace the oven. I found more glass that fell inside the unit last night, and I'm a little concerned about missing something and having smaller pieces explode into even smaller shards inside after fixing it. We aren't fond of the idea of eating glass.
There is a "chimney" in the back of the oven that goes up to the back of the stove-top. Some of the shattered glass fell in there, and I think there may be some stuck inside. We are weighing options.
I did find a good deal at Camping World on their black Friday deals on a Suburban SRNA3LBBEZ for under $500 shipped. That one comes with the nicer grate - other than that it's a direct drop-in replacement for what we have. It would eliminate the worry about all of the broken glass, but it costs more than just replacing the manifold.
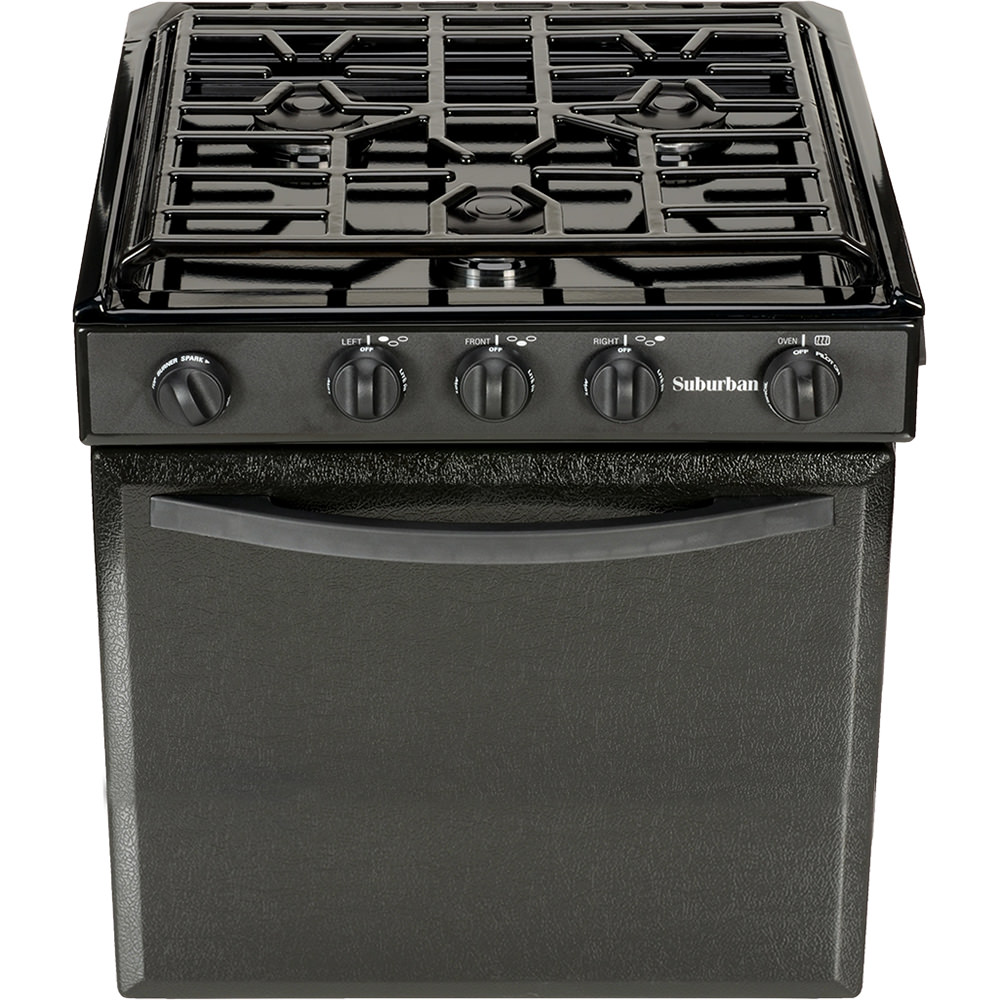
It's something to consider, even though it's a bigger expense to do it that way.
Well, we decided to replace the entire range unit after all. I figured out a way to pay for it over a few months without paying any interest.
We've had intermittent issues lighting one of the burners on the stove-top, and I discovered why in the process of cleaning up the stove. The piezo igniter has a broken connector. It's not possible to replace just the connector, so we'd need to replace the igniter as well. To just fix everything to bring it up to 100% so far would be about $200 in parts not including a replacement top.
Then, as we were cleaning the oven, a WHOLE bunch of glass fell into it from the chimney, and we thought we had everything. Since I can't prove what's in there, we just want to get it replaced. It really hurts, but the sale at Camping World saved us about $100 over anywhere else for a delivered unit - it ended up being under $500 even after shipping and sales tax. Hopefully we will see it before Christmas (they drop ship directly from Suburban) so we can make cookies and do some other baking. Eventually we need to get replacements for the two interior doors that have broken in the trailer, but this is the higher priority and was less expensive. We will be finding a metal cover for it later.
The other advantage of replacing the unit is that we get the nicer grate, so pots should move around easier on the stove-top. My wife has had a couple of times when a small pot tilted and almost spilled when one end was able to drop through the wire grate. All of this said "just do it, make it right, and get it done". It does have a black door instead of the stainless steel we have now, but we think it will look fine.
It looks like the stove is drop-shipping from Suburban, so we are still waiting on that. They haven't updated the shipping details on the Camping World site.
I did get a call from Gentry McConnell at Grand Design today when I let them know about the doors that fell apart. He was really nice, just like everyone else I've ever spoken with there.
It turns out that those doors are NOT made by Grand Design, but by an outfit called Genesis Products. I did let GD know about the issue, and they will be looking for any other reports. We are far enough out of warranty that they could not give us any discount of the replacement doors or anything.
I finally got in touch with Genesis Products via their Facebook page. It turns out they aren't so easy to contact. I wanted to contact George Tierce, their VP of Continuous Improvement, but I'm not sure that did anything.
I just thought of something - if the 1.25" x 24" x 72" door size is a standard in the RV industry, we might be able to find a suitable door from another make closer to home. We'd prefer to get a simple solid "slab" door so we don't have to worry about it falling apart in the future. I just don't think I trust anything built like that anymore.
I received a contact back from Genesis Products via Facebook this afternoon. It stated "We have our customer service team working on a possible solution for your issue. Could you please send us your phone number or email address?"
I let them know how to contact us. Hopefully they can help us out.
I also had to deal with some 3-year-old mischief.
Our trailer has a Greystone F2611E Electric Fireplace installed in the main living area. It does add some ambiance, and it has an electric heating element and blower motor to add some supplemental heat to the living area if needed. It's supposed to get down to about 20F in the next few nights, so we may need it.
There are some slots in front where the heat outlet is. A certain little 3-year-old discovered that tiny pieces of paper could be dropped in there. They would go down to the inside and landed on the fake logs. She thought it was great!
I wanted to make sure they were out of there and that nothing was lodged in the heating element area before we had to use it. I had to remove the fireplace from the opening. The facade lifts up on both sides, and exposes the 4 screws (two on each side) that hold it in. When you pull it out, it will need to pivot with the left side coming out first so the cord on the right side can clear the opening.
I then had to figure out how to open it. You can remove the back by taking off three screws on the top, three on the bottom, and two on each side. Here is the inside. The blower motor is the silver part on the top in the center.
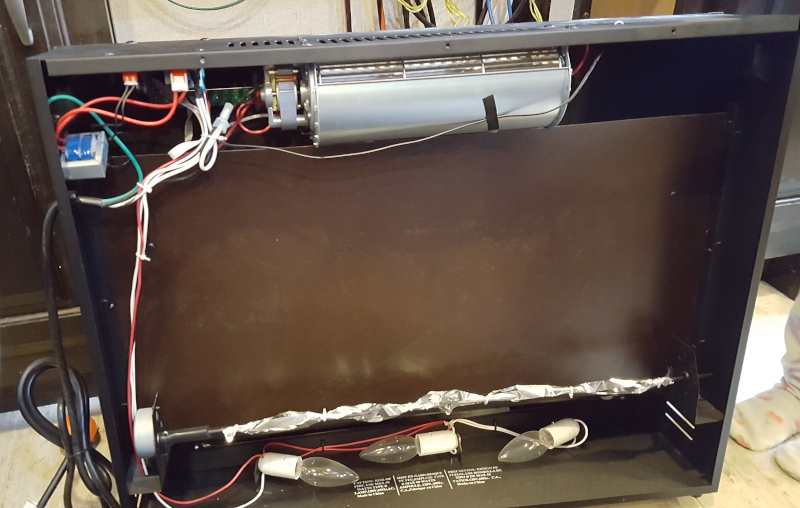
There is a small opening on the right side at the top where I could fish a small hose from a small shop vac down to the inside front to get the paper out. It *only* took about 5 minutes to get all of them.
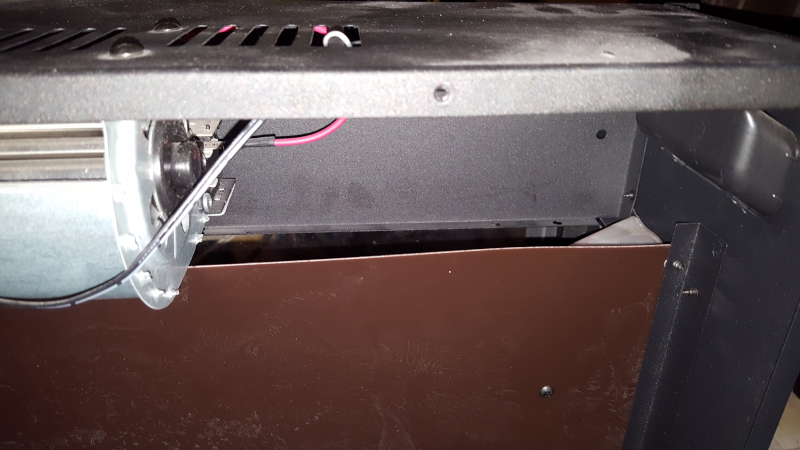
Then I closed it up and tested it. Everything was fine, so I re-installed it. Now we have supplemental heat if necessary.
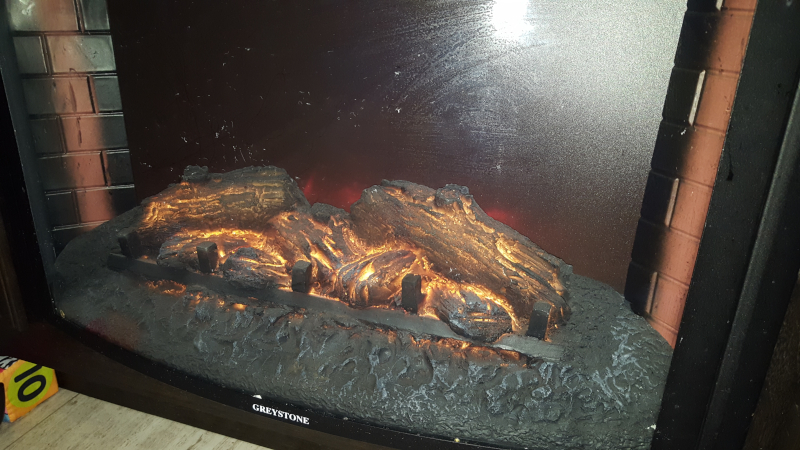
Last year when I had the Achilles tendon surgery, we rented a 420# cylinder since I couldn't carry our 30# propane cylinders, or even walk, for several months. That worked out reasonably well, and was a cost savings. We haven't done it this year because we are hoping to get down to St. George as soon as I find a new job. A full cylinder weighs too much to move, and it would block the trailer in until it was emptied. That takes about a month or a little less in the coldest part of winter.
We have found a couple of places under $2.50/gallon for propane where we can refill our cylinders. The cheapest we have found is $2.39. Tractor Supply is also under $2.50.
It's nice to be able to walk again to I can go get cylinders refilled, although it was nice to not have to worry about last year it on mornings like today. It's snowing outside.
It's sad, because by 07:00 on a Sunday morning in a place with a lot of snow in the winter, there were about 14 wrecks on the roads. Hardly anyone on the road, and 14 wrecks. People forget how to drive in it, and you really don't want to be on the road during the first storm of the year. We got everything done yesterday because I knew from experience this would be the case.
Last year we found a Lippert product that really IS worth it. It's their Flow Down Sewer Hose Support System.
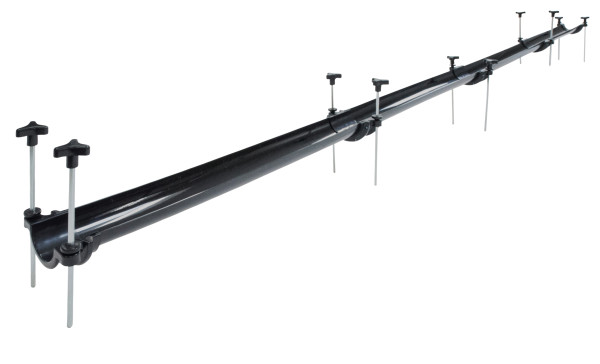
We found that some of the other systems on the market tended to fall over in high winds, which can sometimes accompany snowstorms. The skeletonized nature of this system allows wind to flow over AND under, and it didn't move at all last winter. This is one product that Lippert was smart to buy, and we recommend it very highly.
I got an interesting question yesterday - if we were to be looking at Grand Design to buy a trailer this year, what would we get?
As long as we are only talking Grand Design, our current choice would be the 397TH with the theater seating and free-standing dinette.
The garage is 12'6". It has the washer/dryer prep up front in a separate enclosure, and plenty of room at the foot of the bed for a crib (which we needed when we got our 385TH). It also has the main living area TV in a great spot. The pantry looks to be more shallow, however, and it has the solid-step up front, which we would prefer to replace with the conventional, external folding steps.
The 399TH looks nice and has the 13' garage, plus the side-mounted patio, but we prefer having the main living area windows on the curb side. The washer and dryer would also have to take space from the garage, leaving you with less than we have. Overall, the 385TH was the best floor-plan for us. It would have been nice to have the garage about 4" longer, but we are happy with the 385TH for us.
One problem faced by toy hauler owners everywhere is keeping track of how much fuel you pump out of the pump tank. I'm a bit OCD when it comes to keeping track of things like gallons of propane used in the trailer, and fuel used in the truck. There isn't any meter on the pump or nozzle on the pump tank in the trailer, so you are left to guesstimates at best - unless you put a meter in.
Most of the fuel pumps installed in toy haulers are made by Great Plains Industries (GPI), including the EZ8-RV installed in our Grand Design Momentum. Most of them have a 3/4" output, and use a 3/4" hose with 3/4" fittings. Most come with a 6' or 8' hose. Given that 1' is taken to get the hose to the edge of the trailer, the remaining length is often pretty short to refuel anything that's not right next to the trailer.
On 16-April-2017, I went to Tractor Supply and picked up a 14' hose and installed it. That allows it to reach around the back of the trailer, and makes refueling an ATV easier. The nozzle has female 3/4" threads. On that trip I also came across a GPI Fuel Meter (01A31GM also known by part number 113255-1) that's designed to go in-line between the hose and the nozzle.
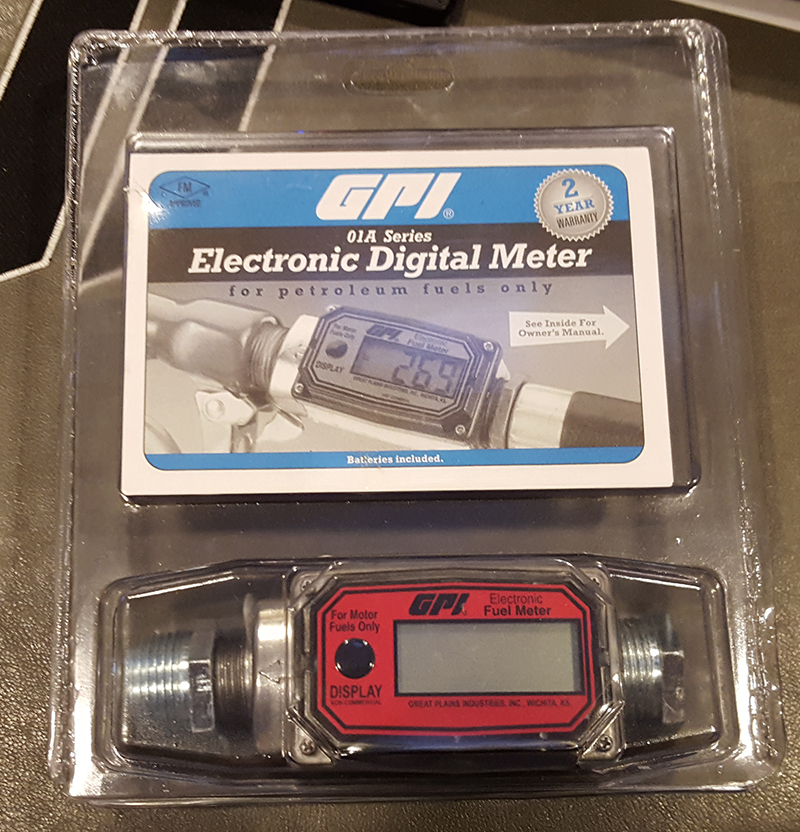
We didn't have the money for one at the time, so I filed it away for future installation. A couple of months back I found a clearance company on eBay with new units from a retailer that had gone out of business. I was able to pick one up for significantly less than the $139 to $149 they normally go for. These were made in 2015, so are out of the manufacturers warranty, but the reseller will replace it if it fails over the next 3 years. They have been around long enough that I figured it was worth it at the price.
The meter portion is attached to the housing with 4 Phillips-head screws. They come off and the meter detaches.
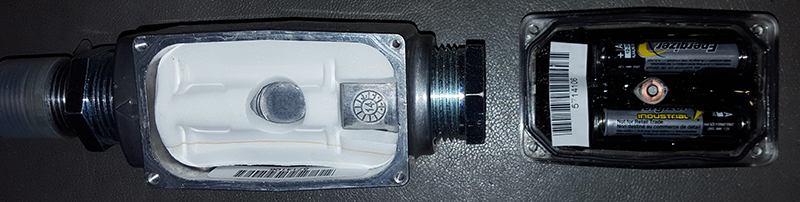
It looks like it's magnetically coupled to the impeller inside, so there is no liquid in contact with the electronics. It's powered by two AAA batteries. I replaced them with new ones before installing it.
Prepping the unit for installation is easy. It can be placed directly onto 1" fittings, and comes with adapters to go to 3'4" fittings. Just use some Teflon tape, install the 3/4" adapter fittings, and then attach it between the nozzle and the hose. The arrow on the case shows the direction of flow.
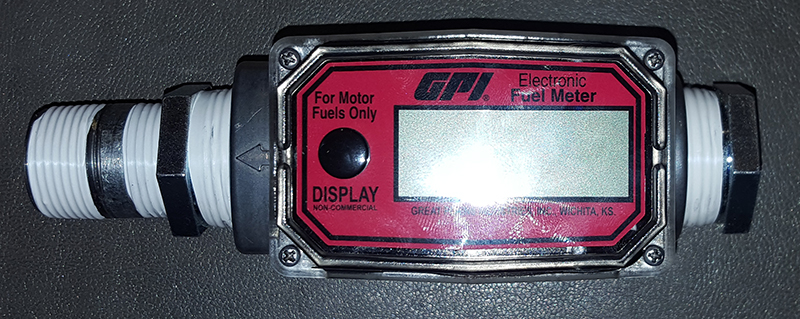
After it was attached and tightened down, to test it I started the pump and topped-off the generator fuel tank from the pump tank. There were no leaks, and I watched as the meter counted up by tenths. The generator tank was full right as it hit 3.0 gallons. We run the generator for 1 hour every two weeks to keep it exercised, so I figure that has to be close enough since the last time I filled it. The tank level meter built into the trailer shows full now.
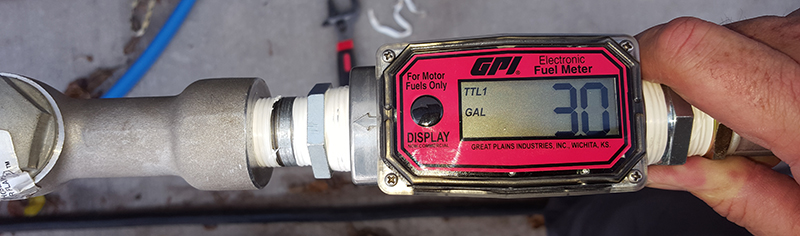
There are two readings. TTL 1 is the current fuel dispensed total. That will reset each time it is used, or you can manually reset it by pressing and holding the black button while TTL 1 is on screen.
TTL 2 is the total fuel dispensed. That will reset when you replace the batteries.
This will let me keep much better track of the fuel we dispense. The accuracy is rated at 5% (5 gallons per 100). It's good enough to take the guesstimating out of the process, and give us some useful data.
Well, we never heard back from Genesis Products on the doors they made that came apart, but we did hear from Grand Design today that they are going to take care of those two doors!
We needed to confirm the part number, and when Brad contacted me, the 660265 part number references a door with two wood panels that was used in some trailers but isn't what was in ours.
The door that was between our aft bathroom and garage - which we used to replace the bedroom door with the glass panels when it came apart - was a solid slab door with no panels. When we moved that door to our bedroom, we found we liked it better. We want to use that style to replace both of the the doors with the glass panels, as there isn't anything to come apart on them in the future.
On a hunch, I looked at the Grand Design parts website for a 2015 Momentum instead of a 2016 like ours, and found part number 660262. I guess that some had that door (including our trailer), and some had the two-panel door - it may have been something they were changing over mid-year. It does show that it's 1 3/8" thick instead of 1 1/4", and when I measured ours again it's just between 1 1/4" and 1 3/8", but it works fine to replace the glass-paneled doors.
They have been ordered! I was floored when they said they would do that.
Once again, Grand Design has demonstrated that they support their owners FAR more than other makes. Brad went above and beyond for us. That really *REALLY* helps us out (a lot more than you'd think), and reinforces the idea of #GDRV4LIFE!
I'll cover the installation when they come. It's easy - 2 screws for each of the three hinges, and the doorknob.
I got a question from a reader this morning, asking me how we keep track of the fuel consumption - both propane and unleaded - in the trailer.
I have a master spreadsheet in which I keep track of all of our finances, including bank accounts, loans, HOA dues payments, etc. I also have tabs in it to track fuel consumption, and a bunch of other things.
There is also a tab in there for keeping track of weather where we are for each day of the year. I track high and low temp, maximum sustained wind speed, maximum wind gust, maximum humidity, and precipitation. I can cross-reference data on those sheets to look at propane usage vs. ambient temperature. or electricity usage and temp/humidity, etc.
On the propane page, I note the date and time, and what happens related to propane - what cylinder went empty, and which one I swapped it with.
We have six 30# cylinders that we rotate through, with the even numbers being used on the curb side, and the odd numbers used on the street side.
When the auto-changeover shows one empty, I trade it out for the next cylinder in the rotation for that side, and I note which one went in, and which one came out. I also change the auto-changeover to indicate the currently active cylinder.
Having six cylinders on hand is sufficient that I generally only need to go get them filled once a week. In the coldest temperatures we have been in (night in the negative single digits, daytime in the teens) we have hit 24 hours per cylinder, but this generally only happens for a night or two. Worst-case scenario I may have to go a day early.
When I get them filled, I note the date, time, where they were filled, the price per gallon, number of gallons, sales tax, and total price.
I also note how much went into each cylinder. This way, when each one empties, I know how much was consumed. In general, when it's really cold outside and you get them re-filled, you may see as much as 7.4 gallons go into a cylinder. In warmer temperatures, it may be closer to 6.8 gallons.
This also gives me a clue as to any problems with a cylinder. If one isn't taking on what I'd expect, it may need to be purged or have another problem.
I also reference what interior temperature we have set on the furnace.
I keep track of our diesel in the truck in a similar way. I note the date, time, station name and address, pump number, gallons of diesel, price per gallon, total price, mileage, drive hours on engine, and idle hours on engine. This allows me to accurately track MPG. Tracking how many idle and drive hours allows me to track not only maintenance intervals, but also average speed. I also track average, minimum, and maximum fuel prices.
I also note any DEF (Diesel Exhaust Fluid) taken on board, and can track similar statistics for it.
I do the same thing for our ATV, although it uses unleaded, and does not provide you with idle hours, only total engine hours.
I keep track of the same things for the RV generator tank. Date, time, station location, pump number (PUMP TANK if filling from the pump tank on the trailer), price-per-gallon, total gallons, total price.
I have a separate tab for RV Generator run time. I track the date, generator start time, generator end time, and the hours on meter at the generator end time. At the least I run it for one hour every two weeks to exercise it.
On the RV unleaded pump tank, now that we have a meter, I can track gallons dispensed as well. For that tank/pump I track date, time, location, pump number (PUMP TANK when dispensing), Price Per Gallon, Gallons Taken On (if taking fuel on), Total $ Taken On, Gallons Dispensed (if pumping fuel out), Total $ Dispensed (using the last price-per-gallon taken on), and what it was dispensed to (usually either the ATV or the generator fuel tank). We only use Ethanol-free in that tank and in the generator tank.
If we end up doing the auxiliary tank in the truck, I'll set up a tab for it that will track it like the RV unloaded pump tank. I'll first fuel the truck from it and track that on the truck fuel tab. That means I'll need a meter on it too. Then I'll refill the auxiliary tank when convenient and we find lower cost fuel, and track that on the tab for that tank.
It's a lot of information to track, but having this gives me plenty of statistics to know what we did and what we should plan for in the future.
I got a call from the UPS Store we use at about 13:30 today that the new oven had arrived. It came on a pallet weighing 90 pounds. I think about 40 of that weight was the pallet. They took it off for me while I drove over there. It was easy to lift the stove into the back of the truck, and I took it to the trailer, put it inside, and then drove back to work.
After I got home from work I unpacked it, verified that everything was good, and removed the old one. There is a propane quick-connect with a shutoff valve at the bottom of the forward edge of the kitchen slide out, which provides propane to both the fridge and the range. I shut it off, went inside, and began the process of removing the existing oven.
Once you remove the grate and the main top, there are 4 screws - two on each side of the top. Remove those, and then the two on the front under the oven door.
Remove the propane connection, and pull the old unit out. The propane connection remains in place. The stove seems to seems to weigh 50 pounds or so at most.
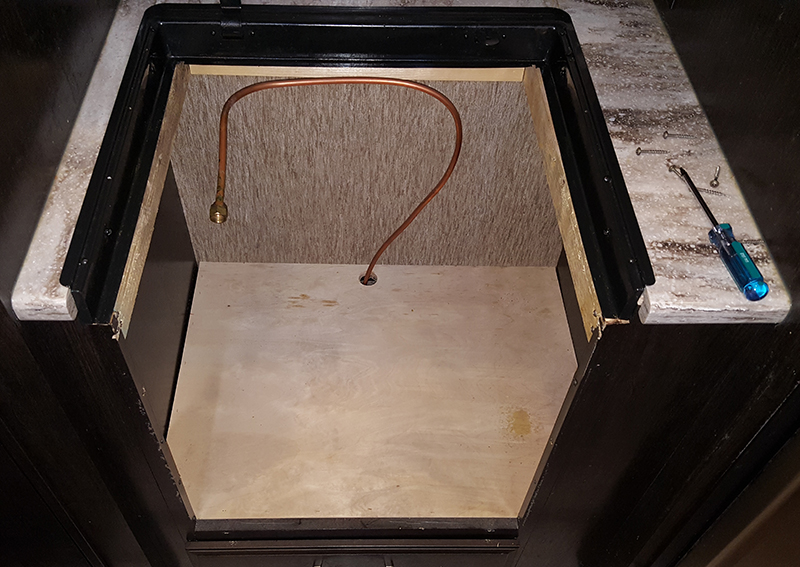
I vacuumed out the area underneath and cleaned everything out really well.
Then simply slide the new one in place. The mounting is identical for this one as the original one - although this one has a manifold from a different manufacturer (round vs. square).
Two screws on each side of the top, two screws in the front under the oven door, and the propane connection. Tighten it down nicely, then turn on the propane outside and check for leaks.
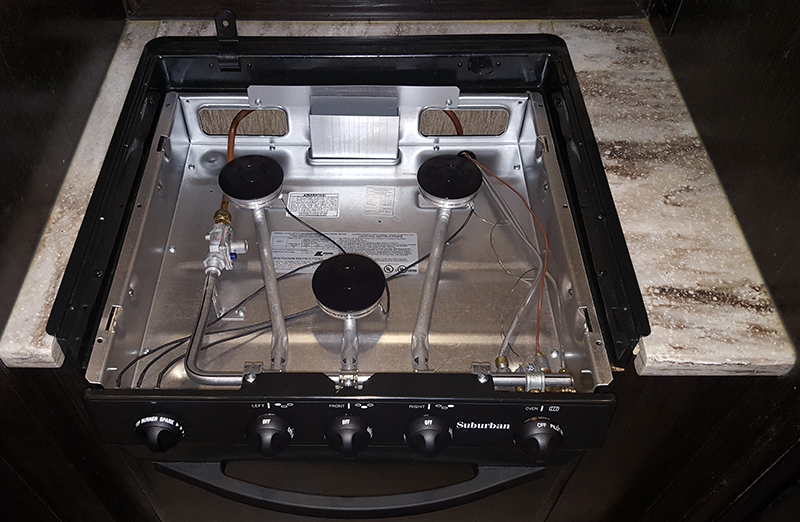
Once that's done, you can put the main top and the grate in place. The completed installation looks really nice. We like this grate much more than the wire grate. You will note I left the frame for the glass cover in place but that the broken glass has all been removed. Without the frame there is bare wood visible. For now, we will run this way.
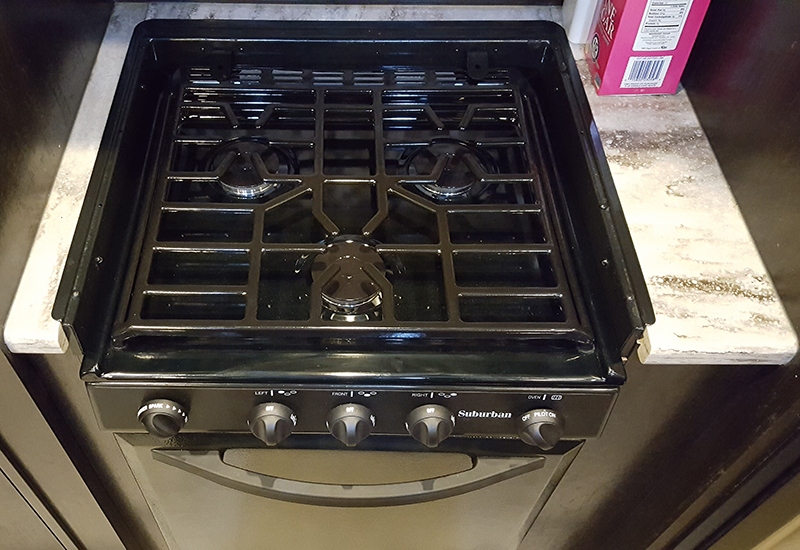
With the assembly complete, I proceeded to test the top burners. After the air was cleared from the lines and propane was present, I turned the piezo igniter knob and all three lit up.
I then lit the oven pilot. It took a few seconds for the air to clear that line, then I ignited the pilot with a lighter, held the pilot control in for a few seconds, then released it. The pilot stayed lit, and the oven controls worked to run the entire oven burner. Perfect again!
The whole process, including taking photos and cleaning everything really well, took less than an hour. Had we used the dealer, well, I expect that the parts would still be on order with an ETA somewhere in 2019, and the installation scheduled for sometime around labor day.
I also got a call today about a job I applied for some time ago. I never heard back from them and had been wondering why. They explained that they had some management changes and things had been put off until that was complete. They wanted to know if I was still interested, and I let them know I am.
They won't be interviewing until after 1-January, so I have a while to wait, but this job is a work-remote position that sounds really good. I'll keep you posted. In the meantime, I plan to keep looking since this isn't a done deal.
I found something interesting this morning.
If you have read our article on finding and buying a deeded RV lot, you remember I setup a website to help the owner of the lot we wanted, to find buyers for the other 50 he had. The day after he found the last buyer for his lots using that website, a corporation stepped in and offered him even more money (which he accepted), and bought those other 50 lots - shafting everyone else that had already pledged to buy lots and were ready to close.
As of this morning, it looks like that company is now working on selling 40 of the 50 they bought, but at over $10,000 more each than they paid for them. When they bought them, they paid well over what RV lots in the resort had ever previously sold for. Now they want $10,000 over that?
I'd love to buy a second lot for our daughter to have in the future, in case she's interested in the full-time lifestyle on her own while we are still around and using our lot. There is no way we can do that until ours is fully paid off, and certainly not at what they are asking now.
I wish them luck.
I spent most of the weekend working on an Avaya system upgrade for work. Yesterday was the 12-hour conference-call-from-hell as the vendor and Avaya tried to figure out why an upgrade process was not working. The system even got into translation corruption after something the vendor partner did, so they needed to have the Tier 3 folks at Avaya look at it, and we made the decision to hold off the rest until next weekend. I really prefer to have a service agreement with Avaya directly, but my employer took the cheap route so we have to work through the vendor partner first. I spent the rest of the day dealing with the fallout from that.
I got a call from our UPS Store today that a big box arrived. It was from Indiana, and it turned out to be one of the two replacement doors that Brad sent. It was shipped from Grand Design and packed very well. I got it home and unpacked it, and it was perfect. I wanted to get it inside before the approaching rainstorm hit. I got photos of everything that I'll add in here tomorrow. I'm on another call with the Avaya vendor now.
You'll never believe this, but as I was getting the door in the trailer, the Lippert steps under the front door broke.
I fell, but didn't get hurt and didn't let the door hit anything, so it was undamaged. I got it in the trailer, and found this broken part of the Lippert step (part number 258998 according to the sticker on the steps) laying on the ground. It looks like die-cast metal.
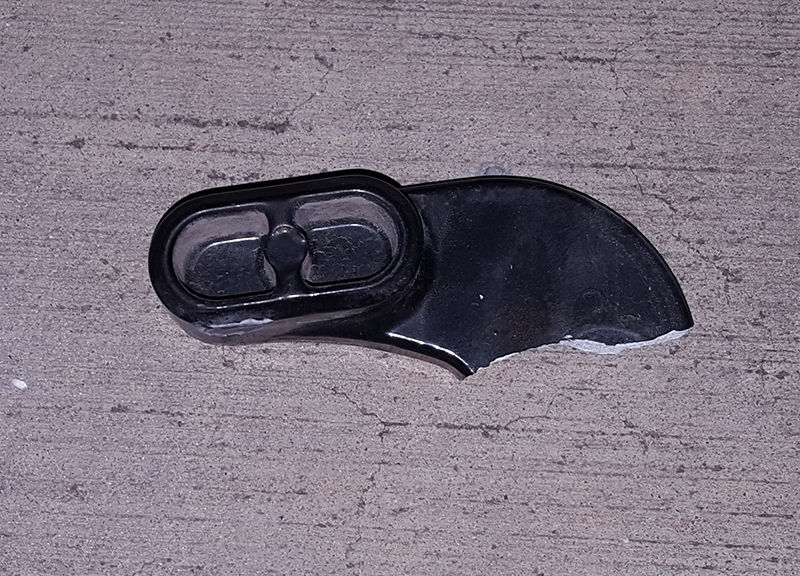
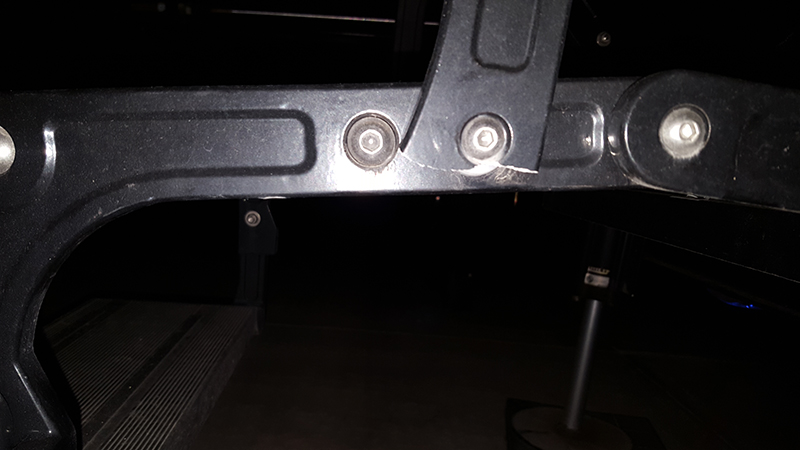
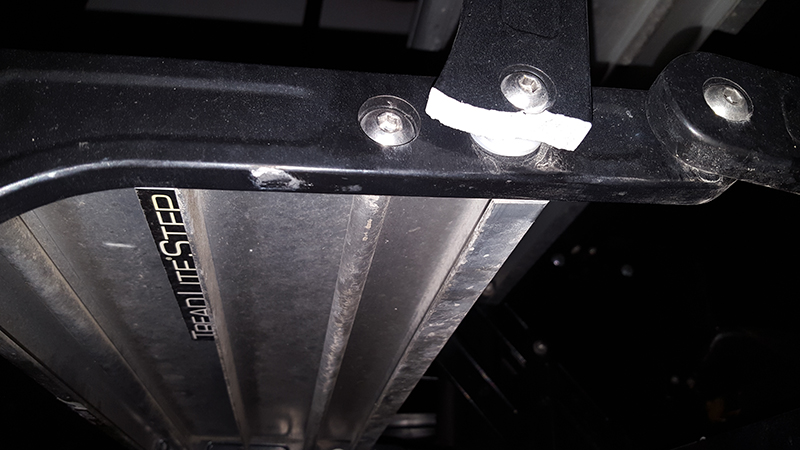
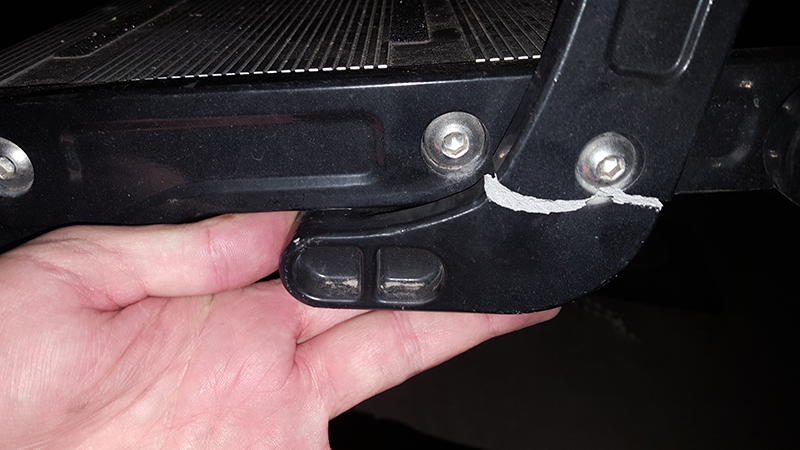
So, here is what the second door looked like when it fell apart a few weeks ago. I realized it was coming apart as I opened it and was able to try to keep most of it together.
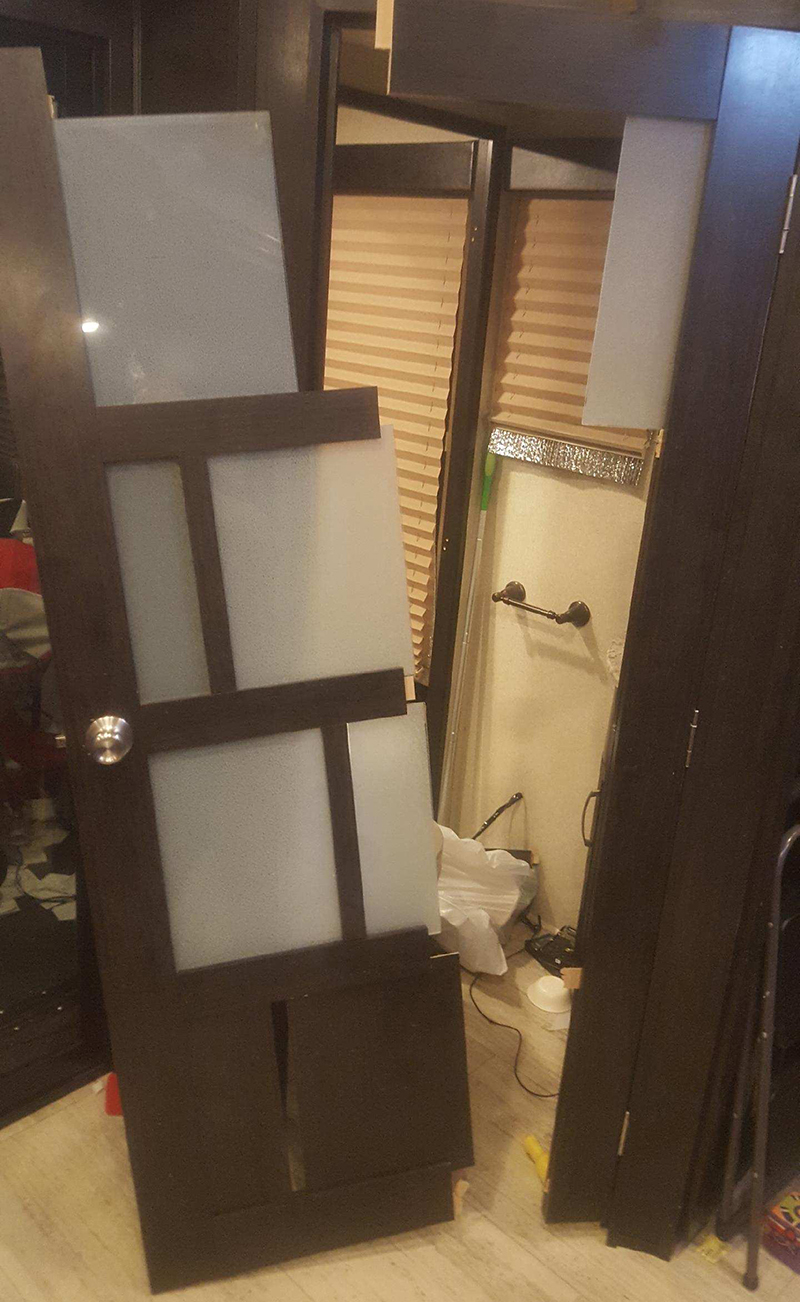
To install the new door wasn't difficult. I had saved all of the metal parts (hinges, screws. and doorknob) from the door that fell apart, so it was just a matter of re-installing them.
The doorknob and latch holes were pre-drilled on the new door. I just had to line up the hinges, mark them, and then drill a pilot hole for the original screws. There is no mortising for the hinges on these doors. They mount on the flat surface. When the next door arrives, I'll take some close-up photos.
The door went in quickly and looks great.
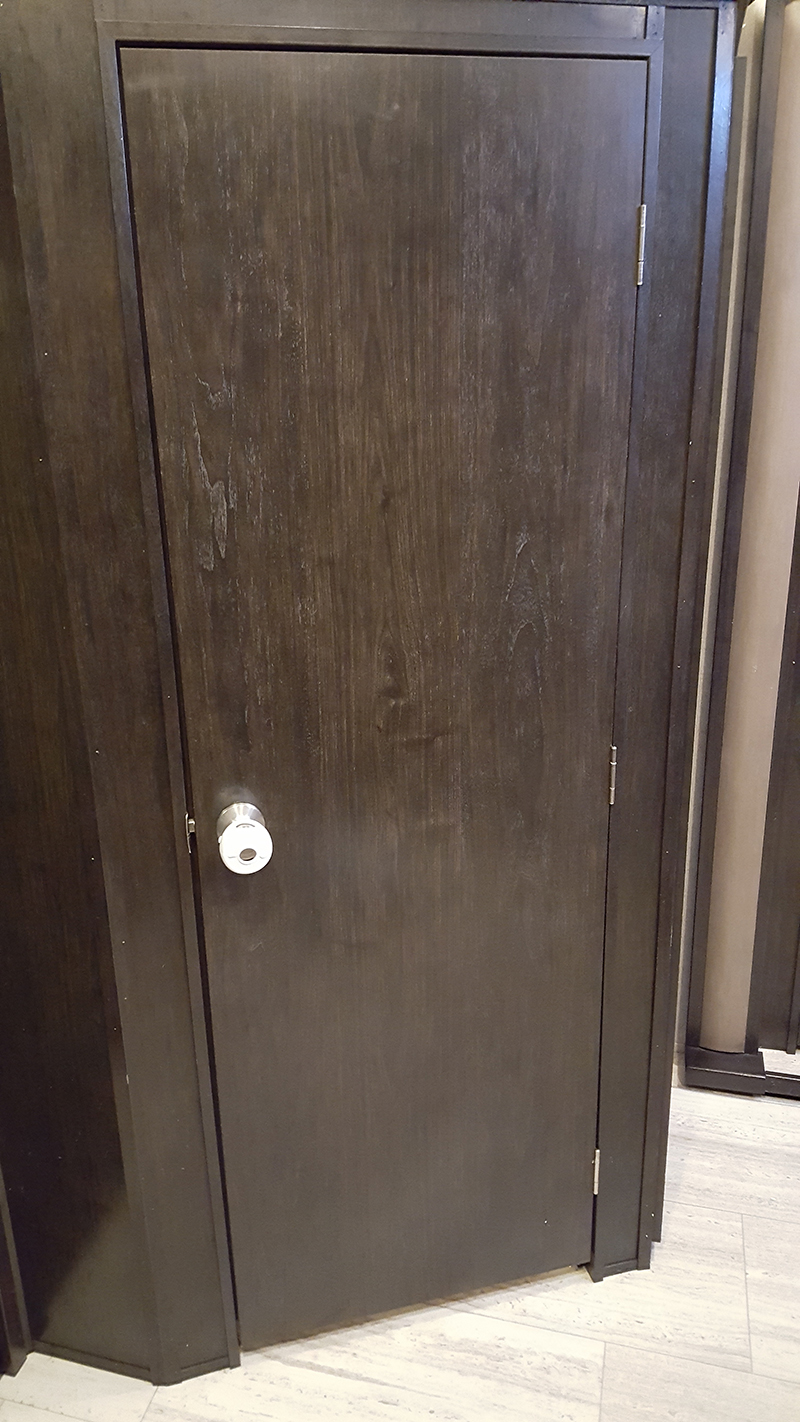
After the door was in, I checked my Lippert documentation on my computer to see about ordering a new bracket for the steps. The docs indicate that replacement parts aren't available, only entire assemblies. That's why there is no parts diagram for them.
I'm going to look for other options. I'd prefer to find something a little better. Oh the many joys of trailer life!
Update - I'll post the photos tomorrow. I was on a conference call until about 1 AM when we found a fix for the issues earlier today and I have to get up early to be in the office by 6 AM.
Well, the upgrade from hell is on-hold until after the 1st of the year. It looks like we were lucky enough to discover an issue with the update installer on the call center server in the specific configuration we have, so we are going to build a new one in parallel and use a different tool to copy the databases.
That's going to take a little while, and our company has a change-freeze around the end of a quarter. We did get the main CM and AES servers updated, Avaya resolved the translation corruption on the CM servers, and we verified that they seem to work with the old AACC for now. We previously updated Session Manager, System Manager, Utility Server, and our SBC's, so after the AACC we just have the voice mail, WFO, and ACR to go. Only a couple of weekends (maybe three) and two or three more weeks of prep work.
I got all of the photos uploaded this morning from the previous activities on the trailer. As you can see, that new, solid door matches the rest of the wood perfectly. We are still waiting on the second one from Grand Design and all of our doors will be back. We are using a hang-up curtain between the garage and the aft bathroom now - since that door became the main bedroom door when that door previously fell apart.
I've been looking into options for replacing the Lippert step. The factory version is discontinued. Apparently Lippert has a newer part number 432696 that is the updated replacement. They seem to run about $225.
I'm looking into other options to see if anything better is out there. The manufacture date on these steps was 5 of 2015, and we picked up the trailer in 6 of 2015. The steps to the back door are the same part number, and seem to be in good shape, although we don't use them as much. I'd like to believe they will last much longer.
I may end up moving the rear steps to the front, but I'm not sure yet. In this cold weather, I'd prefer to only do this once. It's going to be snowing for much of the next week. I really wish we could be down in St. George.
At the moment we are using an oven thermometer to calibrate the new oven. We will see what the actual temp is when we set it to 300, 350, 400 and 450. This will give us an idea of adjustments we need to make. Sometimes Suburban ovens are right on. Others aren't. We discovered that our old one was about 25F lower than the temp we set. I'll let you know how close this one is.
I received an interesting question via e-mail last night, and I want to respond.
"Since Grand Design is installing Furrion ovens now, did you consider getting one when you replaced the Suburban?"
That's a good question. We did look at the the Furrion ovens. There were some immediate, practical concerns with switching to a different product, as well as some quality concerns. I do like the look.
In practical terms, I downloaded the installation manual for the Furrion product. When I was looking over the installation, they require 12VDC (for the backlit knobs at the least), and they appear to be a slightly different size. Getting 12VDC to the location would not be difficult since there is a power switch for a 12VDC light above the oven. The bigger issue was that I wasn't sure that the mounting opening would match up, and with what I have going on with my employer right now (a major software systems upgrade of everything telecom related), I would not have the time to modify the mounting opening if that ended up being needed.
Since I'm on call and we were in the middle of an upgrade process, I didn't want to get into a project here that I might have to walk away from. Three-year-olds don't exactly listen to "don't touch" when they see copper pipes sticking out of the wall, or a brand new stove sitting in the middle of the kitchen floor. "I want to look" always ends up in touching. Always. I don't mind that under controlled circumstances, but I needed to move fast.
I knew that I could replace the oven with an identically-sized and configured unit in less than an hour. That was a major motivation. As I removed the old unit, more glass fell out, and I discovered that some of the pieces were really small. I didn't want to risk something falling into our food if we missed it. I'm glad we just replaced it.
It was also far easier to get parts for the Suburban products. I had a hard time when I started looking for Furrion replacement parts. In the future, I'll fix any issues that come up. I would have done so this time if both time and the need for cleaning out the small shards of glass were not concerns.
That leads to the other potential issue with using a Furrion oven. They don't have the best reputation for quality. We had to replace one of the Furrion stereos in our trailer as a warranty issue, and there are many others that have had the exact same issue with them. I will say that the two Furrion stereo units we have now, plus the Furrion backup/observation camera, are working fine. I still see many complaints about their products in the various forums I frequent.
I think they are getting better, but that concern, plus the availability of replacement parts, were enough that I'd prefer to go another direction for now.
I hope that answers the question.
======================================
I got another question on the Grand Design Owners site about buying land at a tax auction - as you can learn a little about at Finding and Buying a Deeded RV Lot.
"I was wondering if you had purchased land using tax sales? I don’t know anything about them after spending a few minutes just now doing some research online it seems like a good way to buy land at little expense but I’m sure there are drawbacks. Do you have any experience?"
We almost did. You really need to do your homework (on the owner and the land itself), but you can sometimes find a good deal. Search the property records with the county recorder, and any lawsuits, etc. on the owner.
Before we bought our deeded RV lot (when it looked like it was never going to happen), we found a piece of land in Box Elder County, UT that was reachable towing a trailer, It was 40 acres, had nothing against it other than the tax liens, was zoned appropriately, and the tax sale amount plus penalties, etc. was about $1200. The bidding would have started there.
You need to have cash or certified funds, and you need to be at the tax sale in person. You want to check the tax sale list published by the county every day, as some folks redeem their properties by paying the taxes, interest, and penalties, which they can do right up to the sale.
The day before the tax sale, the owner redeemed the property.
I ended up not going to the tax sale as there was no way to reach any of the other properties listed like it (vacant land) with a trailer. When we started considering this, we drove out and visited a number of them. We drove out to one until we came to a ravine that we could not even cross with the truck. The land was about 8 miles beyond that. There was no way to reach it. There is a lot of land out there like that.
Even if we had gone to the tax sale, I knew that we would be up against several folks that buy them to resell. Many of the people that list on LandWatch and LandAndFarm are speculators that buy them at tax sales, then re-list them for 4 to 6 times what they paid for them.
If you check the previous year tax sale results, you can see who purchased the property and what they paid for it. It usually shows up on those websites as soon as they get the deed, and usually for 4 to 6 times what they paid. Since similar properties were listing for $15K to $30K at the time, I figured they would be willing to go somewhere around $3K to $5K in bidding, and at the time we didn't have the funds to go over $3K. Up until they redeemed the property, I figured we'd give it a shot.
I hope that's helpful too. It's not a bad way to find land like that, but you need to check it out yourself before you decide.
I got another call from the UPS Store today. It was the second replacement door that Grand Design sent! Once I get it installed, the trailer will be back up to 100%. I'll work on installing it tomorrow.
Well, I ended up working some extra last week to help out at work when the network group had a major outage issue. It turned out to be a security scanning device that went crazy - something was was supposed to enhance network security and reliability. I think it needs some work.
We got a frozen section right where the sewer hose goes into the 90-degree elbow and into the sewer. That was fun to deal with.
More later.
I apologize for not getting the photos posted, but I've been dealing with the system upgrade from hell, and this week has been super hell. Part of the issue is that I'm at the mercy of the vendor and can't work with Avaya directly - I hate having my hands tied. I'm just working to keep everything working so agents can take calls until we get through this.
I have a number of items to post, but no time right now.
I do want to note that I got a call from Lippert. They heard about the broken step, and while it was out of warranty, they sent us a replacement set of steps (the individual parts aren't available). They arrived yesterday, and I'll work on installing them in the next week.
The upgrade still isn't done, and I'm fighting fires.
Sorry I haven't had time to update, but life has just been too hectic over the last month.
We got through the main upgrades at work. I was able to keep things running until Avaya got back to the reseller and helped them fix what was wrong. They are reluctant to call Avaya because they have to pay every time they call them, but when the customer is facing issues, your responsibility should be to them and getting them taken care of. Our reseller has other ideas.
I've had some interest on the new job search. One of the things I haven't mentioned is that I took a lower salary in exchange for the promise of WFH. They finally declared that WFH isn't happening, and never offered to increase my salary. It was only a handshake agreement, so that's about what it was worth. We will see what happens now. We really want to be at our place in Southern Utah, but an increased salary would cover renting a spot elsewhere if we need to.
I also have an interesting observation about our new Suburban SRNA3LBBEZ oven. Not only is the oven more accurate - especially after I adjusted the screw for the calibration - but the burners are also MUCH better. They boil water far faster than the original, for example. I don't know what the deal is, but it's been a great improvement. After some of the stories I've been hearing about the Furrion ovens they are using in new units, I'm really glad we didn't go that route.
I have both of the interior doors replaced, and now everything inside is pretty good.
The weather finally cooperated and I was able to get the replacement entry steps installed today. This is a case where working smarter will really pay off if you have to do this alone.
The steps are held on with four carriage bolts (two on either side) at the top. They have 9/16" nuts on the back side. If you have two strong people, remove the nuts and washers, then have one strong person support them while the other pulls the bolts, and both of you can lower it to the ground. Since my wife doesn't fit that definition, I needed an alternative.
Meet Mr. Harbor Freight Pneumatic Jack and Mr. Two By Four.
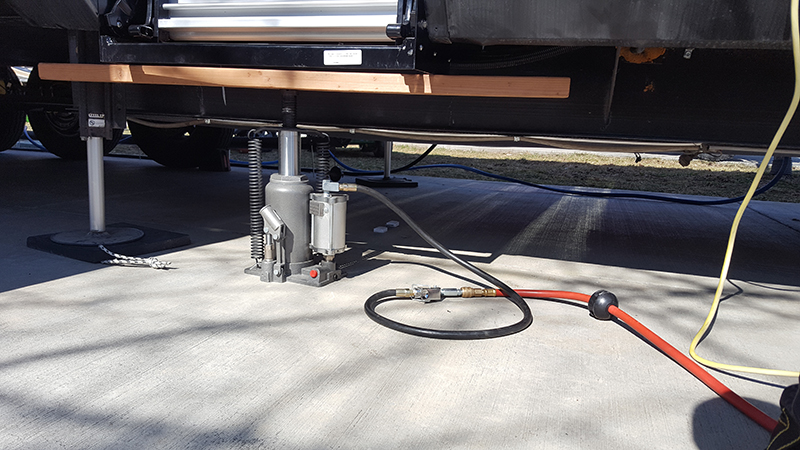
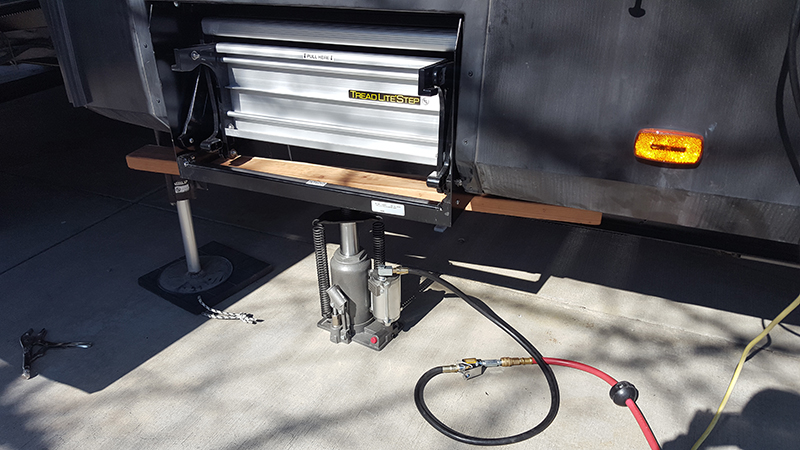
I was able to use my compressor to bring the jack into position with the 2x4 to just support the steps. Then I was able to pull the bolts, and lower it to where I could pull it out.
Installation was just sitting the new steps on the 2x4, and raising the jack into position. Insert the bolts, attach the washers and nuts, lower it, then finish tightening it down.
The interesting thing is that the new steps (made in 2016) feel FAR stronger and more solid than the original ever did. I think they may have had a crack in them from day one, but the part didn't break free until this year.
Now that is is done, I can fix what went wrong last weekend - our Progressive Industries EMS-HW50C completely failed.
Last Sunday AM I awoke to a strange sound. Things just didn't sound right. I sat up and noted that the light on the TV was off - meaning that our AC power was out.
I got up and looked out the window - next door neighbor had power, and the street lights were on.
I checked the EMS display inside, and it was dead. Flipping the switch on it did nothing.
I went outside and the breaker was on, and the lights on the power cord and the shore-power connection on the trailer had power. Not a good sign.
It was in the 20's outside, so I wasn't in the mood for much troubleshooting. I did pull the cover on the EMS and it was totally dead, but incoming power was present. It was dead.
I knew there was a procedure for bypassing it, but could not find it. You have to call their tech support. I'll cover that tomorrow.
I pulled the power cord from the outlet to kill incoming power, and re-wired the incoming power straight to our cut-over switch. Connected it back and we had power. I went back to bed.
When I woke up, I could not find the original receipt for it, but I found the receipt for the dual-display that we ordered later. Since I knew they would deny coverage because I didn't have that original receipt (I have everything else EXCEPT for that), I found the cheapest price on-line and ordered one from Tweety's RV. It arrived yesterday, so I'll get it installed tomorrow morning.
I've been fighting a visual migraine, and it's coming back with a vengeance. Time for some midrin and a nap.
Migraines are not fun. If I can catch it fast enough, midrin really works, but it knocks me out for a bit. Better than the alternative, but still not fun.
This morning I got the new Progressive Industries EMS-HW50C installed. It's a whole-house surge suppressor and a whole lot more. They protect your RV against the following possible bad-power conditions...
I'm told that they don't completely fail often, but when they do like ours did (incoming line power is good, but the unit is completely dead including the red LED inside), your shore-power connection won't work unless it's bypassed. I did so by re-wiring our power to remove the old EMS-HW50C from the circuit, but there is a faster way. According to the factory...
"You need a jumper wire to go from the open spade terminal on the bottom of L3. Remove the 18 g white wire (red connector) on L2 and and plug jumper into that terminal."
For reference...
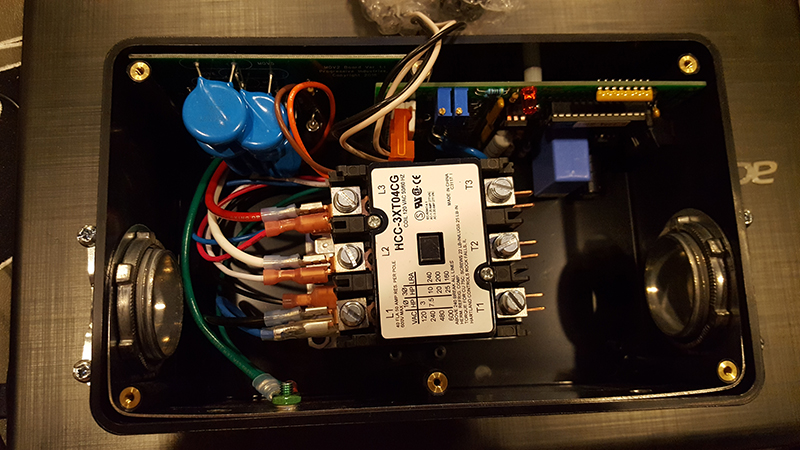
I pre-wired the power output cable from the EMS that will to our transfer switch while sitting at my desk in the back of the trailer. That made the process faster. While I was doing that, my daughter was asking me what all of the parts are and trying to repeat the names. When it came to the MOV's (Metal Oxide Varistors), I told her the name. She said "mogifers". Forever more, I'll be calling them mogifers.
Installation is relatively straight forward...
All in all, pretty simple, except that you are doing all of this laying on your side in a cramped space with only flashlights to illuminate the area, and in my case, eyes that now require progressive lenses. Not QUITE so simple, but not bad.
It came up immediately, and everything worked. It's good know that we are again protected from electrical issues that can get VERY expensive. We were only unprotected for a week, so not too bad.
I got the cases buttoned up, put everything back into the storage compartment, and I'm calling it a day.
I am, however, working on the only other issue we have.
Our 2016 385TH came with recessed interior LED fixtures. There appear to be two sizes, with larger ones used in the main living area and smaller ones elsewhere. All have a flange around the outside which is screwed into the ceiling using 3 screws. There is no retaining spring on the fixtures. The lens has a raised ring around the center that snaps into the fixture.
They have the following part numbers...
The smaller ones are PM-RV12V-PA3-PC-R
The larger ones are PM-RV12V-PA4-PC-R
They are a very warm color temperature.
The manufacture date on ours were 3-2015 on both the smaller ones and larger ones. The unit was delivered to us in 6-2015.
One of the smaller ones in our bedroom started flickering intermittently about a year ago. It hasn't been enough of an issue to worry about. Now we have one of the larger ones doing the same thing. I checked the wiring connections and they are all electrically solid.
I'm trying to find replacements, but not having much luck so far. Ideally, we'd like to find something closer to 6000K or 5500K. I checked on one of the forums and no one knows who the maker is. I've got a request into Grand Design to find out who it is, but I haven't heard back yet. I'll let you know when I do.
I have received some questions via e-mail and I've tried to answer all of them. I'll post some of them here too.
I heard back from Grand Design today. They apparently change manufacturers on the LED lighting pretty fast. This is evidenced by the part numbers they have for them,
The original lights are their part number 420230 for the 4" and 420229 for the 3". These are discontinued. The part number on the lights themselves actually cross-references to several lights that have differing appearances from each other, and are not like our original lights.
The replacement part numbers from Grand Design are 420246 for the 4" and 420240 for the 3". In referencing their photos, these appear to be made by a company called "Facon". The 4" is part number DLFST4-008 and the 3" is part number DLFST3-008. Both of these have spring-arms to hold the light in place, versus using the three screws.
An internet search on this brings up Amazon as the first result. They have diagrams showing the installation opening requirements. The 3" requires a 2 1/6" hole, and the factory used 2.25" on ours. I'm told they still work. The 4" requires a 3.25" hole, and the factory used a hole that's about 3 3/8".
I asked the supplier/manufacturer if they make a 5000K or 5500K version, and they only have these in a 3300K. They are rated 210 lumens.
Knowing that the original lights are not available any more, I'm going to take some time and find lights that match the color temperature we are looking for and that will work with the existing mounting holes.
Sorry I haven't made any recent updates on the site. Things have been a little crazy, but also very good.
As most of you know, I have been looking for other employment for some time. Last month, I found a new job as a consultant. It still requires me to be in the area for the time being, so working from our permanent home base in Southern Utah is limited, but the client is paying (on top of my salary) for the site we are renting nearby. That alone is far better than my previous employer. There have been many other perks as well.
Since I had saved up a bunch of vacation time at my previous employer, we took a couple of weeks off and stayed on our home base site after I left my previous employer. It was great being down there. We also took the time to do a complete tech refresh on the trailer and updating a few systems - spending the money we haven't been able to over the last few years.
Since the batteries that the dealer put in our trailer were crap, I had been planning to replace them. In March, during an extended power outage, they proved to be almost dead.
I found some Duracell Ulta AGM 105AH Deep-Cycle batteries on sale at Batteries Plus and ordered a pair of them. It took about a week for them to arrive. When they did, I killed power to the trailer and pulled the old batteries out. We took them to the Batteries Plus in Washington, UT for the core exchange, and took the new batteries home. In about 30 minutes, I had both batteries replaced.
At the same time, we also wanted to replace the WFCO 75-amp converter installed at the factory, since they are not great at charging or maintaining AGM batteries. We ended up with a BD1280CL 80A converter. So far, it's doing very well. The voltage is also adjustable on it.
We updated all of the TV's in the trailer to 4K units. When we got the HDMI matrix switcher several years ago, we bought one that does 4K, UHD, at up to 60P. That's the best that was available. None of our other systems were 4K, but we planned to upgrade those in the future. This allows us to pipe the output from our Roku, Apple TV, DVD player, and other video sources to any combination of TV's. It's very convenient.
One of the hindrances to this was that we don't want "smart" features. To be honest, if someone made a good 4K TV with 1 HDMI input and a good TV tuner with NO Bluethooth, WiFi or Ethernet connectivity, we would have gone with that. No one does. The trend is going the other way, with companies adding their own "personal assistants" to everything, meaning cameras and microphones.
Another issue with 4K TV's is that some actually REQUIRE a network connection in order to even operate as a TV, and they don't have hardwired Ethernet ports - meaning that you must put them on your WiFi network. We don't want that, and finding something that will work proved to take a LOT of seatching.
The Living Room TV that Grand Design put in was a Haier "50" class. The mount swings out from the wall, but on only so far. You still have to look hard-right when sitting on the couch to watch TV.
The Bedroom and Garage TV's were Haier "32" Class. They are both posistioned well, and the one on the garage can switng down from the mount to be easier to see when sitting in the garage.
The basement has a mount for the TV, but it didn't come with one. We put an old no-name TV down there, but it didn't work well to begin with.
We found last-years Samsung 7xxx series TV's on clearance at Best Buy. They don't have personal assistant features, and you can basically turn off, or at least ignore, the other "smart" features. They have hardwired Ethernet ports but don't require an internet connection to operate.
They had them all on clearance at Best Buy, and the Washington, UT Best Buy had the 50" and 40" versions. The 40" happens to fit where we had 32" units, so we got three of those and a 50" for the Living Room.
When it came to the basement TV, the mount there would not allow it to work. I found a mount on Amazon for about $30 that worked perfectly.
Now, all of our TV's are 4K, UHD, and up to 120P. They all use the same HDMI profile so there are no issues sending the same input signal to all 4 if we want.
Since we had updated the TV's, we ended up getting a Roku Ultra, the latest generation of the 4K Apple TV, and a 4K Blu-Ray player and replaced our older units. All of them are connected to our 4K HDMI matrix switcher, and to our data network via hardwired Ethernet connections with static IP addresses. That makes it easy to remotely access the devices if necessary. The last digit of the IP address matches the input number on the matrix switcher, and I have a range dedicated for video source devices. I can quickly communicate with them, and I can also monitor their individual data usage so we know what device is using what.
They only limitation we have now is that the HDMI matrix switcher supports only 60P, not 120P. There aren't any that support 120P that we have found at this point. 60P is so much better than we have had so far, so we are happy with that. The source devices and all of the displays all support 120P, so when a 120P-supporting switcher becomes available, we will be able to update only that unit.
We also picked up a set of Snap Pads for the Lippert Level-Up system. I had a situation where the old flat, detachable pads I was using caught the brake cable from the trailer and pulled it, causing the brakes to lock up when backing into a site. Using the Snap Pads will eliminate that possibility in the future.
The last upgrade we did was to install the Lippert Waste Master sewer hose. We had issues a few times with our old sewer hoses freezing - even with a good slope to them. This sytsem, in conjunction with the Lippert Flow-Down sewer solution, should eliminate that. I'll post some photos of the upgrade process. It was not difficult, and so far, has been working fine.
My new position is a 1 year contract, and I'm working to help them get ready to convert to a cloud-based PBX/call center provider. I've done a little work with a few of them now, and I'm confident that I can translate the Avaya scripting into the language used by whatever new provider they select. We have interviewed several, narrowed it down to 2, and hopefully, a decision will come about soon.
The position might extend into a permanent position offer, or it might not. We are using this to eliminate our remaining debt and prepare for what the future brings. Soon we will have both loans on our home-base site paid off, and we will be down to the trailer as our only debt.
I apologize for the delay in updating the site. Just like for all of you, this has been a year of unexpected changes and challenges.
The contract position I took proved to work out very well, and then the novel Chinese virus appeared. We began a successful conversion of the client site from an on-premise-based Avaya phone system to an entirely Cloud-based Genesys system. Because of the virus, they decided not to complete the transition of the rest of the company until after their summer sales season. They retained me as a contractor, and sent everyone to work from home. Eventually, they hired me on full-time.
We remained in the area for the first couple of weeks (remember "two more weeks"?) until they extended WFH indefinitely. We then headed to our permanent home base site. The good thing about this was that we immediately saved even more money, and were able to quickly finish paying off our permanent base site. .
We'd be on the road biw, if there were more places to go that aren't completely shut down.
I posted the following on what used to be a grand forum for owners discussing Grand Design RV's. Someone mentioned that prices for some items have gone up, and it looked like Amazon was gouging on some items. The censored the post due to a mantion of religion and comments about government, so we have elected not to participate there any more. I'll let you look it over and decide for yourself how you feel.
Keep in mind that some companies have shutdown for periods of time, and that some materials and products are more expensive due to shortages of materials or import issues due to this virus. This has caused a lot of things to get more expensive as the mess has grown.
One of the reasons that we have had one person in our family doing our grocery shopping since this thing started is so that they can observe what products become scarce when, and how prices have changed during the whole mess. We also keep an ear to some prepper forums where they track local and regional shortages and get an overall picture of where things are and where they are going. It's been interesting as you can see certain trends start somewhere, then end up around the country.
Early on I ordered some N95 masks with replaceable inserts and a pretty good quantity of inserts. Even though the government was telling people NOT to buy or use masks, I predicted that at some point they were going to mandate masks to do anything. Shortly after I got ours you could not find any anywhere. I won't comment on the politics other than to say that the "crisis" was a perfect opportunity for unprecedented social experiments, and government is never one to let an opportunity for things like that to go to waste. When was the last time a "state epidemiologist" had ANTYHING of real consequence to do?
Even here in Utah where the majority religion preaches preparedness, when the panic really hit back around March 13th, grocery store shelves were bare. It was surreal, like something you would have seen in a zombie movie. I spoke with the manager at the grocery store, and he said he'd never seen anything like it in his entire career. At that time, there were no shortages of things, but the supply chain took time to catch up, and by the time it did, there were shortages of things like TP (including RV TP).
We usually kept around 2 months in the trailer (I bumped that up to three before the TP panic hit here), but our food supplies were not that robust because there isn't enough room for storage in a trailer, and due to weight concerns. After everything locked down, we were able to be at our home base lot, and we had access to more storage with our shed there. We even got a couple of the wire rack shelf units and put them in the trailer garage to add more food storage. Since there wasn't anywhere to go, that configuration worked when we needed it.
I had also replaced the trailer tires (with Sailun S637's) just before the panic hit. Being made in China, I expected at the least a supply chain disruption there. We picked up an ice maker, Ninja Foodi (VERY highly recommended), and a Foodsaver so that we could vacuum pack meat for the freezer. They were all planned purchases for the year, but we accelerated them to that point before they became more scarce and before prices went up. We were a little late to the game on the bread machine, but found one for a not-too-inflated-but-only-a-little-inflated price.
It is a really good idea to compare Amazon, WalMart, and other retailers, and not only on price. Amazon started "prioritizing" deliveries, so your Prime membership really wasn't worth much. A Ninja Foodi was over a month out for delivery. Same price at WalMart, and delivered in three days.
Just a few thoughts that came to mind from your post.
Too many are jumping on the Censor, Silence, and "Cancel Culture"/Mute/Deplatform bandwagon. I really hate to see that. If you are so afraid that you can't even mention "government" in a factual form, and explore the reasons for things being done - something is wrong. What do you think?
I've heard some very kind words of encouragement from folks that feel the same way about the old GDOF and far too many other online forms. It's even been suggested that I start one with FREEDOM OF SPEECH as a core value. I might just do that - stay tuned.
I want to cover some of our status updates that people have been asking about.
With what I was making as a contrator, we got our home base lot paid off in a few days less than 2 years. Since we didn't have a loan that was specific against it, we had the deed right up front, but now it's paid off.
I've hearing that due to the China virus, many credit card providers are going away from sending out courtesy checks with special rates, or even balance transfer offers, and are instead offering loans against the credit card with a 1 to 2 year payoff, and only allowing maximum amounts around $5000 to $10,000 depending the card holders credit limit. I've heard of rates varying with the lowest being around 7% to 10%.
Someone asked me if I thought that was a good deal and that they should buy an RV lot now, or if they should wait.
First, I'd look into a personal loan at a local credit union before I did that on a credit card. You would most likely find a lower rate that way, and likely a longer term and possibly a larger loan if needed. I'd also explore getting a Personal Line of Credit, especially with another credit union or bank separate from your local credit union. You can often get them with a greater credit limit, but they may have a higher rate than a personal loan. You can always use one to take advantage of a good deal, then open a personal loan at your local credit union for a lower rate, and payoff the PLOC with that, then pay that loan off over a greater term.
I did some looking around at both vacant land and RV lots. There are not a lot of RV lots out there, and the prices on the ones that are out there have gone insane since the China virus hit.
There is ONE RV lot for sale in another RV resort near us. They aren't 55+, but if you are in an RV, they only allow two people to occupy it no matter how big it is, or how many bedrooms it has. That's how they keep families with kids out, without being formally 55+.
The lot has a 2018 Voltage toy hauler on it. It looks like someone left it to their kids when they passed. They want $80,000 for the RV, and $80,000 for the lot. Both of those prices are nuts! I doubt the trailer cost that much new. Most of the RV lots in there without park models on them have sold for around $50,000 from what I'm told.
The lot has a shed on it, and it's right behind where the trailer goes, so with a toy hauler you can't drop the rear ramp or use it as a deck! There was plenty of space for the shed in front of where you'd park a car/truck, but that's all empty space. You'd really need to move the shed, and it looks like they installed water and power to it, so that would have to be re-done. It looks old enough that you'd be better off starting over.
Even remote rural land that you may be able to use an RV on has greatly increased in price. Where you might be able to get 40 acres of land in Utah a few years ago that was listed for $10,000 and could be purchased with an offer of $8000 or less, now you are seeing the biggest available lots being around 20 acres (and very few of those) for $10,000 firm, with those being completely landlocked lots with no nearby roads, and no access easements.
I'm seeing more and more 1 to 2 acre lots both in Utah and surrounding states for prices ranging from $7500 to $20,000. Some of these are zoned to allow for full-time RV living, while others are strictly part-time only.
If it was me and I didn't absolutely need one that I can live in right now, I'd wait. A lot of people feel like this is a bubble that's going to burst. They might be right.
If I found a really good deal on the low end of the price spectrum, where I don't have to pay to bring electricity or water from a great distance, and where I can put in a septic system for not a ton of money, I might be interested, but the price would have to be really good. There are a lot of very inflated prices out there. There is a lot of land where you'd have to pay a LOT of money to get electricity, water, or sewer. With the price of the land, you'd be in it for WAY more than it's worth.
A couple of years ago we picked up a few acres in a very off-the-grid area, but one that is level enough so that we can get the trailer to it without going too far off-road. We have a direct easement to a county graded dirt road from our land. It was something that was cheap enough that I could pay it off quickly, even after paying for a professional survey of the corners of the land. The owner didn't realize or accurately describe what the access easement gave the land, and the survey cleared that up immediately. I was able to rent a skid steer and put a "driveway" on that easement in a couple of hours one day.
Other, smaller properties in the same area are now being listed for two or three times what we paid for ours complete WITH the cost of the survey and the small amount of interest we paid - and they have no access easements and no completed survey. It was a great deal from a motivated seller that we were able to move on immediately when we found it. That's one of the benefits of having an established Personal Line of Credit.
We try to live frugally, so that we can take advantage of some of these bigger opportunities.
We can be out there in the RV, but there are NO utilities out there at all. We are thinking about putting in a barn and doing some other activities out there, and might be able to get a well and put in a septic system. Both of those are more substantial investments, and loans will have to be things like Personal Loans or Personal Lines of Credit. Again, having a good credit rating and a relationship with a local credit union will make a big difference in how much you will pay in interest, etc.
We have the generator on the trailer (we can go about 1//2 tank in a 24 hour period running two AC units constantly during the hottest part of the year), and we obtained a TransferFlow Dual Refueling Tank for our truck (which I mentioned in a previous entry) with 50 gallons of diesel and 50 gallons of Ethanol-free gasoline for refueing the trailer, so it's not a problem to bring in fuel. I got that when they were running a big 20% off sale on them, which they have not repeated this year due to the China virus.
If we do a barn, I can put in a large 12VDC battery bank and a wind generator plus a big inverter. That would give us a more renewable power source.
Water is also an issue. The process to get a well is very complex and very expensive, but we are exploring that option.
I was looking for other water options, and I found several companies around the USA that make Potable Water Trailers, with tanks from 500 gallons to 1,600 gallons. Each manufacturer offered different options and benefits. We decided to get a 1000 gallon water trailer with a gasoline-powered pump and a backup gravity-feed system, all NSF61 (lead-free, potable water safe), from a company in Tucson, AZ called C&I Equipment Company/Arizona Trailer Specialist. I did a personal loan for it with a 3 year term, but it should be paid in about 1. Our local credit union gave us a rate better than they advertised, and it wasn't a deal we could pass up. It took them about 18 days to build the trailer from scratch, and they added a couple of modifications I requested, including an RV water hose hookup on the low-point drain. It's really well made! One interesting note is that the tires are the same size as our Momentum, and the wheels have the same bolt pattern.
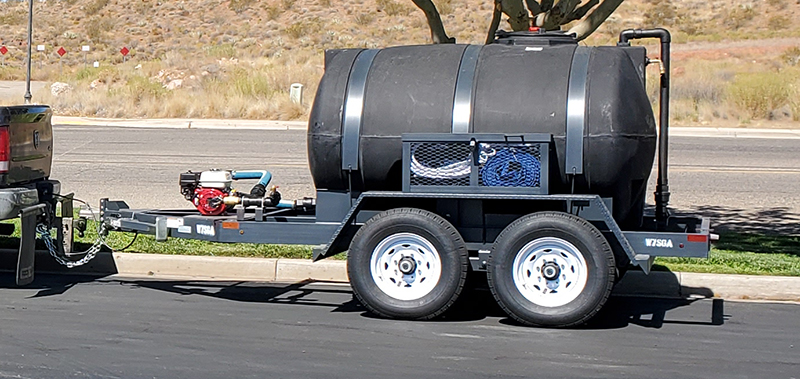
I drove to Tucson the Monday after it was complete, and picked it up and brought it home, stopping at the DMV to register it on the way back. In Utah, they have to SEE the VIN on anything coming from out-of-state, even if you have a certificate of origin or a previous registration in another state - even on trailers.
Here is a great example of government bureaucracy in action. I got there, and when the older lady went outside to read the VIN, she couldn't bend down far enough to read it on the tongue of the trailer, and didn't end up actually reading the VIN, even though she kind of acted like she could. She ended up going by what was on my paperwork (which I had already verified was correct). It was a complete waste of my time taking it there, but it let a government worker check the box on their procedure list at my inconvenience. When government becomes a factor in your life by requiring you to interact with it, it's almost never a good thing.
The delivery fee was going to be $700. We saved about $500 by having me drive there to pick it up and drive it back, even after factoring in fuel, food, etc. That covered most of the taxes we were required to pay on it, and the registration fee.
We can fill the water trailer at our home base lot and drive it to our land quickly. It can also be filled from a fire hydrant, and there is one fire hydrant several miles down the road out to our land that is ALSO NSF61 rated, giving us a source where we can get water not too far from the land.
The trailer also has a fire-hose output from the pump, and it came with a fire hydrant wrench, a NSF61 hose for filling it from a hydrant, a NSF61 fire hose to hook to the output pump, and a nozzle for that hose. It can lay a lot of water out very quickly, which is a good thing when you are off the beaten path in areas that are susceptible to wild fires. A thousand gallons is enough to let us stay on our land for a LONG time with even a small amount of conservation - and keeping a certain child from playing in the bathroom.
We can deal with the waste tanks by driving some distance to a rural area RV dump in the region. It's not super convenient, but we can go a week at a time between dumps if we keep our daughter from playing with the water faucets, so not too bad.
It's nice to be out in the middle of nowhere. Our Momentum is great for this. We recently spent a week out there, and the nearest living being was miles away. It was great!
We do want to get a barn built, and that may be our next project. I want to get a tractor with a backhoe attachment for out there too. Those will be more expensive, so we are holding off for now.
So back to the question - if I didn't NEED a deeded RV lot RIGHT NOW, I'd wait.
If I NEEDED one right now, I'd be looking constantly to find the best possible deal, and not jump at the first thing I found. There may be some deals out there, but there are not a lot of them. Most are very badly overpriced at the moment. I'd also check with my local credit union before taking a loan on a credit card.
Another question that I received was if we were looking for a trailer today, would we buy another Grand Design?
That is a good question, and we re-visit this every so often. We still really like toy haulers, especially for a family. The 385TH was the best choice for us at the time, and we have no regrets at all. You can read about our search for a trailer at the beginning of this page.
We ARE glad that we got it before the OneControl system came out. Real light switches and generator controls are much better, in my opinion, and my family agrees.
Looking at their current lineup on their website, the 397TH would be our preference. The garage is 12.5', it has a good-sized pantry, and the bedroom has the washer/dryer closet in it, but still looks like a pack-and-play could fit at the foot of the bed.
We have, however, heard that GD quality has dropped since they were purchased by Winnebago. That was a concern expressed by many owners at the time it happend. I remember our first meeting with Bill Fenech back when we decided to go with Grand Design, and I was worried when his involvement with the company ended. It seems that they still support the end purchaser, but it looks like some folks are saying that Grand Design wants dealers to look at issues first. That's not very convenient when you are a full-timer.
If you go back over the majority of the issues we had, I was able to get them to send me the repair parts for a number of items, including a complete baggage door assembly, and I did the work myself. The only time I was not able to do that was when the bedroom slideout had to be removed to fix a water leak. Even though we tried to organize and orchestrate the repair with the dealer (General RV) well in advance, they dropped the ball and lied about what the delay was when we arrived on the specified day for the work to be done and they didnt have any of the parts needed!
GD overnighted parts to them, but we were still out of the trailer and in a hotel, for several days.
That kind of support from Grand Design was what kept us sold on them. If that's going away, then it's back to square one when we start looking at trailers again.
I'm hearing really good things about Alliance RV including that they have some former Grand Design staff, and are trying to put that same support effort into their company. If that's really the case, they might be something to look at. The whole China virus thing has really hit the RV industry, and a lot of people bought them looking for ways to have an isolated vacation. I'm glad we aren't looking for one ourselves right now.
I just completed our annual Suburban water heater maintenance - changing out the anode road, and flushing the unit. It's an easy process, but one that you need to do. We have pretty hard water at our home base site, so flushing out the deposits in the tank helps to keep it working efficiently.
A few weeks ago I had to do some repairs on our water system. We have the Grand Design alternative water system in our trailer. They started using it in between issues with the KantLeak (which can and does) and switching to the Nautilus system.
They used 4 valves in it, and it seems that they last a few years, but then can leak from a seam in the plastic. In our case, it started leaking, badly, when we were getting ready to leave for our remote land. I had to delay leaving to do the repair. They aren't really common valves that you can find just anywhere, but I ended up finding direct replacements at U.S. Plastic Corp. I bought 6 of them so that I'd have a number of spares.
In the case of this repair, I also ended up replacing a LOT of the plastic PEX fittings used by the factory, as well as the flexible hose that they used on the cold water side. I bumped several hoses in the process of replacing the valve that went bad, and they started leaking from just that manipulation. I went through a LOT of tees and elbows, but replaced all of them with metal fittings, and replaced major portions of the flexible hose with real PEX cut to length. I bought the big jars of PEX elbows, tees, and PEX cinch clamps at Home Depot, and I'm glad I did.
That project delayed our departure for a few days, first waiting for the replacement valves, and then the better part of a day replacing factory PEX and hose. At least we didn't have to worry about resevations, departure times, or check-in times, so it wasn't as bad as it could have been. It's yet another of the advantages of having a permanent home-base site, and some rural land to go to, especially when the China virus has everything closed.
Because we are in Southern Utah now, we aren't going to get a heated water hose for the winter. We used one from Valterra while in Salt Lake City. They leave no taste in the water, and work really well, except that after a couple of years they seem to develop a leak in the hose where the metal hose end goes into the flexible hose. That was with only seasonal use too (about November through March), we switched to a regular Valterra water hose as soon as the temperature no longer dropped below freezing.
The ends of the Valterra heated water hose are covered with a heat-shrink or other material, and we found leaks coming from inside of that material right at the two year mark. They replaced the first one free-of-charge, but the second one hit two years and was leaking again at the same spot but at the other end of the hose. We ended up discarding it.
Our area may get to or below freezing a few times in the winter. When it does, we are going to switch to using the fresh water tank for those nights. We keep it sanitized and refreshed, and use it for everthing including drinking when bookdocking.
Our lot had a Yard Hydrant on it when we bought it. We used it once, then it stopped working. A housing development went in on land adjacent to the resort (which was originally supposed to be an expansion to the resort, but the owner got into financial trouble and sold it to a developer), and they connected to a water line in the park. When they did so, it released a bunch of sediment into the water lines. That plugged up the valve in the yard hydrant.
I had to dig down several feet to remove it, which was NOT a lot of fun. I also re-worked the water supply line at the same time. I put in a sleeve that cost about $60, to allow me to simply unscrew the Yard Hydrant if we ever need to replace it in the future without any digging. I also made sure we used a hydrant that is NSF61 Lead-Free.
The nice thing about yard hydrants is that they drain themselves when you shut off the water flow at the handle, so that they don't freeze and break. They also stick up several feet into the air,so you don't have to get on your hands and knees to hook up to them. I'll just hook up a water hose and fill the tank on the trailer, then put the hose away after done.
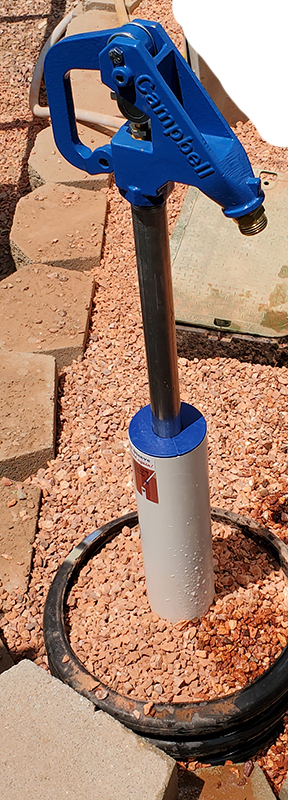
I'm going to be updating the site more often, and I might even start working on a new forum. Stay tuned!
If you have any questions, please ask!
Just another interesting observation.
I went to the grocery store yesterday. Had to go back today, but wasn't planning to get much. I noted that a LOT of things that were abundant on the shelves yesterday were gone or very nearly gone today. Cannned meats and other canned items, even sugar, flour, etc. This is a heavily Mormon area, and it was looking a lot like some of the lead up to the big run on the stores earlier in the year. I even asked the cashier when I checked out if she had noted that people seemed to be stocking up. She said it reminds her of earlier in the year, there were a LOT of poeple stocking up, presumably in advance of the election.
If you haven't stocked up now, do it soon. I suspect that we may be heading for another rush on the grocery stores soon.
Well, we finally had to replace the curb-side propane regulator, the ubiquitos GR-630 "red" regulator used to drop the pressure on lines running across trailers. We got lucky, ours lasted a bit over 5 years. There have been a lot of owners that had the factory regulator fail after 18 to 24 months. It's a common failure component, to the point that they are a little hard to find right now since they come from China.
The regulator I bought to replace it is a Marshall Excelsior MEGR-130-30 High Pressure Regulator from Amazon - https://www.amazon.com/gp/product/B00QZCTVQQ
I've had a LOT of luck with Marshall Excelsior products, and I have no problem recommending them. I even bought a spare for the future.
Since the connections to the regulator are 1/4 NPT, I used Oatey 31403 Gas Line Thread Seal Tape, 1/2-Inch x 260-Inch, Yellow. You do NOT use tape on any inverted flare connections, but you do on NPT. This is thick tape, but it works.
I also replaced the pigtail with a KIBOW Propane Pigtail Hose Connector with Acme Nut X 1/4 Inch Male NPT Flare-20 Inch Long Hose. Use a 9/16" wrench to tighten it down. It says Flare in the description, but it is an NPT connection.
They have a separate inverted flare version that I used on the street side to go to the main changeover regulator there. The factory pigtail just happened to be getting a leak when flexed in the right position, so I needed to replace it too.
It took about 15 minutes total, and I checked with gas leak detector when I was done. No leaks, and it seems to work fine so far. I'll keep you posted if anything changes.
I keep saying that I'm going to get better about updating the site, then life has a way of getting in the way.
The company I work for formally restarted the process of converting the rest of their support organization from Avaya to Genesys last month. It was supposed to start in September, but things way above my pay grade happened and we were put into a holding pattern. I've spent a lot of time keeping several Avaya systems running without being forced to upgrade all of them. That would be another nightmare, and not one I want to tackle - been there, done that, don't want to go back to that. Honestly, Genesys is the way to go. Avaya has been sitting on their laurels for far too long. When they decided to get out of the hardware business, things took a turn for the worse. It's just accelerated over the last few years. I'm glad to have had the chance to evaluate several systems to replace Avaya (including Cisco), and that I have been able to learn Genesys in-depth.
Now, we need to convert well over 1000 users across many call centers, with agents dispersed all over the world. This includes many queues with lots of specialized flows (Vectors in the Avaya world) - both inbound and in-call, several IVR's, a secure pay-by-phone system that I have also been involved building, plus a LOT of telephone numbers.
Did I mention this needs to happen by the end of February? Two months. With a department of basically two people.
We have already done one group with the help of two other people that are more directly involved with that group. It went perfectly, even with the requirement that Genesys interface with another really oddball system.
We are doing another major group next week. I've been buried in all of the IVR changes (complete with influenced routing based on SFDC data), and the specialized inbound and in-queue flows this group requires. It's about 25 queues with almost all of them needing special handling. It's been both a nightmare, and really enjoyable. I love this stuff.
On the trailer side, we had a break in the main bathroom sink faucet. It's a Dura Faucet like all of the others, but it's a model that they have discontinued - it attaches to the wall with a faucet that shoots straight down. I think they were not used very commonly, and were only made for a year or two. They don't show up in any Dura Faucet catalogs I can find before or after that year - I can't find one for 2015/2016.
I also can't find any of them on-line anywhere to order a replacement.
I located it on the Grand Design site (350006 : FAUCET VESSEL WALL MOUNT SATIN NICKEL), and sent them an e-mail early in the morning to see if they have any in-stock. I sent the e-mail to their customer service, and they sent an e-mail back indicating that I need to e-mail their parts department.
That's interesting. They sent ME an e-mail telling me to e-mail another department.
That's a change. In the past, I had people let me know if I contacted the wrong department, but they also forwarded my e-mail to the right department. That was kind of a let down, as it delayed an answer.
OK. I can live with that. I didn't have time to call, so I sent an e-mail to the parts department.
I never heard back from the parts department, even after two e-mail messages.
A lot of people speculated that when Grand Design was bought by Winnebago, their CS would go down hill. This is only one experience, but they might be right.
I did manage to find the internal parts for the faucet online, and was able to get the parts needed - including a handle (which also broke off) - to get it fixed. It only took a few minutes to replace the valve and the handle, and I bought a complete extra set of each since the complete unit is not readily available.
Recommendation and note for future - look into anything in any trailer you buy that is not something you have often seen on others. If it's likely to be discontinued by the manufacturer, consider buying a replacement or some parts if they might be hard to find in the future.
Anyway, I got that fixed and we back up to almost 100% now. I forgot to mention that the motor on our main air conditioner started to have issues at the end of the summer. Part of the reason we got three air conditioners in our trailer - three is two, two is one, one is none. The other two AC units were able to keep up with what we needed. I did find a replacement motor online - more on that in my next entry.
For those of you asking me about RV sites and financing, I try to respond as fast as possible. I have noticed that prices have officially gone insane. Lots in the resort where we are located are over $50,000 now. The last one sold for $55,000 without a trailer on it. Are they worth it? If you are looking for one, yes. There are no others currently available in this area, and even what I find in other areas have been going higher and higher. I'm glad we got ours when we did.
Another lot here was listed earlier in January for $95,000 with an older 5th wheel on it. It was under contract within two weeks.
I'm also getting questions about emergency preparedness, which I am also working to answer. I'll post more about this in my next post.
We are also working to get a barn on our little farm, but since it's not a "working farm", there are issues with getting financing for one. I'm lookng at options. More on that later.
I need to get online with my work so that I can update a dozen Visio diagrams showing the call flows, and run another check on what has been set in place for next week. Since they are a 24x7 operation, getting it right the first time is really important.
We got the group of agents and queues converted from Avaya to Genesys with NO real issues. We had one toll-free number that didn't get moved right, but we were able to compensate for that in about 5 minutes. Everything else went off without a hitch! That was over 1000 agents and 20+ queues with zero down time.
We have one more group of agents and queues next weekend, and then it's on to planning for the next big project. I have one more week from hell, then we will have a chance to breathe. Even Genesys said they have never seen a project of this size go off with only one minor issue. I felt good.
Last weekend we got a chance to go out to our farm and spent 4 hours stringing over a mile of electric fence wire. That was a project! My daughter did really good walking along with me while I fastened the wire to insulators at each post, and my wife drove the truck and spooled out the fence wire using a jig I setup. My daughter really alternated between riding in the truck and walking with me. It was fun. We even saw signs that rabbits have been active in the area.
On the RV side, pretty much everything is working right at this time except for the motor on the main AC. I have the replacement, but haven't had a chance to replace it yet. I do have a hydraulic leveling jack that I need to check, but I think it is just a fitting that needs to be tightened. We have run into this before.
We had TWO RV lots in this resort go up for sale in the last two weeks. I was very surprised to see that. They were both SOLD within a week of being listed. One of them has a workshop, trailer, and fence, and was sold in less than 5 days. I don't even know what the listing price was, by the time I saw the sign in front of the lot and looked it up, it was under contract and the listing was gone!
If you are looking for an RV lot somewhere, take a look at our article at http://rvhome.school/finding-buyng-deeded-lot.html and hope you can find a good deal. They are selling fast everywhere, and prices are insane. I made some major updates to the article.
I just found out that Marcus Lemonis of Camping World bought Nielsen RV - the local St. George, UT Grand Design dealer - two days ago. Since Grand Design will not deal with Camping World, it will be interesting to see what happens. I expect that they will sell off existing inventory, and then GD owners or those looking to buy them will have to go elsewhere. We later found out that they will be operating as Gander RV.
The former owner of Nielsen RV is now working on a large RV resort in the area. It will have over 400 sites when completed, but they are not selling sites - rental only.
We have been spending as much time as possible at our farm site, finishing the fenceline and things before nearby ranchers start their cattle in the area for the spring.
We picked up a couple of Flame King 100lb HOG Propane Cylinders a while back - these are a new design, and work REALLY well. I found the best deal on them at WalMart.com. They have integrated wheels and handles to make moving them easier. As you get older, you learn to work smarter, not harder.
I also got a pigtail for each with a propane meter and a 30 PSI adjustable regulator. I put a QCC1 connector on them, so they just route into the propane compartment and hook to the existing pigtail that goes to the 30lb cylinders. It makes it easy to connect and disconnect them, and quickly switch to the 30lb cylinders when we go on the road.
Some weeks later, we finally had to replace the main auto-switchover regulator in the street-side propane compartment. I noted that with no propane draws in the trailer, I could turn off the cylinder and see the pressure drop in the line. I used some leak check and found that the regulator itself was leaking. I also noted that it would show the curb-side empty when it wasn't. It was about 6 years old, so that's about right. Many folks get 4 to 7 on them, depending on ambient temperatures and other factors. Until we got to our home lot, ours had seen lows below 0 and highs in the 100's. It's in a compartment in the trailer that is fully open at the bottom, so it most likely never experienced those full extremes. It was a good regulator.
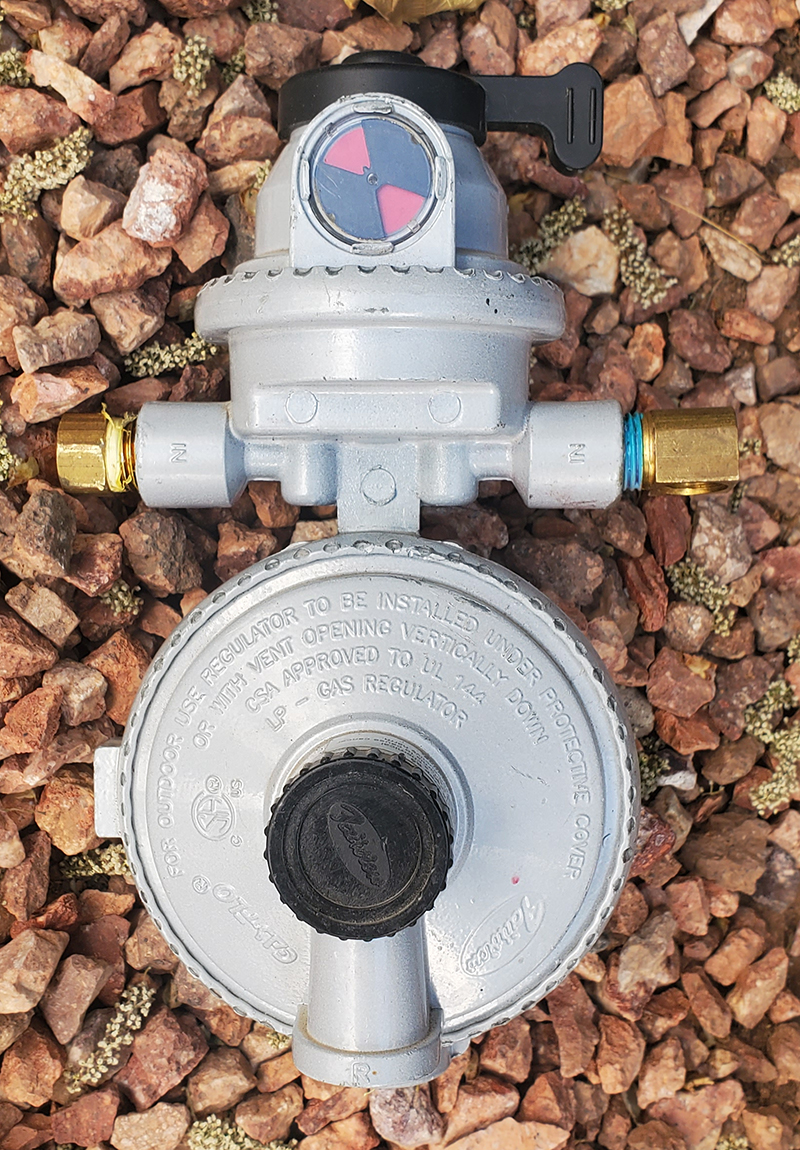
The factory-installed Fairview regulator. It lasted about 6 years for us.
I put in a Marshall Excelsior MEGR-253 to replace the regulator that the factory used. The mounting holes for the bracket are the same, so it was a very easy replacement. After that was done, no leaks! Marshall Excelsior makes some REALLY good products, but you pay a little more for them. I trust their quality.
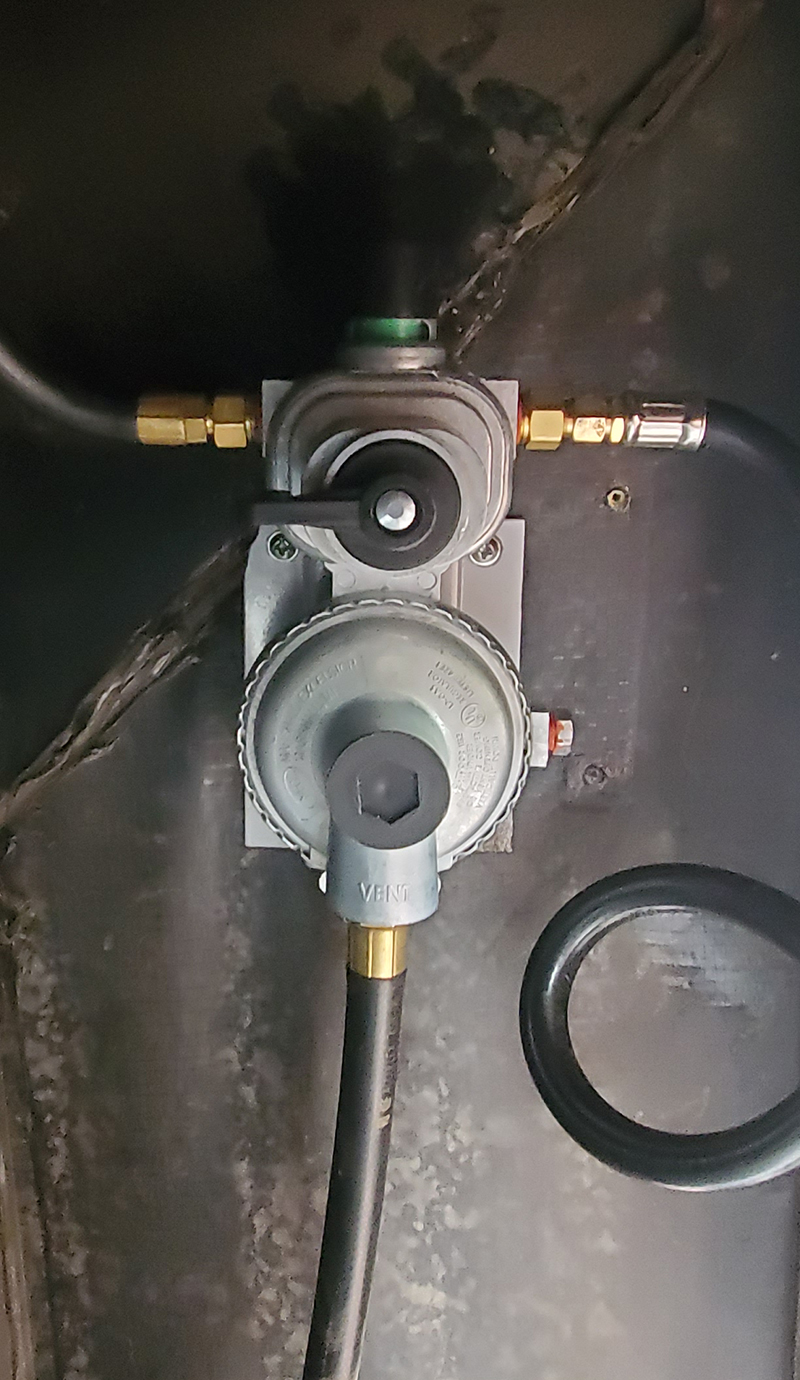
We also marked 1 full year of me working remotely. It's been a real plus for us, and allowed us to get our lot fully paid off very quickly, since we put the money we were paying in rent on the site we no longer had to rent, into paying off our lot. We would have been on the road, but so many things have been closed down.
We have enjoyed customizing our RV lot and making it very much uniquely ours, complete with a western-style fence! Now our daughter isn't kicking her balls into other lots, at least, not as frequently!
We have also been doing a lot of work on our farm. I have the perimeter fence completed, with a good, sturdy bull gate, and the fence is electrified. We used a solar setup for that, since there are no utilities in the area. It's not SUPER powerful, but it will get the job done. Eventually, I'll bump it up with additional batteries and a better fence charger.
We wanted to do a metal barn this year, but the prices of building materials have gone insane. Both wood and metal have gone up. The price of our barn would have doubled since the beginning of the year, and that's just not workable for us now. We had also planned on a hay barn, and the prices of those have gone insane too.
We decided to get a couple of 40' high cube, one-trip cargo containers. We placed them 44' apart, with 60' at the outside edges. Those will provide us with lockable storage for now, and they can act as the base of a quonset hut-type of open ended hay barn. It tiurns out that even buying those was a challenge. They are much more expensive and in shorter supply due to shipping issues. It turns out that soe of the shipping companies are evey trying to buy them back, which is driving the prices up even more.
Eventually we are going to get a 60' x 40' curved roof structure that goes over them, and uses them as the base. It is going to be cheaper than the cheapest hay barn we could find. It will give us a place to store things for the farm until the barn can be done, most likely in a couple of years. In the meantime, we will work to pay off the containers and roof structure, which is costing about what we paid for the RV lot. The land is already paid off.
Putting the roof structure at the outside edges will also make the containers last longer, and give us the maximum protected area.
We are also starting to look into a well, and getting a larger propane generator and buried tank, or a portable diesel generator, for power. Those things, and the barn, are going to have to wait for a while, since we have a quite a bit to payoff for now. It's going to be well worth it when we are done. We still need to get a tractor to start working the land too, but I don't want to do that until I have a safe place to park it.
After working on moving the railroad ties we put the cargo containers on, we are re-thinking our plan for the hay barn roof. I'd love to get it ordered, especially since the price is going up by 26% on the 28th. Yes, metal is going up that fast. We won't be able to afford it after that. Even then, delivery is 10 weeks out.
The problem is that it ships on a flatbed, and we have to unload it. My back was killing me after working to move 8 railroad ties. I can't imagine what unloading that roof from the truck would be like. If we had a tractor, I could get forklift bars for it.We can't afford the tractor right now, and don't have a place to put it, securely, yet. Chicken/Egg.
I can rent a forklift, but then there is the construction. I know that if my back was in better shape I could do it with a scissor lift. I just don't think it would hold up to the job.
What I really need to do is hire a crew to do it, but most contractors here are booked out until the end of the year. We can't even find one - so far - that would even be available to help us unload it, let alone build it. We may have to re-think our plan.
One good thing, when we got out there today, our farm was surrounded by cows, but none of them were on our land. Our electric fence is doing the job.
We decided to hold off on the cover for the hay barn for now. We had requested more information from the manufacturer, but they didn't get back to us until today, and now their prices have gone up, and they are just too expensive. Hopefully next year. We did get some picnic tables ordered for both the farm and our home-base RV site. I'll let you know more about them when they arrive.
We still haven't received the picnic tables. I was looking forward to letting you know about these great tables we found and where you can get them, but I was told twice now that they would be shipping them, and they apparently haven't yet. I'll keep you posted. I'm hoping we didn't lose a good chunk of change.
We did finally get the picnic tables. They are VERY nice. This is one we put together at the farm, so it got a little dusty. I still needed to take off a few foam spacers they put on for shipping.
They are made by Premier Site Furniture in Rexburg, ID. They are REALLY well made, designed to prevent tipping even if you lean WAY back, and they should last forever. They are expensive, but we had seen examples that had been out in the weather for a number of years, and they still look great. Buy once, cry once.
Happy 4th of July! Remember what it took to create this nation, and don't let it be lost to those that desire something less.

For a few months, the motor in the main living area A/C has been having issues. I found that when it did, I could slightly rotate the motor into a different position (by turning the bottom of the squirrel cage) and then it would start when I applied power. It has been getting progressively worse, and yesterday it failed. The other two A/C units - bedroom and garage - can hold the trailer at a good temperature up to about 105F outside temp. Once it gets over that, you really need the main AC running to keep the whole thing comfortable. Things got hot fast this year, and there hasn't been the "lull" in termperatures I was hoping for to fix it on a cool day.
With the temperatures expected to be over 108F today and to hit 115F this weekend, it was time to replace that motor.
I'm not fond of heights and ladders, but I was able to get on top of the trailer just after 06:15 this morning and get the motor replaced.
Items needed included a couple of 5/16" sockets and ratchet handles (1/4" and 3/8"), a cordless drill with adapters for sockets, a philips-head screwdriver, a regular flat-blade screwdriver, a really small one to get the AC power connector apart, a pair of diagonal cutters, some zip ties, and some WD40.
I also needed a new motor. I had ordered one as soon as I identified that issue was the motor and not the control board or capacitor. The motor is Dometic part number 3315332.005 - motor kit for the Brisk Air II. It was just about $100 on Amazon. I thought about replacing the fan blades and squirrel cage as well, but I decided that I'd go with what we have for now since there was no sign of rubbing or chafing of the blade or squirrel cage contributing to the issue.
I found a GREAT video on YouTube about doing this repair. It's the best place to start - https://www.youtube.com/watch?v=z7INkX5i3XI AZ EXPERT did a really good job on this video.
I did a couple of things slightly differently. I killed the AC power to the A/C unit at the breaker. Then I went up top. I removed the cover on the capacitor and got the connection to the ground and the two to the capacitor off first, and I had already unplugged the AC power connection assembly from the bottom. I got it clear and pulled it up, then disconnected the fan blades from the long arm of the motor and removed the 5/16" nuts and the washers so I could pull the motor up. It took a bit to pry off the fan blade, but it came off.
Once I could lift the motor, I cut the three wires to the AC connection assembly from the motor. They won't be re-used, and I don't see getting that motor fixed as a cost-effective item.
That let me get the motor free, so I could work on the squirrel cage (WD40 really needed here). I then routed the wires from the new motor and seated the new motor in place with the old squirrel cage attached, and got the new AC power wires into the connector. Once that was done, I was able to button everything up with some ZIP ties, put the cover on, and get it all closed up.
It worked perfectly after that. Now, we aren't worried about the ambient temps that are coming. That was the first major repair on any of the Dometic A/C units.
My size 13 foot did brush up against an attic vent on the top of the trailer about 2 or 3 feet to the rear of the middle A/C unit. It looks like it cracked (very brittle). I'll work on a replacement or fix for that shortly.
I was still able to start work only about 15 minutes minutes late, so not too bad for an early morning.
I was sent a question about our A/C fix. It included a common misconception about A/C units.
The statement "RV air conditioners will only cool the trailer to about 20 deg below the outside ambient temperature" was included.
That is false.
I repeat, that is false.
A generally accepted way to TEST if an air conditioner is working properly is to measure the air temperature at the INTAKE to the air conditioner and at the OUTLET from the air conditioner. You should see a difference of about 20 degrees F if the unit is working properly.
Many people hear that and take it to mean that it will never get cooler than 20 degrees below the ambient temperature. That is simply not true.
As the A/C unit lowers the temperature, the INTAKE temperature drops, which causes the OUTLET temperature to drop, and the temperature overall to continue to drop.
Take this weekend, for example. We got up to 117F outside the trailer. This is a BIG heat wave.
Inside, the hottest it got to was 82F near the ceiling with all three A/C units running. At the floor and seating level, it was considerably cooler, and quite comfortable. The bedroom never exceeded 72F!
If the A/C units would not cool below 20F from ambient, it would have been 97F inside. It never got near that.
As I mentioned in the post above, the bedroom and garage A/C units can generally keep the temperature in the entire trailer pretty nice up to about 105F outside, because they are all ducted together. At or above 105F, we really need all three. At 117F, we REALLY needed all three, but they did fine.
And to answer the question I was asked...
The motor began to fail to start when called for. If you listen to the A/C unit, there is a relay click and the fan starts. A short time later there is another click, and then the compressor starts.
We would hear the first click and the motor would not start. We would then hear the second click and the compressor would start. At that point I would immediately shut it down.
If I took the bottom cover off and slightly rotated the squirrel cage (blower fan), then tried to start it up again, the motor would usually act normally and start up. There were certain positions where it would not start. I ordered a motor once I had the diagnosis. I also checked to make sure the fan blades and squirrel cage weren't rubbing on anything.
When it died, it made a "screech" and then slowly stopped spinning. We shut it off, then tried it a bit later, and it would not go again. It was also much harder to turn.
I had been waiting to replace it hoping for a weekend morning that was cooler, but it got hot early and we didn't really have any cooler weekend mornings. When it died, I had to do it during a weekday, but was able to get it done so I didn't have to miss work.
I hope that clears it up. I would have taken photos, but I needed to get it done and didn't have time to take photos.
It is looking like the barn is out of reach for the indefinite future.
Speaking with builders and metal suppliers, I don't see prices and backlog clearing for at least a couple of years. Even the quonset-hut cover over the containers to make a hay barn is priced too high right now. We don't want to just stop making progress, so we took a look at our long-term plan and tried to find another piece we could bite off, and hopefully pay for by the time a barn is reachable.
We already have the potable water issue resolved with our water trailer (See 17-October-2020). We want to get a well (eventually), but this buys us time. We also want to do a septic system out there, but the county seems to want a more permanent structure before we do that. There is an RV dump some miles away, so we can do that. Aside from water and sewer, power is the other factor that keeps us from spending really long periods out there.
We are WAY too far out for utility power to be practical. We use the Onan 5500 generator in our Momentum, but in the height of the summer, we use a LOT of Ethanol-free gasoline. Gas prices right now, as they are everywhere, have gone way up.
Driving out to our remote property, there is a rural auto shop that we pass. Earlier this year some trailers started to show up on their lot with big solar panels on them. I saw one parked in town, and got a closer look. It had an 11KW Kubota diesel generator (notice that diesel is cheaper than gasoline now?) with a 113-gallon fuel cell, 2 big 48VDC battery banks, and I assume at least one inverter in an enclosure, as the outside of the enclosure has 125VAC/250VAC outlets on it. It also has ten 235-watt solar panels.
I started doing some research and came across the story of DC Solar. It's a long story, but the owners scammed their investors and the government, they were thrown in jail, and their assets were confiscated. Between 4000 and 6000 "Solar Generator Trailers" were auctioned off around the country. There were a number of configurations. The top end "A" and "B" configurations have the generator, fuel cell, batteries, two 6KW inverters, solar charge controller, and a couple of 30' crank-up towers on them (made by US Tower, which will be familiar to other Ham Radio operators) with 4 large LED floodlights on them.
I missed out on getting one at auction earlier this year, where we could have paid even less. The nearest auctions were in Las Vegas NV, Kingman AZ, and in California, but we found out about them after they were over.
I did my research on the trailers and the company, then I called this dealer. It turned out that he had purchased about 40 of them in various configurations at the auctions in California and Las Vegas, and they were selling pretty well. A few of them were the "B" configuration. I like the A configuration base trailer better, but these are functionally the same - only the base trailer it was built on is a little different (and painted white on the "A" vs black on the "B").
Long story short, we worked out a deal for a "B" configuration trailer that was good on both ends, and we used our PLOC to buy one.
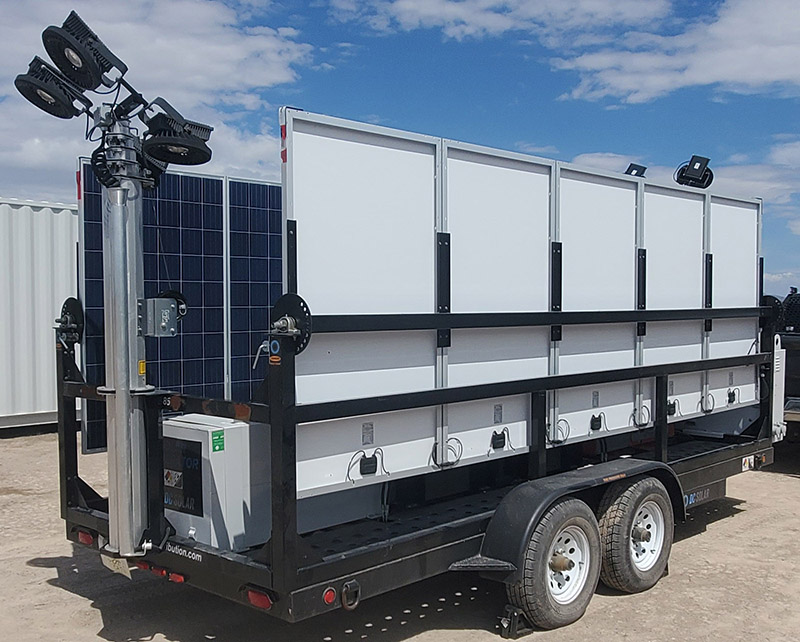
It SHOULD handle running our Momentum out there, since there is no practical way to get utility power out to our place. I need to replace one switch for one of the light towers, which will take me about 10 minutes. Other than that, everything works perfectly. I'll post some more photos and information later. In the meantime, if you are looking to buy one of these and want to know about what components were used to make them, take a look at http://rvhome.school/installed_systems_manuals.zip. I put that together last night, it's all of the info I currently have on them. I hope to have the "real" manual that DC Solar made for them shortly.
Today was an adventure.
We took the solar trailer to the farm, and planned to stop and fill the generator fuel tank with farm diesel on the way. We found a place that sells it in a town on the way out there.
On the way, however, we blew a tire on the trailer. I suspect they are quite old. I managed to get the tire off, and then limped to another exit where we found a tire store open on what is a State holiday in Utah. $200 later we were back on the road. Ouch. I did get a tire with a higher load rating.
We topped the tank off with about 62 gallons of off-road/farm (red-dyed) diesel, then headed to the farm. Once we got it there and got it setup (which takes under 10 minutes), I reconfigured the solar controller to use optimal charging parameters as supplied by the battery manufacturer. I also reset the inverter controls to start the generator when the batteries get to about 75% versus 50% as factory configured. I want to see how that does. I don't want to let them get too low during our heaviest use.
It's really pretty cool. We went from having NO power out there except when the Momentum is on-site, and then only when the generator is running, to having power on demand. It's not as convenient as having full utility power, but in a way it's already paid for itself, as the solar array does a lot. I already powered a grinder and few other things for a small project I needed to do.
Eventually, when we have it paid off, I'd like to look at putting in 400-watt panels vs. the 235 watt we have today. That would make it even better.
We are now going to get the Momentum ready to go out there for an extended period. During the "shelter in place" situation of the last year, we stored a lot of things in the garage. We need to clear that out to really start to travel again.
At least my employment is full-time work from home. They don't care where I am, and that suits us just fine. I will need to go into the office one last time when we decomission the on-site Avaya PBX later this summer. Genesys Cloud is working REALLY well overall. They aren't perfect, but their offering was the best way to go for this company.
We haven't made as many updates lately as we spent a lot of time on our off-grid farm property. I do have a few items for today...
We got a good equalization charge on the solar trailer, and I made sure the water level on the batteries was topped off after. That did make a difference. We ran on it exclusively for about a month.
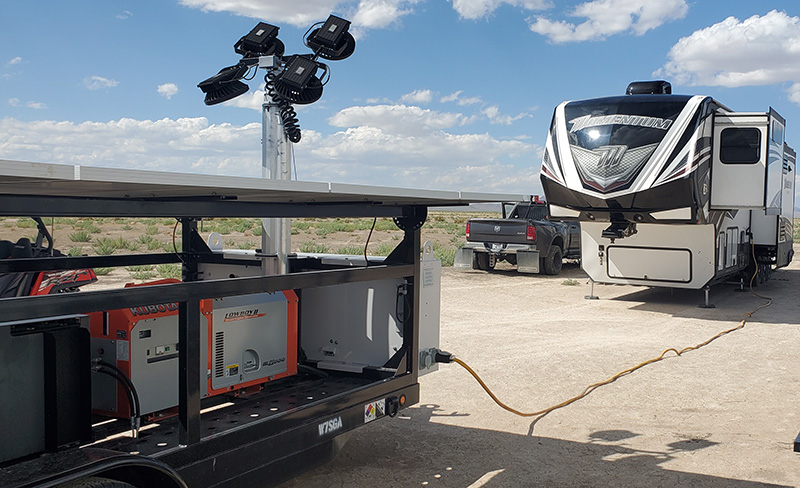
The solar on the trailer will meet our needs without draining the batteries during the day, when we are not needing to run the air conditioning units. When we are, however, the trailer batteries plus the solar do supply everything we need to run all three.
Doing so does drain the batteries, slowly, during the day. About 6 PM or 7 PM the generator is automatically started by the SMA inverters to recharge the batteries when they hit 40%. It runs for 4 hours, then shuts down when they hit 90%. That takes about 1/16th of a tank of fuel to do so. It does this quite reliably, hitting 40% sometime between 6 PM and 7 PM. That gives us 16 days between fillups, although we usually do so more frequently.
Using the farm/off-road diesel does save a substantial amount, although prices are still high right now. This was still far less than the $50K minimum quote I received from the electric utility about the possibility of running utility power out there. I expect the cost would be much closer to $75K or more when everything is factored in.
We have run into one conundrum.
Our farm property has an electric fence now, and a good bull gate with a heavy chain and heavy lock at the entrance. I'd still feel much better if we had a barn to leave the trailer in. That just got too costly this year.
When we got our home base lot, we were able to get one of the widest lots in the resort. That gives us enough room for a secondary trailer parking area next to our Momentum, with a small island in between the main and secondary parking areas, for the sewer, water, and power hookups. There is, however, a reason that the lot is wider than most of the others.
There is a fire hydrant in front, several feet onto our lot from the property line. It makes it so that you can't backup and straighten a DRW/CC/LB pickup with a trailer onto that secondary parking area. You can't get the trailer all the way to the back. This wasn't a problem with the ATV trailer, the ATV (being much shorter and much more narrow than the truck) can move it, or I can move it by hand.
The water trailer and power trailer are both too heavy to move by hand on gravel, even with a conventional push-type trailer dolly. If it was concrete over there, I think I could do it, but it's gravel and that is not likely to change in the near future.
We were able to get the solar trailer here, but it's not very far to the back of the lot. If I could get it pushed back more, I could also get the water trailer here for the winter.
I started looking into powered trailer dollys, and narrowed our choices down to two different manufacturers. We ended up ordering one yesterday. It's a Force 10K from Parkit360. They are a Canadian manufacturer with a US warehouse. They are about 4-6 weeks out on shipping according to the manufacturers website, so I'll post more when it arrives and we get a chance to see how it works.
We are also going to get back into doing videos again, so this may be our first new one.
We always knew that deciding to live full-time in a 2016 Grand Design Momentum 385TH RV, and homeschooling our children, would lead to many adventures. Then came Covid, and so many things being shut down that we decided to buy an inexpensive (under $8,000), off-grid farm property in Utah, and spend a lot of our time between there and our home-base site in Southern Utah. The farm is a work-in-progress, we don't even have a tractor or anything yet.
Thankfully, I found a position doing what I do (currently Genesys Cloud and formerly Avaya PBX programming, and ongoing call center design and implementation with interfacing to #Salesforce and other systems) that I can do from anywhere, and we actually have good cellular service (including data) out there, even though we have no utility power or running water (which we supply with a 1000-gallon potable water trailer) out on the farm.
This last week brought an adventure that we never expected. Our daughter got very sick over a very short time while we had the RV at our farm property. At first, it was really a set of very unspecific-appearing symptoms. It rapidly evolved. Thankfully, there is a really good community hospital not too far away. When she worsened overnight, we rushed her to their ER at, I think, around 6 in the morning. It was all a blur. All of this with my wife being due to deliver our new baby at the end of the month.
Within a few minutes, we discovered that our daughter's blood sugar was a bit under 400. It turns out that your child going into diabetic ketoacidosis is how many families get the news that their child has Type-1 Diabetes. The ER staff and the attending there were SO amazing. They were really great, and zeroed in on what was going on really fast. When I saw the nurse quickly check her blood sugar and mention "360", I was shocked. They also consulted with doctors at two other large, regional hospitals (St. George and Primary Children's Medical Center), they were able to get her started on insulin, and prevent it from getting any worse.
Because of time and distance, our daughter got a helicopter ride before 11:00 on Intermountain Healthcare Life-Flight to Primary Children's Medical Center in Salt Lake City. It turned out that our farm was directly in the flight path from the hospital where we started and PCMC, and from the air she saw our RV, fenceline, and the few items we have out there so far. It took us a while to get to PCMC by truck, and it turns out, parking a crew-cab long-bed dually at PCMC is a bit of an issue, as most of their parking is underground and made for compact cars with no Ham Radio antennas. There are, however, a handful of large vehicle spaces along a driveway by their outpatient clinic.
They took great care of her, and over the next two days we learned about Type-1 Diabetes, giving insulin injections both manually and via a pen, and how to count carbohydrates and determine the correct dosage, which is likely going to change a little as they fine-tune for her body and it heals from the DKA. This whole scenario is common enough that they have a complete protocol, training program for parents, and nursing area and nurses designated just for cases like this.
Since you are calculating mealtime bolus doses of short-term insulin based on how much she eats, it's an "interesting" process. She often either eats 1/2 of what she thought she would, or she suddenly wants more than she thought. By the beginning of the third day her entire personality (and her ADHD) were back, and I never thought we'd be so happy to have her little backtalking, crazy self back.
Being in an RV in this situation presents both challenges AND benefits. Keeping insulin cold (but not frozen) is important. Our Norcold RV fridge runs on either 110VAC power or on propane. We have a solar-trailer at the farm to give us a shore-power 110VAC source there, and our RV also has a built-in gasoline-powered generator. Combine that with the auto-switchover propane regulator on the trailer, and we have plenty of backup cooling capability for her insulin. Our fridge is, however, smaller than a standard residential fridge.
We may supplement it with an Iceco VL-series at some point, which runs on either 110VAC or 12VDC power. The trailer has dual 12V deep-cycle batteries, which are charged by the converter when we are on shore or generator power, or can be charged via a portable solar panel unit we have.
We came back to our RV at the farm late yesterday with a huge bag of needles, syringes, testing supplies, emergency injectables for the event of a low-blood sugar situation, ketone test strips for high-blood sugar situations, and both long-acting and short-acting insulin, and a ton of reading material and instructions. Being in an RV, storage space is at a premium, but this is a priority, so we will figure it out. We have some Trones (from Ikea) drawers mounted on the wall in the forward bedroom, so one of those is about to become the supply drawer.
We got through dinner and her pre-meal test and meal dose (did I mention issues when she decides she wants MORE than she said she did, and her current absolute terror of needles?), and her bedtime test and small correction dose (with the accompanying terror of needles). She's only 6, so it's really hard to get her to understand.
We were all exhausted, but it's 03:00 and I can't sleep now.
We have so many excellent health-care providers to thank. Everyone at PCMC and at the facility where we started. I'm leaving out the name of the facility where we started as we had a stalker at one point, and we don't want to reveal exactly where our farm property is. I'll post more later as I have time. Right now, we have a lot to do, and trying to finish getting ready for the baby. Thankfully, we are pretty prepared there.
Well, another "adventure" under our belts.
Our son was born via c-section due to a sudden rise in his heart rate (over 200 beats-per-minute). Immediately after, it was normal. The NICU checked him out and everything was good. They couldn't explain it.
Fast forward a few days, and we were getting ready to take him to his first well-baby Dr. visit first thing in the morning. He was acting a little off as we got him ready. Very tired. I took him to the appoint by myself as my wife is still recovering from the c-section.
When we got there, his heart rate was super fast again. His Dr. called the hospital in St. George, and they got in contact with the pediatric cardiac team at Primary Children's in Salt Lake City. They had us drive him straight to the hospital from the Dr., with only a quick stop to pick up my wife and daughter.
We got him to the ER in St. George, and they were able to get it normalized without using electrical cardioversion, but the medicine they used stopped working and it went up again. They got it normalized again, and then that dose and medicine stopped working. Every time his rate jumped back over 200, well, I don't want to remember the feeling.
They put him on Esmolol (IV) and got it down again, and they all agreed that they needed him in PCMC in Salt Lake City. They used an ambulance from the hospital to the airport, a Life Flight fixed wing aircraft this time, and another ambulance from Salt Lake International to PCMC. My wife was able to go with him in the plane, so I got my daughter ready and we drove up, arriving several hours after they did.
Since our daughter has Type 1 diabetes, we have to manage her blood glucose and insulin. While two parents can be with a child in the hospital, our daughter couldn't stay in the room, so I got a hotel room for us for two nights, and traded off the first night in the hospital with my wife so she could get a little sleep. She is breastfeeding him, so the first night we used some that she pumped.
When it became apparent that his stay would be longer, I took my daughter back to our home base RV site in southern Utah, closed up our Grand Design RV Momentum 385TH, hitched up, and took the trailer back up to Salt Lake City. We stayed in the Salt Lake KOA for about 5 nights.
NOTE: I normally will NOT drive for 10 hours in a day (Salt Lake to St. George and then back with the trailer), and will NOT arrive at a destination after dark - with good reason. I slightly rubbed a tree coming in to the site due to a very sharp turn I had to make - and the fact that the tree was covered in vines, making it almost invisible in the mirror, and that I was exhausted. There was no significant damage to the trailer other than a small hole in the skirt on one side.
I was way too tired by the time we finally got there with the trailer - it was after 10 at night, but I needed to be there to talk to the medical team when they met the next morning.
They had a detailed ultrasound performed on his heart, and it is perfectly normally from a physical perspective. The valves are all working right, and it's perfectly formed. The issue is an electrical problem. Coming from the world of computers and engineering, I'm always asked to find and resolve the root causes of issues. With this, there are ablative procedures they can use, but that's only IF medication can't be found to work. It turns out that this isn't a rare situation.
They transitioned him off of the Esmolol to another medication that can be taken orally, and it was working for almost a day, then his heart rate went up yet again.
They needed to get the dose just right as it is all by weight. He is growing fast.
We finally headed home on a Wednesday after they found exactly the right dose.
As we passed Scipio, Utah, our 2014 Ram 3500 gave me a low coolant warning, followed by an overheating warning. I was already slowing down when the coolant warning went on, and I hit the heater on full and pulled off the road immediately. It turned out that we blew the radiator hose. It's the model with the dual radiators, and the factory plastic Y in the upper radiator line. I had replaced the leaking factory hose several years back with a hose from Mishimoto Automotive that was supposedly guaranteed to work better. After what I paid for it, I'm not impressed.
![]()
I got online and did a search for "heavy capability wrecker" in Fillmore. I found Dearden Motor Co. (435-743-6612). I called them, and James came out immediately. He was fantastic. If you EVER need towing in the Fillmore, UT area, give them a call.

Having the 4WD Ram, I was able to put the transfer case in neutral, which prevented the need to disconnect the drive shaft. Their wrecker was able to tow the Ram with our Momentum attached, and we made it safely to Fillmore.
James put us right in front of their shop. We needed two parts to get back on the road. The Mopar part numbers are 52014722AB upper radiator hose with Y and the 68166469AB secondary upper hose. James was able to find them out of Salt Lake, but they would not be there until the next morning.
I forgot to mention that my wife and daughter both had follow-up appointments the next morning. We missed those, but were able to stay in the trailer in front of their shop in Fillmore until the next morning. They also let us add some water to our fresh water tank, and with the layout of the Momentum 385TH, we could access the bedroom, main bathroom, and 1/2 of the fridge without opening the slideouts. Keep that in mind when you are looking for an RV.
The bed was, however, a little crowded that night.
The next morning, James had the parts and got them installed. I'll note that it also pays off to have a grill quick disconnect kit for these trucks, as it made accessing the hose connections REALLY eash.
After he replaced the hoses, I worked on filling the system with coolant (I have the vacuum kit to do that, and I had kept it in the basement storage in the trailer. We also have a compressor in the basement of the RV, and I was able to run the compressor with the Cummins-Onan Generator, which also gave us power (and air conditioning) overnight. We got the parts, labor, and tow paid for and back on the road.
Traveling with a diabetic daughter and a son that now needs medicine on a regular basis, plus a wife still recovering from a C-Section, is a whole new experience. Fortunately there are plenty of rest areas where we can pull off and let people use the bathroom, access refrigerated medicine, etc.
Towing your entire house behind you does have some advantages. I really hate having to move it unexpectedly, but you have to do what you have to do. At least we have everyone home, alive, and can deal with all of the follow-up appointments and things that are coming up.
Questions? Contact me at questions@rvhome.school